Homemade Whole Wheat English Muffins: Soft, Chewy, and Brimming with Fresh-Milled Goodness
There’s nothing quite like the warmth and satisfying chew of a freshly baked English muffin. But imagine one made with the wholesome goodness of 100% whole wheat flour, freshly milled at home. These Homemade Whole Wheat English Muffins are incredibly soft, delightfully chewy, and packed with flavor. They offer a healthier alternative to conventional English muffins and are surprisingly quicker to make than their sourdough counterparts, bringing the joy of wholesome, homemade bread to your breakfast table with ease.

These versatile whole grain English muffins are a fantastic foundation for so many delicious meals. They excel as convenient freezer breakfast sandwiches, transforming your morning routine. Get creative and use them as mini pizzas for a quick weeknight dinner, or elevate your brunch with elegant Smoked Salmon Eggs Benedict. And of course, there’s the timeless pleasure of enjoying them toasted, generously spread with creamy butter and your favorite fruit jam. Their robust flavor and satisfying texture make them an instant hit in any form.
The Unbeatable Goodness of Homemade Whole Wheat English Muffins
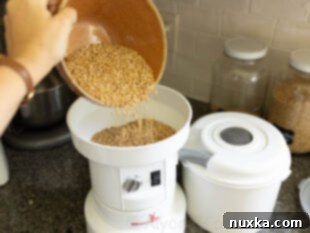
We are absolutely smitten with these wholesome, whole wheat English muffins, especially when they’re fresh off the cast-iron skillet! Even my eight-year-old happily snacks on them plain, which is a testament to their deliciousness. What makes them truly special is the use of freshly milled flour. In mere seconds, my powerful electric grain mill transforms whole grains into vibrant, nutrient-rich flour, making the health benefits well worth the small effort. Opting for homemade means you control every ingredient, ensuring a pure and nourishing product free from the additives often found in store-bought versions.

The Magic of Freshly Milled Hard White Wheat Flour
For this recipe, I exclusively use 100% hard white wheat berries, which I source from Azure Standard and mill myself at home. This particular type of wheat is ideal for English muffins because of its higher protein content. This protein structure is crucial for developing a soft, elastic, and stretchy dough, which is the secret to achieving those coveted “nooks and crannies” that English muffins are famous for. Freshly milled flour also offers a superior flavor profile, a delightful aroma, and maximum nutritional benefits that you simply won’t find in commercially processed flours.
The Story Behind This Whole Grain English Muffin Recipe
This particular whole grain English muffin recipe came into being out of a desire for efficiency and deliciousness. I wanted to batch-prep breakfast sandwiches for the freezer, and while I adore sourdough, I didn’t want the extra time commitment of feeding a starter for this particular project. So, I opted for reliable dry active yeast, making these muffins accessible for anyone, even without a sourdough starter. Although, as you’ll read below, I do offer a sourdough variation!
This recipe yields a generous dozen sandwich-sized English muffins, perfect for a family breakfast or meal prepping. When I’m gearing up for a big freezer breakfast sandwich session, I often double the recipe to make two dozen, ensuring we have a healthy, homemade option readily available.
Even though I used commercial yeast, I was determined to infuse these English muffins with that characteristic tangy flavor and subtle sourdough-like aroma. My secret ingredient? Homemade kefir. Kefir provides a wonderful tartness and helps break down the whole grains. If you don’t have kefir on hand, cultured buttermilk or simply soured milk (milk with a splash of vinegar or lemon juice) will work beautifully, giving you a similar delightful tang.

The Benefits of a Cold Fermentation
To further develop that complex, nuanced flavor often associated with sourdough, I incorporated a crucial step: refrigerating the dough overnight. This cold fermentation not only enhances the flavor profile but also works wonders with whole grains. It gives the whole grains ample time to fully hydrate, softening them and allowing some of the phytic acid to break down, which can improve nutrient absorption. Plus, it’s incredibly convenient! I can whip up the dough in the evening, let it sit for a quick initial rise while I clean up dinner, and then pop it in the fridge. The next day, the dough is ready to be shaped and cooked, breaking up the labor and making batch cooking a breeze. Having homemade English muffin dough ready in the fridge truly simplifies busy mornings.
If you’re pressed for time, don’t worry! You can certainly skip the overnight refrigeration and bake these wholesome English muffins on the same day. The kefir will still provide a lovely tangy flavor, and they will be just as delicious, soft, and satisfying, proving that healthy and homemade doesn’t always require extensive planning.
At our farmhouse, these homemade whole wheat English muffins are devoured by everyone, from the toddlers to the adults. Sometimes, they disappear so quickly that I don’t even get to freeze them! But that’s perfectly fine because I can easily whip up a fresh batch whenever the craving strikes, knowing I’m providing my family with nourishing, delicious bread.

Can These Be Transformed into Sourdough English Muffins?
As a devoted weekly sourdough baker, incorporating sourdough into our healthy bread routine is very important to me. While this recipe uses commercial yeast for convenience (eliminating the need to feed a starter), it’s already a significant step up from store-bought options, which are often laden with additives and lack the superior taste of homemade. However, if you’re keen to embrace the sourdough magic, you absolutely can adapt this recipe.
To convert these into truly wholesome whole wheat sourdough English muffins, simply adjust the liquid: decrease the kefir (or buttermilk) by a quarter cup and add 3/4 cup of active sourdough starter to your dough. The bulk fermentation process will then need to occur at room temperature for at least 4 hours to allow the sourdough culture to develop properly. After this initial rise, you can either refrigerate the dough overnight for enhanced flavor (as in the original recipe) or proceed with shaping, a second rise of about 2 hours, and then cooking on the same day. This will yield English muffins with the distinctive sourdough tang and texture that many adore.
Mastering the Art of “Nooks and Crannies” Texture
The hallmark of a perfect English muffin is its signature “nooks and crannies” – those delightful pockets and crevices that eagerly absorb butter and jam. Achieving this texture requires a particular approach. English muffins are often more expensive to produce commercially than bagels due to their specific ingredient ratios, which include more fat and milk, and the labor-intensive process. The key lies in creating a dough that is quite sticky and highly hydrated. This higher hydration is what encourages the formation of those open, irregular air pockets during cooking. While machines can be costly to replicate this, shaping the dough by hand is often the best way to gently handle and preserve the delicate structure needed for maximum nooks and crannies. The most critical factor is to achieve the precise thick, yet slightly sticky, dough consistency outlined in this recipe.
When you gently split them open, the interior should reveal a beautifully irregular, porous structure, ready to be filled with your favorite toppings. This unique texture is what sets English muffins apart from other bread products and makes them so incredibly satisfying.

Mise en Place: Gathering Your Tools & Ingredients for Success
Preparing all your equipment and ingredients before you begin is a cornerstone of successful baking. This “mise en place” approach ensures a smooth and enjoyable cooking experience, letting you focus on the craft rather than scrambling for forgotten items.
Essential Equipment: The Right Tools for the Job
Having the correct tools can make all the difference in achieving perfect homemade whole wheat English muffins. Here’s what you’ll need:
- 12-inch Cast-Iron Skillet: Crucial for even heat distribution and achieving that perfect golden crust without burning.
- Large Mixing Bowl: Essential for combining and proofing your dough.
- Set of measuring spoons and cups: For accurate ingredient measurements.
- Electric Grain Mill: For milling your fresh whole wheat flour. This is key to the texture and nutritional value of this recipe.
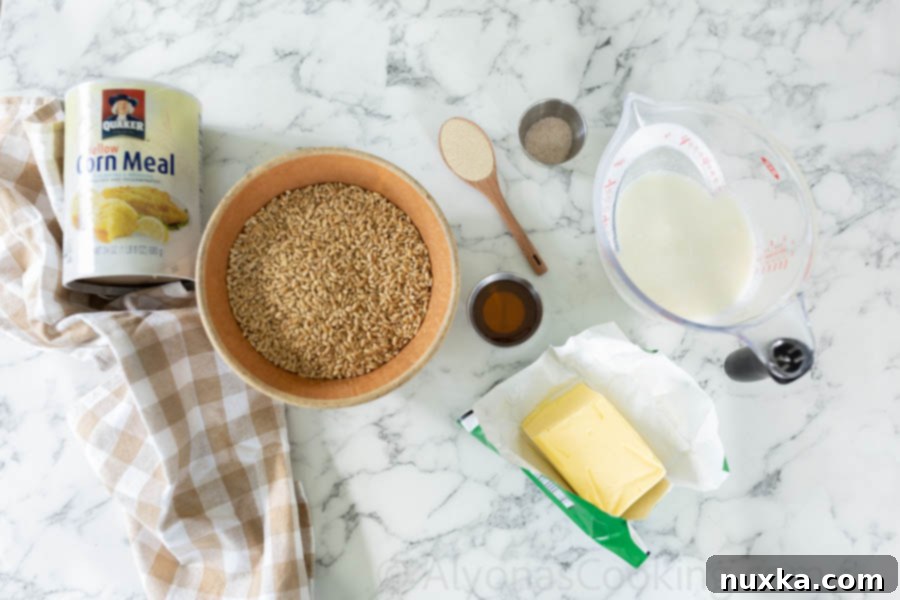
Key Ingredients: Crafting the Perfect Whole Wheat Muffin
Each ingredient plays a vital role in the flavor and texture of these incredible English muffins:
- Cultured Buttermilk or Milk Kefir: These acidic liquids are fundamental for imparting the classic tangy flavor that makes English muffins so distinct. They also contribute to the dough’s softness and help activate the yeast.
- Honey: We use raw honey directly from our bee hives, adding a natural sweetness and depth of flavor. For a similar taste, this raw wildflower honey is an excellent choice. Honey also helps tenderize the dough and provides food for the yeast.
- Salted Butter: I prefer the rich flavor of yellow Pure Irish butter (usually salted from Aldi) or this Organic butter. Butter adds richness, moisture, and enhances the texture of the muffins.
- Salt: I use Redmond Real Salt. Salt is vital not just for flavor, but also for controlling yeast activity and strengthening the gluten structure in the dough.
- Hard White Wheat Flour: Freshly milled from hard white wheat berries. To yield 4 cups of this incredibly fresh flour, you’ll need to run approximately 3 cups of whole wheat grains through your grain mill. This provides the full nutritional benefits and exceptional texture.
- Cornmeal: This is an essential ingredient for preventing the English muffins from sticking to your work surface and the cast-iron skillet, creating a lovely crispy bottom.
Step-by-Step: How to Make English Muffins Using Whole Grains
Creating these delightful whole grain English muffins is a rewarding process. Follow these detailed steps to achieve perfect, soft, and chewy results. For a complete tutorial with step-by-step photos, please refer to the recipe card below.
- Warm the Liquids: In a small saucepan, gently heat the buttermilk (or kefir) with the butter until it reaches approximately 80°F (27°C). It’s crucial not to overheat cultured milk products, as they can curdle. The butter doesn’t need to melt completely; it will soften sufficiently. This warm liquid provides the ideal environment to activate your yeast. Set this mixture aside to cool slightly if it got too warm.
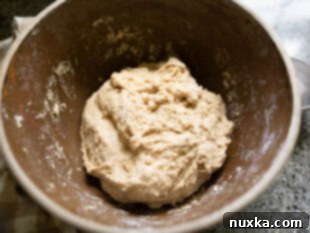
- Combine Dry & Wet Ingredients: Begin by milling your hard white wheat berries to produce freshly milled flour. Transfer the warm, aromatic flour into a large mixing bowl. Pour in the buttermilk mixture (ensuring it’s not too hot, ideally between 95-105°F for yeast activation), and evenly sprinkle the dry active yeast over the surface. Add the honey and salt. Using your hands, mix everything together thoroughly until a soft, sticky dough forms. This sticky consistency is key to developing those desirable nooks and crannies.
- First Rise & Refrigeration (or Same-Day Baking): Cover the bowl and let the dough proof at room temperature for one hour. After this initial rise, you have two options:
- Overnight Refrigeration (Recommended): For a deeper, tangier flavor akin to sourdough, and for easier batch management, refrigerate the covered dough overnight (8-12 hours). This cold fermentation also helps the whole grains fully hydrate.
- Same-Day Baking: If you’re short on time, after the first rise, you can proceed directly to shaping. After shaping, allow them to rise for another 30-40 minutes at room temperature, then cook them in the skillet as directed. They will still be delicious and tangy!
- Shape and Second Rise: The next morning (or after your first rise for same-day baking), remove the dough from the fridge and let it come to room temperature for about 1-2 hours. Generously sprinkle your work surface with cornmeal; this prevents sticking and adds a nice texture to the bottom of the muffins. Using a 1/3 cup measuring cup, scoop out portions of the sticky dough. Gently shape each portion into a ball, then place it directly on the cornmeal-dusted surface and flatten it into a disk, approximately 3/4-inch thick. Sprinkle the tops with more cornmeal. Allow these shaped muffins to rise, uncovered, for another 30 minutes. This second rise is crucial for their airy texture.
- Preheat Skillet: While the muffins are undergoing their second rise, preheat a 12-inch cast-iron skillet over very low heat. This is a critical step for achieving soft, chewy centers without drying out or burning the outsides. I typically use setting number 3 on my stove, which provides a gentle, consistent heat.
- Cook to Perfection: Carefully transfer 4-5 English muffins into the preheated skillet, ensuring they have enough space. Cover the skillet with a lid (a large pot lid works well). This creates a steaming effect that helps cook the muffins through evenly. Cook for 5-6 minutes on each side. The English muffins are fully cooked when their internal temperature reaches 190°F (88°C) using an instant-read thermometer. Once cooked, transfer the English muffins to a kitchen towel to cool completely before storing them. Cooling completely prevents condensation and ensures the best texture.

The Secret to Properly Cutting an English Muffin: Unleashing the Nooks and Crannies
While there’s no truly “wrong” way to enjoy a delicious English muffin, there’s a clever little trick to maximize those incredible nooks and crannies. Simply slicing through the middle with a knife can compress the interior, losing some of that desirable texture. Instead, for the ultimate nooks and crannies experience, follow these steps:
Take a sharp serrated knife and run it around the circumference of the English muffin, creating a shallow cut that doesn’t go all the way through the bread. Essentially, you’re scoring the edges. Once scored, use your fingers (or a fork, for even more texture) to gently pull the two halves apart. This tearing action, rather than cutting, pulls and stretches the delicate internal structure, showcasing all those intricate pockets and crevices. This method not only enhances the visual appeal but also creates more surface area to soak up all that wonderful butter, jam, or whatever delicious topping you choose.
Versatile Delights: Creative Ways To Serve English Muffins
English muffins are undeniably a breakfast icon, but their potential extends far beyond the morning meal. The beauty of these homemade whole wheat English muffins is their versatility. Whether you’re planning a hearty breakfast or a quick dinner, topping them creatively can transform them into a satisfying dish. Here are some classic and inventive ways to serve them up:
- Timeless Toast with Butter and Jam: This is a favorite for a reason! Toasting revives the soft bread, warms it through, and brings out its inherent flavor. A generous spread of creamy butter melting into those nooks and crannies, followed by your favorite fruit jam or marmalade, is pure bliss.
- Kid-Friendly English Muffin Pizzas: A go-to for a quick and fun meal. Simply split an English muffin, top each half with a dollop of pizza sauce, a sprinkle of your favorite cheese (mozzarella is classic!), and a few slices of pepperoni or other preferred toppings. Pop them into a toaster oven or regular oven until the cheese is bubbly and golden. If you make a big batch of English muffins, these become an effortless, customizable dinner.
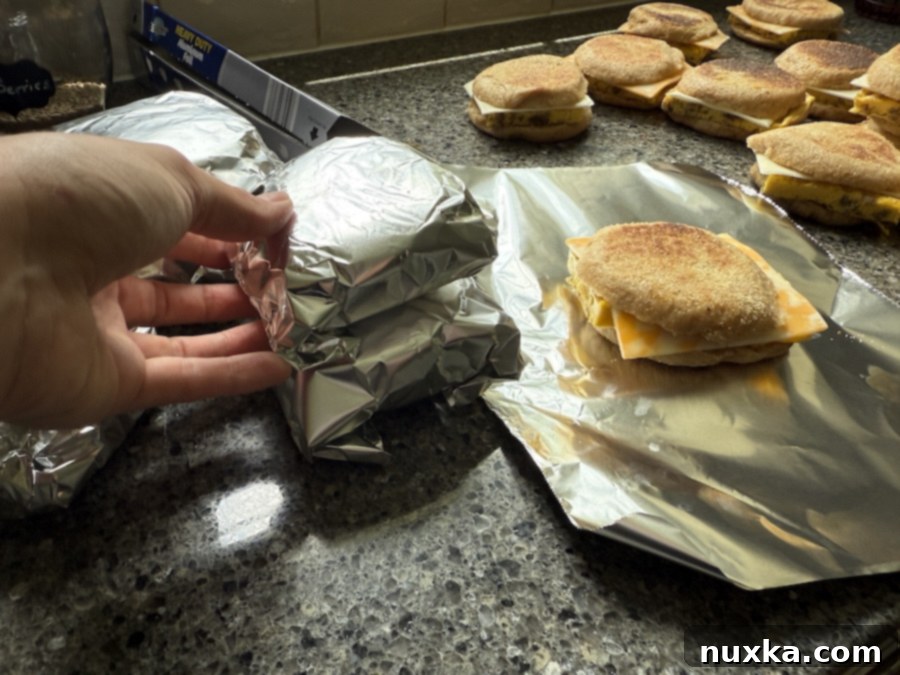
- Amazing Freezer Breakfast Sandwiches: Homemade English muffins are perfect for meal prepping breakfast sandwiches. To make a batch, I blend two dozen eggs with a pack of cream cheese in a blender until smooth. I then pour this mixture onto a sheet pan lined with parchment paper and bake it at 425°F (220°C) for up to 15 minutes, or until set. Once cooled, I cut the egg slab into squares, which fit perfectly on the muffins. Assemble with cheese, cooked sausage, bacon, or ham, and then freeze them individually for easy grab-and-go breakfasts.
- Light and Fresh Lunch Sandwiches: For a healthier lunch option, split and toast an English muffin, then layer it with your favorite deli meat, crisp lettuce, juicy tomato slices, and other fresh veggies. Their sturdy yet soft texture holds up well to fillings, making for a delightful and wholesome meal.

Storing Your Homemade Whole Wheat English Muffins
One of the best qualities of these homemade whole wheat English muffins is how well they store. They retain their moist, soft texture for several days at room temperature. English muffins made with commercial yeast, like this recipe, can typically be kept at room temperature for up to 3 days. If you’ve made a sourdough variation, they may last even longer due to the natural preservatives in sourdough.
I generally do not recommend refrigerating English muffins unless you specifically plan to toast them before eating. Refrigeration tends to dry out bread products, making them less enjoyable. For longer storage, freezing is your best option.
Freezing English Muffins for Future Enjoyment
Yes, you can absolutely freeze English muffins! This is an excellent way to extend their shelf life and ensure you always have a wholesome, homemade option on hand. Whether as plain bread or assembled into breakfast sandwiches, these whole wheat English muffins freeze beautifully for up to 3 months.
Important Freezing Tips:
- Cool Completely: Always ensure bread products are completely cooled before freezing, assembling into sandwiches, or storing in an airtight bag. Wrapping warm bread will create condensation, leading to ice crystals and potentially freezer burn.
- Individual Wrapping: If you’re making breakfast sandwiches for the freezer, wrap each English muffin sandwich individually. This makes reheating much simpler and prevents them from sticking together.
- Reheating Frozen Sandwiches: For best results, I find that frozen English muffin breakfast sandwiches reheat wonderfully when thawed slightly and then wrapped in foil. Bake them at 350°F (175°C) for approximately 25 minutes, or until thoroughly heated through and the cheese is melted. The foil helps keep them moist and prevents the bread from drying out.
Having a stash of these in your freezer is a game-changer for busy mornings, providing a quick, healthy, and satisfying meal with minimal effort.
Expert Tips for Making Perfect Whole Wheat English Muffins:
Achieving consistently perfect whole wheat English muffins is easy with these insider tips:
- Allow Proper Hydration: Whole wheat flour, especially freshly milled, needs time to absorb liquids fully. Allowing the dough to hydrate and rest properly is essential for a soft, pliable dough. Buttermilk’s acidity actually helps to speed up this “autolyse” process, softening the bran and improving dough texture.
- Accurate Flour Measurement: Freshly milled flour is notably fluffier and less compact than store-bought white flour. When measuring, fill your measuring cup full and gently pack it down slightly to ensure you have the correct amount, which is crucial for dough consistency.
- Scoop, Don’t Roll: For a quick and easy process that preserves the delicate dough structure, use a 1/3 cup measuring cup to scoop out uniform portions of dough directly. This method is far more efficient than cutting and rolling, which can create scraps and require extra handling.
- Generous Cornmeal Dusting: Don’t be shy with the cornmeal! Liberally sprinkle your work surface with semolina or cornmeal. This acts as a non-stick coating, preventing the sticky dough from adhering to your surface and, later, to the hot skillet, ensuring a clean release and a lovely crispy bottom.
- Low and Slow Cooking is Key: Cook these whole wheat English muffins over a steady, low heat. Too high a temperature will cause the crust to brown too quickly and become hard, while the inside remains undercooked. I recommend cooking on a number 3 heat setting and allowing a little extra time for them to cook through. Using a lid on your skillet is an absolute must – it traps steam, helping the middles to cook evenly and thoroughly. Without a lid, you’d likely need to finish them in the oven, adding an extra step.
- Cool Completely Before Storing: This tip is vital for preventing spoilage and maintaining texture. Always allow the English muffins to cool completely on a wire rack or kitchen towel before placing them in a bread bag or assembling them into sandwiches. If you wrap them while warm, condensation will form, leading to a soggy texture and creating a prime environment for mold or freezer frost in the freezer. For freezer sandwiches, it also prevents the cheese from melting prematurely before freezing.

Explore More Whole Grain Baking: Delicious Fresh Milled Flour Recipes
If you’ve fallen in love with the wholesome goodness of whole grains and the unparalleled flavor of freshly milled flour, you’re in for a treat! Discover more ways to incorporate these nutritious ingredients into your baking with these fantastic bread recipes. Each one celebrates the rich taste and health benefits that only fresh-milled flour can provide, offering a new dimension to your baking adventures.
More Fresh Milled Flour Recipes:
-
Whole Wheat Sourdough Bagels with Freshly Milled Flour
-
Jalapeno Cheddar Sourdough Bagels with Freshly Milled Flour
-
Whole Wheat Sourdough Bread (Boule)
-
Moist Whole Wheat Bread Loaves Recipe
-
Lithuanian Bread (Polish Deli Copycat)
-
Fluffy Whole Wheat Sandwich Bread Recipe
-
Whole Wheat Sourdough Sandwich Bread with Freshly Milled Flour
-
Whole Wheat Sourdough Baguette Recipe

Rate
Pin
Whole Wheat English Muffins
Equipment
-
12-inch cast-iron skillet
-
1 large mixing bowl
-
1 grain mill (I have the canister attachment)
-
A set of measuring spoons and cups
Ingredients
Ingredients:
-
2 cups Buttermilk or Homemade milk kefir *see notes
-
2 Tbsp honey
-
3 Tbsp salted butter (I used salted but unsalted will work too)
-
2 tsp sea salt
-
4 cups freshly milled hard white flour (milled from hard white wheat berries)
-
1 Tbsp dry active yeast
Instructions
Directions:
-
 In a small saucepan, heat the buttermilk* and butter to 80°F (do not overheat as it can curdle). You want warm but not hot buttermilk to activate the yeast. Set aside.
 -
 Run your wheat berries through a grain mill. Measure 4 cups of freshly milled flour into a large mixing bowl.
 -
 Pour in the buttermilk mixture and sprinkle over the yeast. Add the honey and salt, then mix the dough with your hands until it becomes soft and sticky. Cover and rest for 1 hour.
 -
 After the dough has risen, punch it down and refrigerate it covered overnight or for 8-12 hours to create a tangy sourdough aroma. See notes for same-day baking.**
 -
 Bring the dough to room temperature (about 1 hour). Meanwhile, generously sprinkle the work surface with cornmeal. Using a 1/3 measuring cup, scoop out the dough and form it into balls. Flatten them over the cornmeal and sprinkle the tops with cornmeal. Allow them to rise 30-40 minutes uncovered.
 -
 Preheat a large cast-iron skillet over low heat. Gently place 4-5 English muffins into the pan and cover with a lid (from a large pot). Cook them over low heat (number 3 setting on my stove) for 5-6 minutes per side.
 -
 Arrange them on a kitchen towel and let them cool completely before storing.
Notes
- Cultured Milk Options: Cultured buttermilk, milk kefir, or even soured milk (milk with a tablespoon of lemon juice or vinegar allowed to sit for 5-10 minutes) will all work to provide that signature tangy flavor. When heating, do so with caution as cultured milks can curdle. If it does curdle slightly, don’t worry, it’s still perfectly fine to use in the recipe. If using soured milk, you may find that the dough is a bit wetter, so you might need to add an additional 1/4 to 3/4 cup of freshly milled flour to achieve the correct sticky consistency.
- Same-Day Baking: For a quicker turnaround, you can skip the overnight refrigeration. After the initial 1-hour rise, proceed directly to shaping the dough as instructed in step 4, then allow them to rise for a second time (30-40 minutes) and cook. While the overnight refrigeration imparts a more complex, tangy flavor, the buttermilk or kefir will still provide a delicious tang for same-day muffins.
- Milling Flour: To yield 4 cups of freshly milled flour, you will generally need to run about 3 to 3.5 cups of whole wheat berries through your grain mill. The exact amount can vary slightly based on the type of wheat berry and your mill.
- Storing Freshly Milled Flour: Freshly milled flour retains its peak freshness and nutrient content for a short period at room temperature. Due to the oils in the wheat germ, it can go rancid if left out too long. If you have extra fresh-milled flour, it’s best to store it in a gallon zip-lock bag or an airtight container in the refrigerator or freezer until you’re ready to use it again.
- Storing Cooked English Muffins: Ensure your whole wheat English muffins are cooled completely before storing them in an airtight bread bag or assembling them into sandwiches. Storing them warm can lead to condensation, making them soggy. Homemade English muffins made with commercial yeast will stay fresh at room temperature for up to 3 days.
- Efficient Shaping: Using a 1/3 cup measuring cup to scoop out dough portions is a time-saving technique. It eliminates the need for rolling out the dough and cutting rounds, which can be messy and create excess scraps that need to be re-worked. This method ensures consistent sizing and reduces overall effort.
