The Ultimate Homemade Vanilla Ice Cream Recipe: Creamy, Easy, & No-Cook Custard!
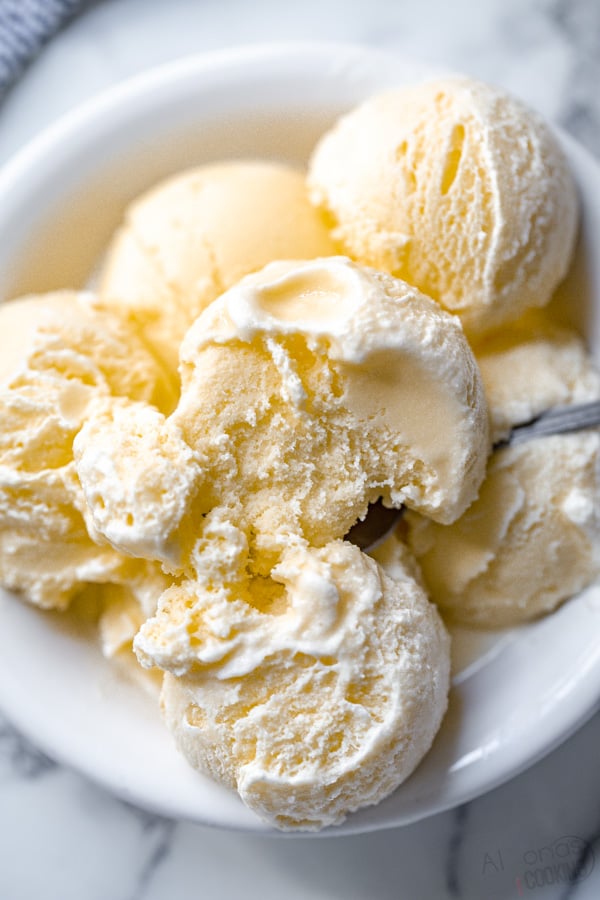
There’s nothing quite like the indulgence of freshly made homemade vanilla ice cream. Its rich, creamy texture and classic flavor make it a beloved treat that evokes nostalgia and pure delight. This isn’t just any vanilla ice cream recipe; it’s a revolutionary approach that delivers unparalleled creaminess and flavor with surprisingly little effort. Prepare yourself for a recipe that’s not only easy but features a brilliant **no-cook egg custard**, transforming your ice cream making experience!
Forget the traditional complexities of tempering eggs over a stove. In this recipe, the eggs are simply whipped to a luscious, creamy consistency, ensuring you get that signature rich vanilla ice cream experience without the fuss and a mere fraction of the usual labor! It’s a game-changer for anyone who loves homemade desserts but wants to skip the extra steps and enjoy a truly superior frozen treat.

This homemade vanilla ice cream recipe forms the perfect foundation for countless other delectable frozen treats. It’s truly the base of all other delicious ice cream flavors! That’s precisely why we have an array of popular ice cream variations, including our sensational Cookies N’ Cream ice cream and our decadent homemade Chocolate ice cream. Once you master this incredibly simple yet rich vanilla base, you’ll be able to whip up any flavored ice cream imaginable, perfect for those scorching summer days or any time you crave a frosty indulgence.
Watch Our Video: How to Make No-Cook Vanilla Ice Cream
The Only No-Cook Vanilla Ice Cream Recipe You’ll Ever Need!
A classic custard is traditionally the secret to a truly great ice cream, providing unparalleled richness and a smooth texture. While many recipes involve a stovetop custard, this revolutionary method makes it incredibly easy! All you truly need are milk, cream, and eggs, and we’ve found a way to combine them into a creamy custard base without any cooking required. The result is an ice cream that’s neither too heavy nor too light – simply perfect in every spoonful.
What sets this recipe apart is its ingenious approach to the eggs. Instead of using only egg yolks or cooking them into a traditional custard, you utilize whole eggs, transforming them into a miraculously creamy, no-cook base through vigorous whipping. This technique eliminates the risk of scrambled eggs, saves significant time, and cuts down on effort, especially welcome during warmer months when you want to minimize time spent over a hot stove.
To bring this delightful creation to life, you’ll need an ice cream maker attachment for your Kitchen Aid Mixer or any reliable electric ice cream maker, such as this popular Cuisinart model. The golden rule for achieving your desired creaminess is simple: for a richer, more decadent ice cream, lean towards a higher proportion of heavy cream. If you prefer a lighter ice cream, adjust by incorporating more milk or a combination of milk and half-and-half. It’s truly that straightforward, requiring only a handful of essential ingredients to achieve homemade perfection.
My journey to perfecting homemade ice cream involved trying various methods. While the allure of a “no-churn” ice cream recipe seemed like a time-saver, I consistently found the texture to be lacking, often resulting in an icy consistency that failed to deliver the smooth, satisfying mouthfeel of premium store-bought ice cream. Similarly, an eggless version, though simpler, often melted too quickly and profoundly lacked that crucial richness and body that makes ice cream so indulgent. And the idea of cooking a custard base over a hot stove in the middle of summer? Absolutely not an option I was willing to entertain—it’s too much work for a refreshing treat!
However, I firmly believed that the addition of eggs was essential for that “oomph” – that perfect richness, stability, and luxurious body that elevates ice cream from good to extraordinary. This conviction drove my quest to create the ultimate homemade ice cream that retained the benefits of eggs without the hassle of cooking. And after much experimentation, my search finally culminated in this spectacular no-cook recipe, which I am thrilled to share with you!

The Best Homemade Vanilla Ice Cream You’ll Ever Make
Indeed, my arduous search for the perfect vanilla ice cream recipe is over! The absolute best part about this particular version of homemade ice cream is the innovative shortcut it takes with the egg custard. I was determined to include eggs in my ice cream for their inherent richness and unparalleled texture, but cooking them felt like an unnecessary obstacle. My solution was to vigorously whip the eggs until light and creamy, integrating them seamlessly into the mixture without any cooking whatsoever. This method is, hands down, the BEST formula for an egg-based ice cream recipe that bypasses the traditional cooked custard entirely.
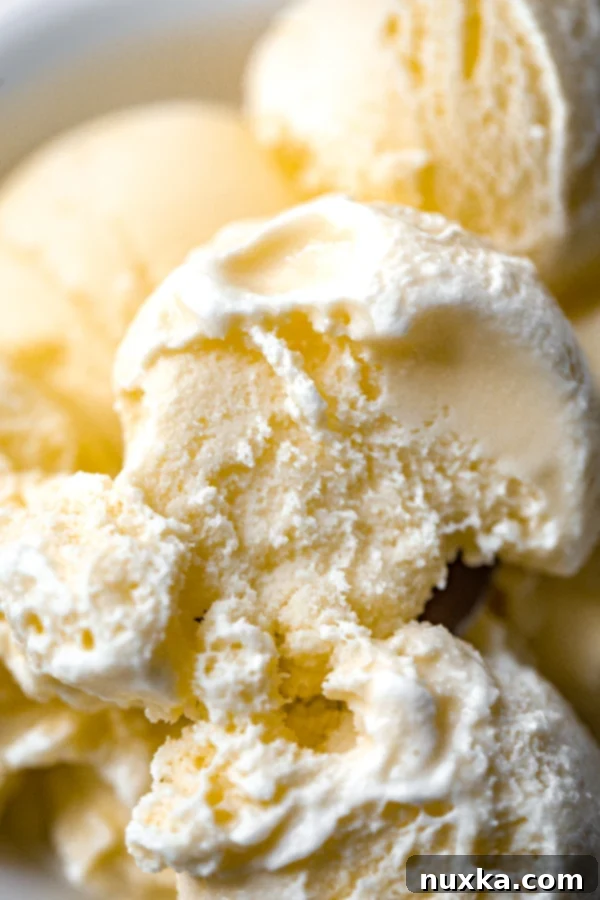
Once you’ve mastered this fundamental vanilla ice cream, the possibilities for creative add-ins and flavor variations are endless and incredibly simple. The combination of cream and milk churns beautifully into a delectable soft-serve consistency that you can enjoy immediately for an instant treat. Alternatively, transfer it to an airtight container and freeze it for several hours to achieve the firmer texture reminiscent of a premium store-bought tub. It is simply divine and is sure to elicit rave reviews from anyone lucky enough to try it!
How to Make This Incredible Vanilla Ice Cream:

Rate
Pin
BEST Vanilla Ice Cream Recipe
Equipment
-
Electric ice cream maker or Kitchen Aid ice cream maker attachment
-
Large mixing bowl
-
Electric mixer (stand mixer or hand mixer)
Ingredients
Vanilla Ice Cream Custard:
-
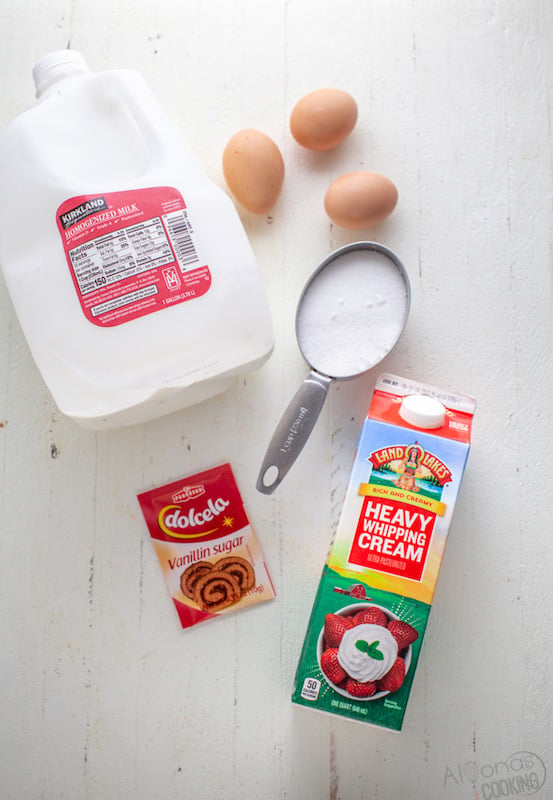
3 large eggs
-
3/4 cup granulated sugar
-
3 cups heavy whipping cream
-
1 cup whole milk
-
1 tsp vanilla extract (optional, for enhanced flavor)
Instructions
How to Make No-Cook Vanilla Ice Cream:
-
 Preparation: To ensure optimal churning, place the bowl and paddle attachment of your ice cream maker in the freezer for a minimum of 24 hours. This crucial step guarantees a sufficiently cold churning environment.
 -
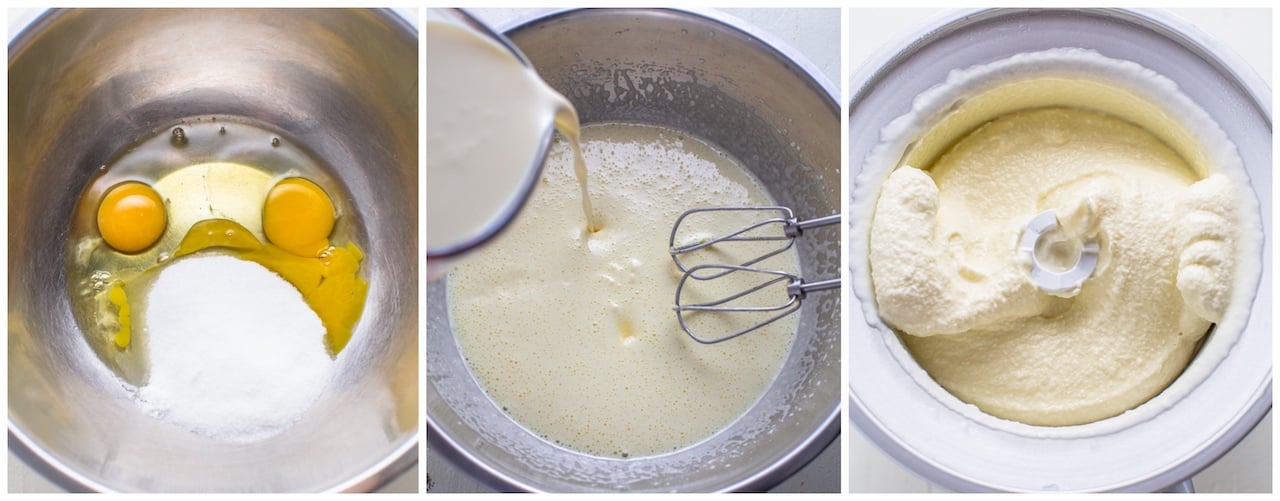
 Prepare the Custard Base: In a large mixing bowl, beat the eggs and granulated sugar together vigorously for approximately 5 minutes using an electric mixer. Continue until the mixture becomes significantly thick and pale yellow in color. This whipping process is key to achieving the no-cook custard’s creamy consistency.
 -
 Next, gently fold in the heavy whipping cream, whole milk, and vanilla extract (if using) into the egg mixture. Mix until everything is thoroughly blended and smooth.
 -
 Chill the Batter: Transfer the blended ice cream batter into an airtight container and place it in the refrigerator for at least 4 hours, or ideally overnight, until it is very cold. For a quicker chill, you can freeze it for 1-4 hours. Proper chilling is essential for the ice cream to churn correctly and achieve its smooth texture.
 -
 Churn the Ice Cream: Once the batter is thoroughly chilled and your ice cream maker bowl is frozen solid, pour the cold batter into the ice cream maker. Churn for 25-30 minutes, or until the ice cream reaches a soft-serve consistency. It may initially appear a bit “gritty” or like very soft whipped cream, which is normal.
 -
 Serve or Freeze: You can enjoy your freshly churned ice cream immediately as a delicious soft-serve. For a firmer, scoopable ice cream, transfer it into an airtight freezer-safe container and freeze for at least 4-6 hours, or preferably overnight, until it reaches your desired firmness.
Notes for Perfect Homemade Ice Cream
To Scoop Firm Ice Cream: For beautifully firm, scoopable ice cream, ensure you freeze the churned ice cream overnight. We recommend using a sturdy heavy-duty ice cream scoop for effortlessly serving your frozen treat.
Soft-Serve Enjoyment: If you prefer a delightful soft-serve texture, the ice cream is perfect to enjoy right after churning. Its creamy consistency is ideal for immediate indulgence.
Nutrition per serving
Calories: 339kcal
Carbohydrates: 18g
Protein: 4g
Fat: 28g
Saturated Fat: 17g
Cholesterol: 149mg
Sodium: 57mg
Potassium: 104mg
Sugar: 16g
Vitamin A: 1160IU
Vitamin C: 1mg
Calcium: 81mg
Iron: 1mg

Essential Ice Cream Making Equipment:
- The BEST heavy-duty ice cream scoop: Essential for serving perfectly firm scoops with ease.
- Elegant ice cream serving glasses: Elevate your dessert presentation for a sophisticated touch.
- Convenient disposable ice cream cups: Perfect for parties, picnics, or easy, on-the-go enjoyment.
Frequently Asked Questions About Homemade Vanilla Ice Cream
What is the best ice cream maker for home use?
When I was searching for an ice cream maker, the Cuisinart model was a strong contender due to its standalone convenience. However, I ultimately chose the Kitchen Aid ice cream attachment. My reasoning was simple: I didn’t want yet another kitchen gadget consuming valuable counter space. Since I already owned a Kitchen Aid stand mixer, I only needed to purchase the bowl attachment. This bowl conveniently lives in my freezer, saving me precious counter space and eliminating the need for additional machinery. It has proven to be a wise and incredibly efficient investment, delivering consistent, excellent results for homemade ice cream.
Is it safe to consume raw eggs in this no-cook ice cream recipe?
I have consistently made many batches of this ice cream without encountering any salmonella concerns. The entire ice cream mixture, including the eggs, goes through a prolonged freezing process, which significantly minimizes any potential risks. Generally, this shouldn’t be a major issue for most people, especially when using fresh, high-quality eggs from a reliable source. If you have a known sensitivity or prior problems with raw egg consumption, or if you prefer an extra layer of caution, you can opt to use pasteurized eggs available in many supermarkets. Alternatively, you can gently pasteurize your own eggs before proceeding with the recipe, though this would involve a slight cooking step, technically negating the “no-cook” benefit for the eggs themselves, but still avoiding cooking the full custard. Remember, if freezing fish is considered safe for raw consumption to kill off parasites, a similar principle applies here due to the extended freezing time.
Can I incorporate vanilla pudding mix into my homemade vanilla ice cream?
Some traditional vanilla ice cream recipes do call for vanilla pudding, and while it can sound appealing for its thickening properties, it can also be quite overpowering in vanilla pudding flavor, depending on the quantity used. While store-bought pudding certainly helps achieve a nice thickness and a smooth consistency, it often alters the color and can make the ice cream taste more like pudding than a pure, creamy vanilla ice cream. If you are keen on experimenting with dry vanilla pudding mix, I would advise starting with just a tablespoon of the dry mix added to the cream during preparation. This cautious approach helps prevent it from dominating the flavor profile and ensures the ice cream retains its intended delicate vanilla taste.
What are the essential ingredients for making homemade ice cream?
Making delicious homemade ice cream is surprisingly simple, especially with our no-cook custard method. Here’s a comprehensive look at the key ingredients and their roles in creating the perfect scoop:
- Eggs: These are crucial for adding a rich, luxurious texture and depth of flavor to the ice cream. In our innovative recipe, whipping them raw creates that perfect emulsified, creamy base without any heat.
- Granulated Sugar: Serves as both a primary sweetener and plays a vital role in the ice cream’s texture by lowering its freezing point, keeping it scoopable. It also aids in the thickening process when whipped with the eggs, contributing to the smooth custard.
- Heavy Whipping Cream: This is the cornerstone for a truly rich and decadent ice cream. The high fat content of heavy cream provides an incredibly creamy, indulgent mouthfeel and contributes to a smooth texture by preventing large ice crystal formation.
- Whole Milk: Used in conjunction with heavy cream, milk helps to lighten the overall consistency slightly, preventing the ice cream from becoming overly dense or excessively rich while still maintaining a delightful creaminess.
- Vanilla Extract (Optional): While the ice cream base is inherently delicious, a touch of vanilla extract (or even fresh vanilla beans or vanilla sugar) enhances and deepens the classic vanilla flavor, providing that familiar aromatic warmth. Feel free to adjust the amount or even skip it if you prefer a simpler base or are planning to add other strong flavors.

How to make ice cream using a Kitchen Aid Mixer (Attachment):
Using a Kitchen Aid Mixer with its ice cream attachment makes the process incredibly efficient and enjoyable. Here’s a concise guide for creating perfect homemade ice cream with your stand mixer:
- Freeze the Bowl: Crucially, ensure your Kitchen Aid ice cream maker bowl and its paddle attachment are frozen solid for at least 24 hours prior to use. This extreme coldness is essential for efficient churning and achieving the desired consistency.
- Prepare the Custard: In your Kitchen Aid mixing bowl (the regular one, not the freezer bowl yet), combine the eggs and granulated sugar. Using the whisk attachment, beat on medium-high speed until the mixture becomes notably thick and pale yellow, typically around 5 minutes.
- Combine Wet Ingredients: Switch to a low speed and slowly pour in the heavy cream, whole milk, and vanilla extract. Continue to beat until all ingredients are just combined and the mixture appears smooth and homogenous.
- Chill the Mixture: Transfer the prepared batter to an airtight container and refrigerate for a minimum of 4 hours, or ideally overnight, until it is very cold. This chilling step is absolutely vital for the batter to thicken properly during churning and prevent it from becoming a runny mess.
- Churn in the Mixer: Once the batter is thoroughly chilled and your freezer bowl is frozen solid, attach the frozen bowl and paddle to your Kitchen Aid mixer. Pour the cold ice cream custard into the bowl and churn on the lowest speed for 25-30 minutes. The ice cream will gradually thicken to a soft-serve consistency.
- Serve & Enjoy: Your freshly churned ice cream is now ready to be enjoyed immediately as a delightful soft-serve! For a firmer, more scoopable texture akin to store-bought ice cream, transfer it to a freezer-safe airtight container and freeze for an additional 4-6 hours, or preferably overnight.

Is chilling the ice cream custard before churning truly necessary?
Absolutely, chilling your ice cream batter is not just recommended, it’s an absolutely crucial step for achieving the perfect texture and consistency in your homemade ice cream. I’ve personally observed a significant difference when the batter wasn’t properly chilled; it tends to result in a soupy, melty mess during churning because the machine can’t freeze it effectively. Once ice cream has melted significantly, it sadly never fully regains its original smooth, creamy texture, often becoming icy. To properly chill your custard, you can either refrigerate it overnight (which is my preferred method for convenience and best results) or speed up the process by placing it in the freezer for anywhere from 30 minutes up to 4 hours, until it’s very cold. This ensures the ice cream maker can work efficiently to create those fine, delicate ice crystals that give homemade ice cream its luxurious mouthfeel.
How long should I churn my homemade ice cream for?
Assuming both your ice cream maker’s bowl is properly frozen (for 24 hours) and your batter is adequately chilled (for at least 4 hours), the ideal churning time is typically no longer than 30 minutes. Churning beyond this mark can cause the batter to start warming up and melting, and your ice cream maker might begin to lose its crucial cold state, leading to a less desirable, often icy, texture. Most electric ice cream makers will achieve the perfect soft-serve consistency within 25-30 minutes. Always keep an eye on the consistency as it churns, and stop the machine when it resembles thick soft-serve ice cream or a very thick milkshake.
How can I adjust the richness or lightness of my ice cream?
The formula for customizing your ice cream’s richness is incredibly straightforward, relying on the balance between its two primary liquid components: cream and milk. Their ratio directly impacts the final texture and taste:
- For a creamier, richer consistency: Use a higher proportion of heavy whipping cream. The higher fat content of heavy cream contributes to a more decadent, luxurious mouthfeel, and also helps create a smoother texture by inhibiting large ice crystal formation.
- For a lighter ice cream: Opt for more whole milk or a blend of milk and half-and-half. These options have lower fat content, resulting in a lighter, less dense ice cream that can be equally refreshing and still wonderfully creamy, just not as intensely rich.
By simply playing with the cream-to-milk ratio, you can effortlessly tailor your homemade vanilla ice cream to your exact preference, whether you crave something intensely rich and indulgent or delightfully light and refreshing.
What is the process of making Vanilla Ice Cream?
At its core, vanilla is essentially a flavoring added to a plain, creamy ice cream base, making it the foundational flavor for almost all other ice cream varieties enjoyed worldwide. The magic of ice cream making begins with a carefully prepared liquid mixture, often referred to as a “custard” or “base,” which in our recipe consists of cream, milk, and our innovative no-cook whipped eggs (or an egg substitute in other recipes).
This liquid base then enters a specialized frozen bowl within an ice cream maker. The machine’s paddle continuously churns and scrapes the sides of the bowl. This constant motion serves a dual purpose: it rapidly chills the mixture, causing tiny ice crystals to form, and it incorporates air, which is crucial for creating that light, airy texture. This continuous mixing prevents large, undesirable ice crystals from forming, ensuring a smooth, velvety consistency. The process gradually transforms the liquid mixture into a semi-frozen state, developing those fine ice crystals and air pockets, which results in a soft, pliable consistency—what we affectionately call “soft serve.”
To truly replicate this creamy, airy texture at home, investing in an ice cream maker is highly recommended. While traditional hand-crank ice cream makers (which require ice cubes and rock salt for freezing) are still available, modern electric versions offer a far more convenient and hands-free experience. For a deeper dive into the history and science of vanilla ice cream, you can explore this informative Wiki Article on Vanilla Ice Cream.

Pro Tips for Crafting the Perfect Homemade Ice Cream:
- Thoroughly Chill Your Custard: Always refrigerate your ice cream batter for at least 4 hours, or preferably overnight, before churning. A very cold base is absolutely crucial for optimal freezing and ensuring a wonderfully smooth, creamy texture in your final product.
- Ensure Your Ice Cream Maker Bowl is Frozen Solid: If you’re using an electric unit with a freezer bowl, make sure it has been in the freezer for a full 24 hours. This extreme coldness is essential; a partially frozen bowl will not churn the ice cream effectively and may result in a soupy, undesirable consistency.
- Troubleshooting Churning Issues: If your batter isn’t thickening after about 15 minutes of churning, immediately stop the machine. Transfer your mixture back into a bowl and refrigerate it. Then, wash and thoroughly dry your ice cream maker bowl, returning it to the freezer for another 24 hours to regain its full coldness. Resume churning with a fully frozen bowl and very cold batter for the best results.
- Enjoy as Soft Serve or Firm Scoops: Your freshly churned ice cream will have a delightful soft-serve consistency, perfect for immediate enjoyment. For firmer, scoopable ice cream that holds its shape like store-bought varieties, transfer it to an airtight container and freeze for several additional hours, or overnight, until it reaches your desired firmness.
Expand Your Frozen Dessert Horizons with These Other Ice Cream Recipes:
- Irresistible Cookies N Cream Ice Cream
- Rich & Dreamy Chocolate Ice Cream


