The Ultimate Homemade Hot Pockets Recipe: Recreate That Crispy, Buttery Perfection at Home

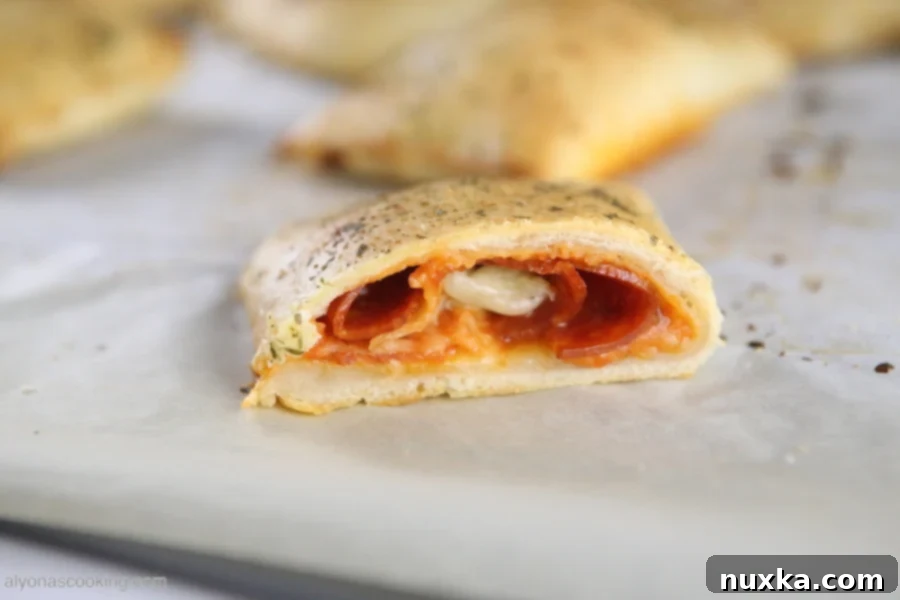
Who doesn’t love a good Hot Pocket? These convenient, cheesy, and savory turnovers have been a freezer-aisle staple for quick meals and satisfying snacks for decades. There’s something undeniably comforting about biting into that warm, flavorful filling surrounded by a perfectly seasoned crust. However, while the convenience is unmatched, the flavor and texture of store-bought versions can sometimes leave a little to be desired compared to a truly fresh, homemade meal. If you’ve ever dreamt of recreating that nostalgic Hot Pocket experience with superior ingredients and an even more delicious outcome, you’ve come to the right place. This ultimate homemade Hot Pockets recipe is designed to be the best copycat Hot Pockets recipe you’ll ever find, delivering that iconic crispy, buttery crust and rich filling right from your own kitchen.
The Secret Behind the Perfect Hot Pockets Crust: It’s Not Pizza Dough!
For years, many home cooks, myself included, have attempted to replicate the magic of Hot Pockets using standard pizza dough. While delicious in its own right, pizza dough often results in a calzone-like texture – soft, chewy, and bread-like. My own culinary journey to perfect these homemade treats led me down a similar path, yielding tasty but ultimately incorrect calzones instead of the specific Hot Pockets experience I craved. The breakthrough came from a closer look at the packaging of a Hot Pockets box itself, emblazoned with the enticing phrase: “Crispy Buttery Seasoned Crust.”
That description was the key! It sparked the realization that the beloved freezer aisle turnover wasn’t made from a yeasted, bread-like dough at all, but rather something closer to a pie crust or pastry dough. This insight completely shifted my approach. The thin, flaky, and distinctly “crust-like” quality of a Hot Pocket’s exterior simply couldn’t be achieved with traditional pizza dough. Instead, the answer lay in a simple, butter-based dough, creating a pastry that, when baked, becomes wonderfully crisp and golden, mirroring the original’s unique texture.
This recipe focuses on creating a dough that leverages cold butter and minimal kneading, much like a pie crust, to ensure that desirable flakiness and crispiness. The cold butter creates pockets within the dough. As it bakes, the water in the butter turns to steam, pushing apart the layers of dough, resulting in that delightful flaky texture. The minimal kneading prevents over-development of gluten, keeping the crust tender rather than tough. The result is a savory turnover that truly tastes like the Hot Pocket you remember, but with the added freshness and quality of homemade. Forget those soggy microwaved attempts; prepare to indulge in DIY Hot Pockets with a crust that’s genuinely “crispy, buttery, and seasoned” to perfection.
Essential Ingredients for Your Copycat Hot Pockets
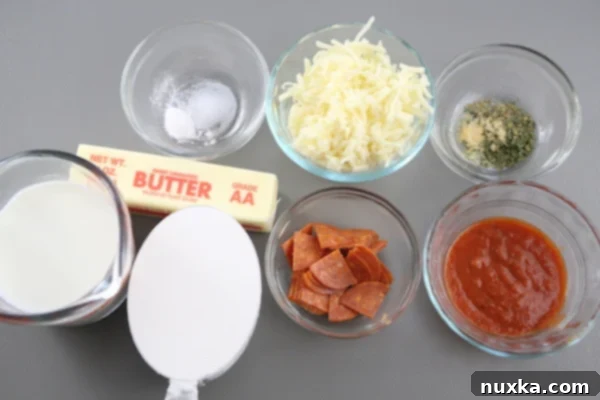
Crafting these delectable homemade pizza pockets requires a few key ingredients for both the distinctive buttery crust and the classic savory filling. The beauty of making them yourself is the ability to choose high-quality components, enhancing the overall flavor and ensuring a satisfying meal every time.
Ingredients for the Crispy Buttery Crust:
The foundation of our perfect copycat Hot Pockets is a simple yet effective dough. The combination of these ingredients will yield that desired thin, flaky, and crispy texture.
- 1 1/2 cups all-purpose flour: The primary structural component of our dough. Always have a little extra on hand for dusting your work surface and adjusting the dough consistency during kneading.
- 2/3 cup milk: Helps to hydrate and bind the dough, contributing to its tender texture.
- 6 tbsp butter, cold: This is the superstar ingredient for our “buttery” and “crispy” crust. Keeping the butter cold and cutting it into small pieces ensures it doesn’t fully incorporate into the flour, which is key for creating those signature flaky layers as it bakes.
- 1/8 tsp salt: A small but mighty ingredient that enhances the overall flavor of the dough.
- 1/8 tsp baking powder: Provides a slight chemical leavening, contributing to a lighter, more tender, and slightly puffed crust.
Filling & Topping Ingredients:
While pepperoni and mozzarella are the classic choices for a Hot Pocket, feel free to get creative with your fillings! Here’s what you’ll need for the traditional pizza pocket experience, plus some essential seasonings for that authentic finish.
- 1/8 tsp dried oregano: A staple in Italian-American cuisine, providing a warm, aromatic, and slightly bitter note to the seasoning blend.
- 1/2 tsp dried parsley: Adds a fresh, green herb flavor and visual appeal to the crust.
- 1/8 tsp garlic powder: Infuses a savory, pungent depth, complementing the other herbs and the filling.
- 1/4 cup milk (for brushing): Used as an egg wash alternative, it helps create a beautiful golden-brown and slightly glossy finish on the crust while ensuring the herbs adhere well.
- Pepperoni: The classic spicy, savory star of many pizza pockets. Dicing or chopping it into smaller pieces ensures even distribution and prevents large chunks from tearing the dough.
- Mozzarella cheese: Melts beautifully to provide that essential gooey, stretchy texture that makes Hot Pockets so satisfying.
- Pasta sauce: Your favorite marinara or pizza sauce forms the flavorful base of the filling. Opt for a thicker sauce to prevent the pockets from becoming too wet.
Step-by-Step Guide: How to Make Homemade Hot Pockets
Making your own savory turnovers is a rewarding process, and with this detailed guide, you’ll achieve perfect results every time. Follow these steps carefully to ensure a crispy crust and a deliciously warm filling. Patience with the chilling steps is key to success!
Preparing the Dough: The Foundation of Flavor
The key to our signature crispy crust lies in how the dough is prepared. Attention to detail here will make all the difference for your homemade Hot Pockets.
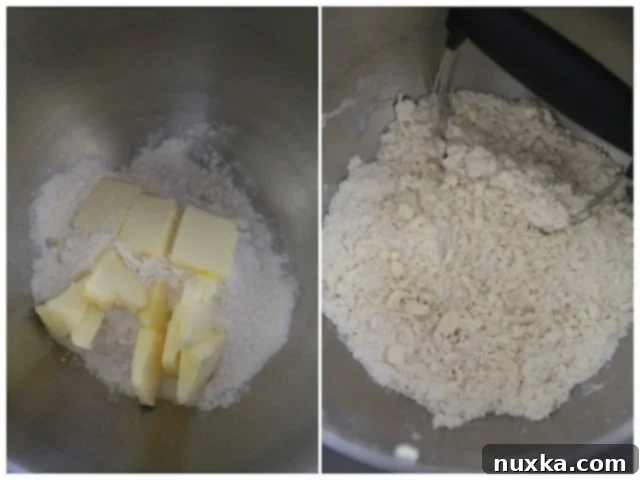
- Combine Dry Ingredients and Cut in Butter: In the bowl of a stand mixer, first combine the all-purpose flour, salt, and baking powder. These dry ingredients create the base. Next, add the cold butter, which should be cut into small cubes (about 1/2-inch pieces). Using the paddle attachment on your stand mixer, or a pastry blender (if mixing by hand), cut the butter into the flour until the mixture resembles coarse crumbs with some pea-sized butter pieces still visible. This step is crucial for creating those flaky layers in the crust.

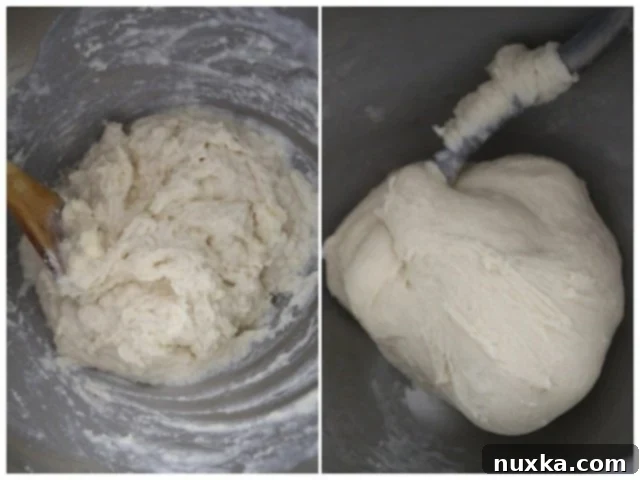
- Form the Dough: Add the milk to the butter-flour mixture and stir gently with a spoon until a shaggy dough begins to form. Transfer this mixture to your stand mixer fitted with a dough hook attachment. Knead on medium speed for about 5 minutes. As you knead, you may need to gradually add a little more flour, one tablespoon at a time, just until the dough comes together and no longer sticks excessively to the sides of the bowl. Be careful not to add too much flour; typically, you won’t need more than an additional cup in total. The dough should be smooth, pliable, and slightly tacky but not overly sticky.

- Chill the Dough: Shape the dough into a disk, cover it tightly with plastic wrap, and refrigerate for at least 1 hour. Chilling the dough is essential for two reasons: it allows the gluten to relax, making the dough easier to roll, and it re-firms the butter, which is critical for that distinctive flaky and crispy crust we’re aiming for.
Assembling Your Hot Pockets: Fill and Seal
Now for the fun part – filling your pockets with your favorite savory ingredients! This stage brings your easy Hot Pockets to life.
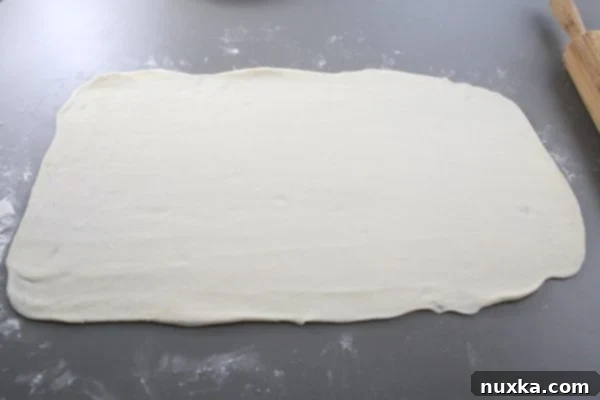
- Roll Out the Dough: On a lightly floured surface, take the chilled dough and roll it out into a large rectangle, approximately 20 by 12 inches. Aim for an even thickness throughout the sheet (about 1/8 to 1/4 inch thick). This ensures consistent baking and crispiness.

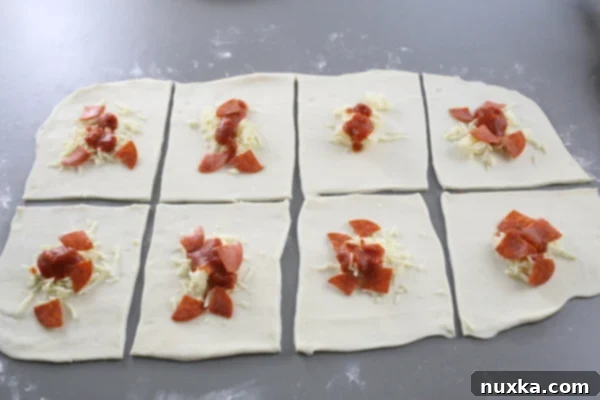
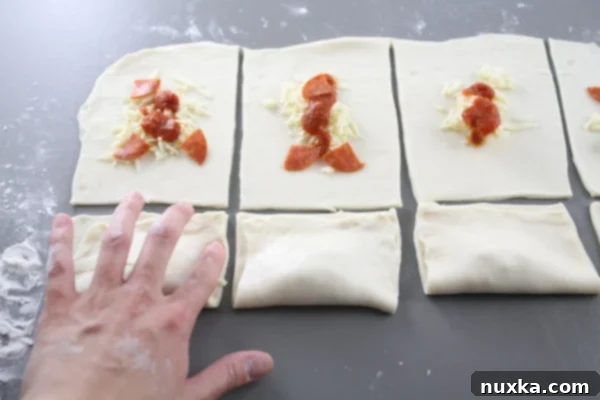
- Cut and Fill: Using a knife or a pastry cutter, cut the rolled-out dough into 8 individual squares, with each measuring about 5 by 6 inches. For each square, spoon a small amount of your chosen pasta sauce onto one half of the dough, leaving a clear border of about half an inch around the edges for sealing. Top with a generous amount of mozzarella cheese and your chopped pepperoni (or other desired filling).

- Seal the Edges: Carefully fold the other half of the dough over the filling to create a pocket shape. Press down firmly around the edges to seal the dough, ensuring no filling can escape during baking. For extra security and a decorative touch, use the tines of a fork to crimp the edges all around, similar to how you would seal a pie crust.

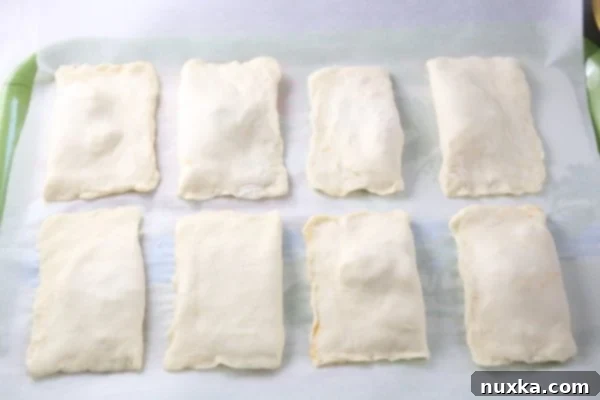
- Second Chill: Once all pockets are assembled, place them onto a baking sheet lined with parchment paper. Refrigerate for another 30 minutes. This second chill is vital as it allows the dough to firm up again before hitting the hot oven, which helps maintain its shape and maximizes crispiness.

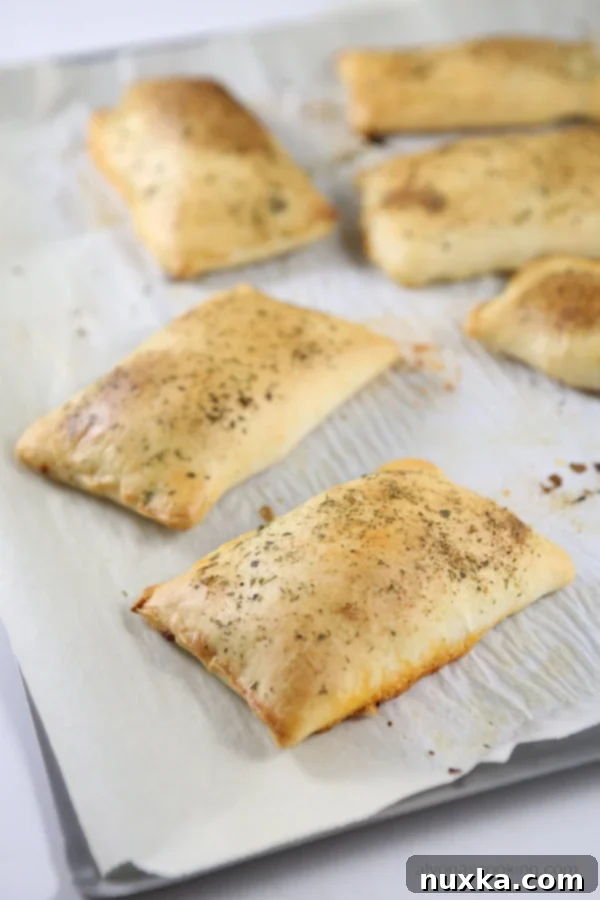
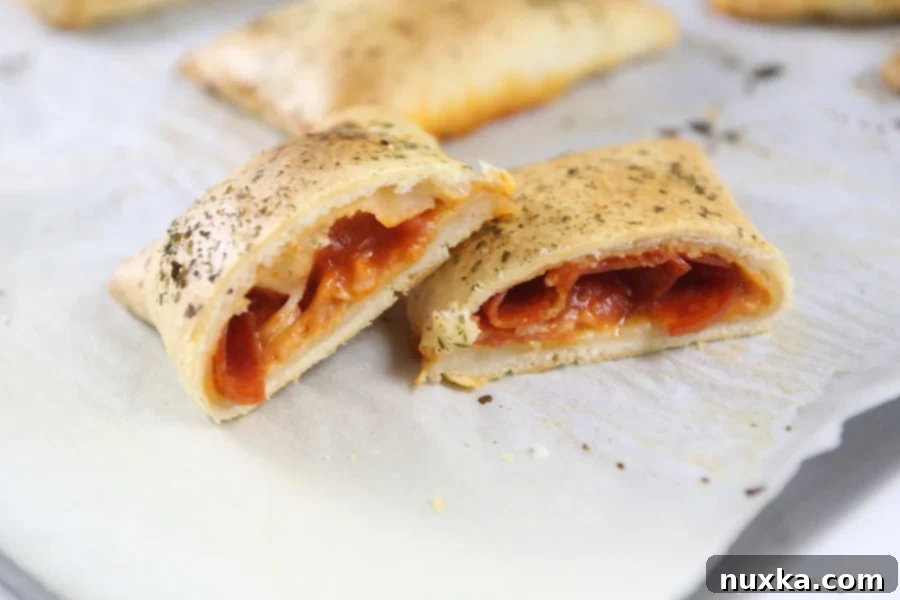
- Season and Bake: While the pockets are chilling, preheat your oven to 400°F (200°C). Once chilled, take the pockets out, brush each one generously with milk, and then sprinkle with the dry herbs (oregano, garlic powder, and parsley) for that authentic Hot Pocket flavor and aroma. Bake in the preheated oven for approximately 15 minutes, or until the crust is beautifully golden brown, puffed, and wonderfully crispy.

Tips for Perfect Homemade Hot Pockets Every Time
Achieving restaurant-quality (or, in this case, freezer-aisle-quality but better!) homemade Hot Pockets is all about a few key techniques. Keep these tips in mind as you prepare your batch of savory turnovers:
- Keep Everything Cold: This cannot be stressed enough! Cold butter is absolutely essential for a flaky crust. Cold dough is not only easier to work with but also helps prevent the butter from melting prematurely before baking, which would result in a tough, rather than crispy, crust. Refrigerate your butter, dough, and even your mixing bowl if your kitchen is particularly warm.
- Don’t Overwork the Dough: While kneading is necessary to develop some gluten and bring the dough together, over-kneading a butter-based dough can make it tough and compromise its flakiness. Knead just until it comes together and is smooth and pliable. The goal is a tender, flaky crust, not a chewy bread.
- Don’t Overfill: It’s tempting to cram in as much delicious filling as possible, but overfilling is the primary cause of leaky pockets. Leave a good, consistent border (at least 1/2 inch) around the edges of your dough squares to ensure there’s enough surface area for a strong, secure seal.
- Secure Sealing is Key: Pinch the edges together very firmly, ensuring there are no gaps. For extra security and a nice aesthetic, use the tines of a fork to crimp the edges all around. This helps lock in the flavorful filling and prevents any molten cheese or sauce from escaping during baking, which can make a mess and dry out your pockets.
- Experiment with Fillings: While pepperoni and mozzarella are the beloved classics, feel free to customize your DIY Hot Pockets! Try cooked crumbled sausage, ham and cheese, shredded chicken (buffalo or BBQ style), spinach and feta, or even a vegetarian medley with sautéed mushrooms and peppers. Just make sure any meat fillings are pre-cooked and cooled, and any vegetable fillings are well-drained of excess moisture to prevent a soggy interior.
- Baking is Best: While the original Hot Pockets are synonymous with microwave convenience, baking these homemade versions in a preheated oven is crucial for achieving that crispy, golden, and flaky crust. Microwaving will almost certainly result in a softer, less appealing texture.
- Even Thickness: When rolling out the dough, strive for an even thickness across the entire rectangle. This ensures that all parts of the crust bake at the same rate, resulting in even browning and consistent crispiness in every bite.
Frequently Asked Questions About Homemade Hot Pockets
How do you make Hot Pockets Crispy?
The secret lies entirely in the dough construction! Unlike a traditional pizza dough which is yeast-based and yields a soft, bready texture akin to a calzone, this copycat Hot Pockets recipe specifically utilizes a butter-based dough. Similar to how a pie crust or puff pastry is made, cold butter is cut into the flour. As the dough bakes in a hot oven, the butter melts and releases steam, creating distinct layers and pockets of air within the crust. This process is what gives these homemade Hot Pockets their characteristic crispy, flaky, and buttery texture, making them stand out from any ordinary calzone or pizza roll.
Can I make these Homemade Hot Pockets ahead of time?
Absolutely! These freezer-friendly Hot Pockets are perfect for meal prepping and busy weeknights. After assembling and sealing the pockets (following step 6 in the recipe), instead of refrigerating them for 30 minutes, place them directly onto a parchment-lined baking sheet and freeze until they are completely solid (this usually takes about 2-3 hours). Once frozen firm, transfer the individual pockets to a freezer-safe bag or an airtight container. They can be stored in the freezer for up to 2-3 months, ready whenever a craving strikes!
How do I cook frozen Homemade Hot Pockets?
To cook your frozen homemade Hot Pockets, there’s no need to thaw them first. Simply place the frozen pockets directly onto a parchment-lined baking sheet. Brush them generously with milk and sprinkle with the dry herbs as directed in step 8 of the recipe. Bake in a preheated 400°F (200°C) oven for approximately 20-25 minutes, or until they are beautifully golden brown, puffed, and the filling is hot and bubbly. Keep in mind that baking from frozen will require a few extra minutes compared to baking fresh pockets.
What other fillings can I use for my DIY Hot Pockets?
The possibilities for customizing your DIY Hot Pockets are virtually endless! Beyond the classic pepperoni and mozzarella, here are some popular and delicious filling ideas to get you started:
- Ham and Cheese: Diced cooked ham with sharp cheddar or melty Swiss cheese.
- Sausage and Peppers: Pre-cooked crumbled Italian sausage with sautéed bell peppers and onions.
- Spinach and Feta: A delicious vegetarian option using cooked and thoroughly drained spinach mixed with crumbled feta cheese and a hint of garlic.
- Buffalo Chicken: Shredded cooked chicken mixed with your favorite buffalo sauce and a sprinkle of blue cheese crumbles.
- BBQ Chicken: Shredded cooked chicken mixed with a tangy barbecue sauce, perhaps with a bit of smoked cheddar.
- Breakfast Pockets: Scrambled eggs, cooked crispy bacon or sausage, and your favorite breakfast cheese.
Regardless of your chosen filling, always ensure any meat fillings are cooked beforehand and any vegetable fillings are well-drained of excess moisture. This critical step prevents the interior of your pocket from becoming soggy and ensures a perfect, flavorful bite every time.

Rate
Pin
Hot Pockets Recipe {CopyCat}
Ingredients
Buttery Crust:
-
1 1/2 cups all-purpose flour (plus more for when kneading)
-
2/3 cup milk
-
6 tbsp butter (cold)
-
1/8 tsp salt
-
1/8 tsp baking powder
Filling and Topping:
-
1/8 tsp dried oregano
-
1/2 tsp dried parsley
-
1/8 tsp garlic powder
-
1/4 cup milk for brushing
-
pepperoni
-
mozzarella cheese
-
pasta sauce
Instructions
How to Make Homemade Hot Pockets:
-
In the bowl of a stand mixer combine the salt, baking powder, and flour. Cut the butter in.
-
Add the milk and stir with a spoon. Knead for 5 minutes adding in more flour (just until the dough doesn’t stick to the sides of the bowl.) Do not exceed more than a cup, add in flour by the tablespoon until it reaches the non-sticking point.)
-
Cover and refrigerate the dough for 1 hour.
-
On a lightly floured surface, roll the dough out into a 20 by 12-inch rectangle.
-
Cut dough out into 8 squares with each measuring about 5 by 6-inches. Fill each square with the desired filling and pinch down the edges to seal the dough.
-
Place pockets onto parchment paper and refrigerate for 30 minutes.
-
Brush the hot pockets with milk and garnish with dry herbs (oregano, garlic powder, and parsley.) Bake in a preheated 400F oven for 15 minutes.
