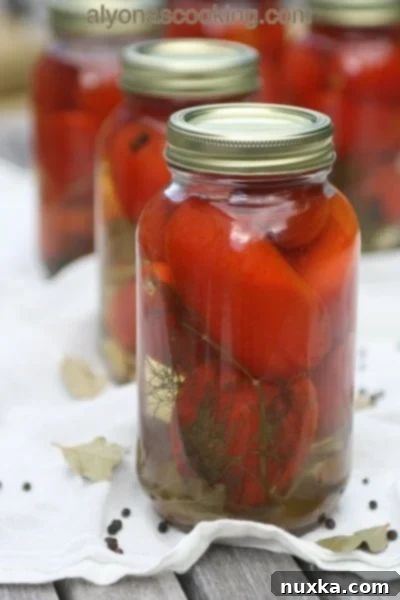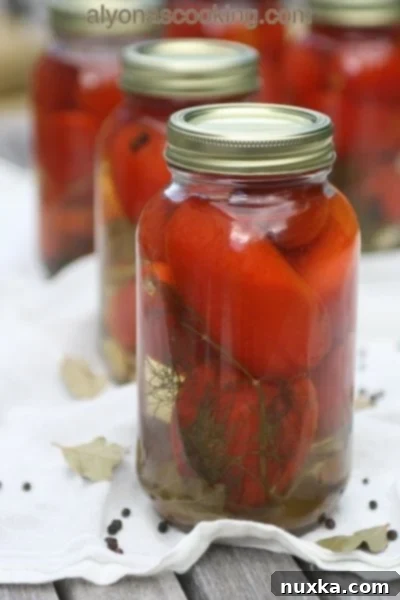
Authentic Ukrainian Pickled Tomatoes Recipe: Tangy & Delicious Homemade Canning Guide
Step into the rich culinary traditions of Eastern Europe with our authentic recipe for Ukrainian pickled tomatoes. These whole canned tomatoes are more than just a side dish; they are a staple, celebrated for their vibrant tangy, sweet, and sour flavors. Passed down through generations, this method of preservation ensures you can enjoy the taste of summer’s bounty long after the season ends. What truly sets this recipe apart is its incredibly flavorful brine—so delicious, you’ll want to drink it straight from the jar!
The Enduring Appeal of Ukrainian Pickled Tomatoes
In Ukrainian households, canning and preserving are not just hobbies; they are an integral part of life and culture. As the seasons change, the act of preserving summer’s freshest produce becomes a cherished ritual. Pickled tomatoes stand out as a beloved classic, gracing dinner tables throughout the year, especially during colder months when fresh produce is scarce. They offer a delightful burst of flavor that complements hearty meals beautifully, acting as a refreshing counterpoint to rich meats or creamy mashed potatoes. This particular recipe, cherished by my mother, brings a genuine taste of home and tradition directly to your kitchen, evoking memories of warm family gatherings and abundant harvests.
More Than Just a Side: The Drinkable Brine and Its Folk Remedies
Beyond their irresistible taste, these homemade pickled tomatoes are renowned for their unique brine. This flavorful liquid, a perfect balance of savory, sweet, and tangy notes, is so palatable that it’s often enjoyed as a refreshing drink. Traditionally, this brine is also believed to offer relief for an upset stomach or hangover, making it a popular folk remedy in many homes across Ukraine and beyond. Whether for its purported health benefits or simply its delightful taste, don’t be surprised if the brine disappears faster than the tomatoes themselves!
Why Homemade Pickling is Best
Canning your own tomatoes is an excellent way to utilize a large harvest. If your garden is overflowing with ripe tomatoes, or you’ve found a great deal at the farmer’s market, this recipe provides a practical and delicious solution to prevent waste and stock your pantry with a homemade delicacy. There’s an unmatched satisfaction in knowing exactly what goes into your food, free from artificial preservatives or excessive additives. Plus, the deep, complex flavors developed through home pickling far surpass anything you can buy in a store.
Essential Ingredients for Your Homemade Pickled Tomatoes
Creating the perfect jar of Ukrainian pickled tomatoes relies on a careful selection of fresh, high-quality ingredients and a perfectly balanced brine. Here’s a closer look at what you’ll need and why each component is vital to achieving that signature flavor profile that has been loved for generations.
Ingredients for Canning the Tomatoes:
- 8 lbs Tomatoes: The star of our show! Opt for firm, ripe, small-to-medium sized tomatoes. Varieties like Roma, plum, cherry, or other small slicing tomatoes work best as they fit whole into quart jars and maintain their texture well during the pickling process. Avoid overripe or bruised tomatoes.
- 7 Springs Fresh Dill: Fresh dill is absolutely non-negotiable for authentic Ukrainian pickling. Its aromatic, slightly grassy, and subtly anise-like flavor is a cornerstone of this recipe, imparting a fresh, vibrant taste that defines Eastern European pickles.
- 28 Peppercorns: Whole black peppercorns add a subtle, gentle warmth and a complex aromatic depth to the brine, enhancing the overall flavor without overwhelming the delicate tomato taste.
- 7 Cloves Garlic, cut in half: Fresh garlic infuses the tomatoes with its pungent, savory notes. Cutting them in half helps release their potent flavor more effectively into the brine and tomatoes.
- 7 (1 quart) Jars: Ensure your canning jars are meticulously clean and free of any cracks or chips. Quart-sized jars are ideal for holding a good quantity of whole tomatoes and are a common size for home canning.
- 7 Black Currant Leaves: This might be an unexpected ingredient for those unfamiliar with Eastern European pickling, but black currant leaves are traditional and highly valued. They contribute a unique, slightly tart, and earthy flavor, and are also believed to help keep the pickled vegetables crisp due to their tannin content.
- 7 Bay Leaves: (Added for consistency with instructions, as it was mentioned there but not in the original list.) Bay leaves add a subtle herbal note, a slightly peppery and minty undertone, which enhances the overall aromatic profile of the brine, complementing the dill and garlic beautifully.
Ingredients for the Pickled Tomatoes Syrup (Brine):
The brine is the heart of this recipe, responsible for the characteristic tangy, sweet, and savory balance that makes these tomatoes so incredibly addictive. It’s a simple yet powerful combination that transforms fresh tomatoes into a pantry staple.
- 3 Liters Water: The pure, clean base of your pickling liquid. Use filtered water if your tap water has a strong taste or high mineral content.
- 2 Cups Vinegar: White vinegar is typically used for its clean, sharp acidity. This acidity is crucial not only for the preservation process (inhibiting bacterial growth) but also for providing the signature tangy flavor of pickled goods. It contrasts beautifully with the sweetness.
- 1 1/2 Cups Sugar: Granulated sugar balances the sharp acidity of the vinegar and the natural tang of the tomatoes, adding a lovely sweetness that rounds out the flavor profile and makes the brine truly “drinkable.”
- 9 tbsp KOSHER Salt: This is a critical ingredient for successful pickling. It must be kosher salt. Unlike regular table salt, kosher salt contains no anti-caking agents or iodine. These additives can cloud your brine, alter the flavor, and even affect the color and texture of your pickled tomatoes. Avoid sea salt or iodized salt for the best, clearest, and most authentic results.
Understanding the role of each ingredient will not only help you follow the recipe precisely but also deepen your appreciation for the rich, traditional depth of flavor in these homemade Ukrainian pickled tomatoes.
How to Make Ukrainian Pickled Tomatoes: A Step-by-Step Canning Guide
This traditional canning method ensures a safe and delicious product, designed to preserve the tomatoes without the need for a water bath canner, relying instead on a hot pack method and slow cooling. While this method has been used for generations, modern canning guidelines often recommend additional sterilization. For absolute peace of mind and adherence to contemporary food safety standards, you may opt to sterilize your jars and lids in boiling water prior to filling. Follow these steps carefully for the best results and a truly authentic taste:
- Prepare the Initial Boiling Water: Begin by bringing a large pot containing 3 liters of water to a vigorous, rolling boil. This water is crucial for the initial blanching step, which helps to prepare the tomatoes for optimal brine absorption.
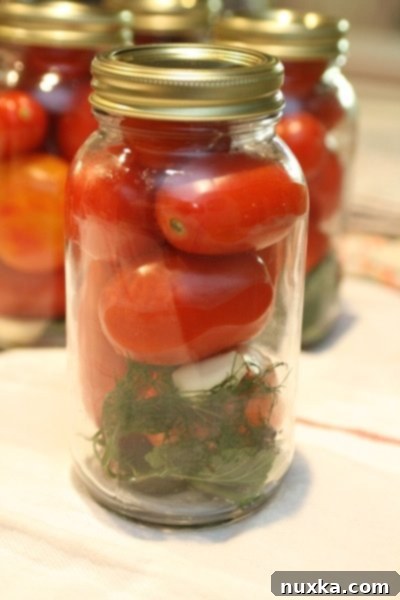
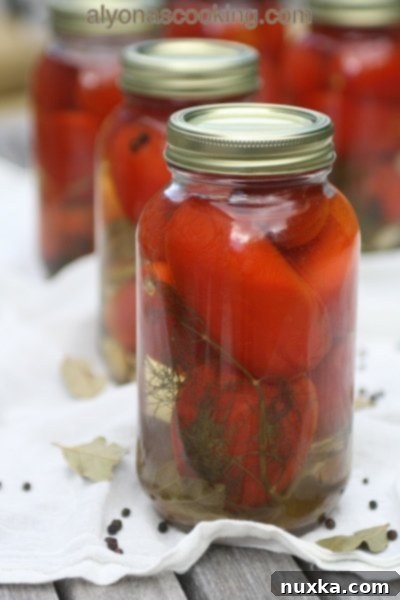
- Prepare and Pack the Jars with Aromatics and Tomatoes: While the water heats, thoroughly wash your 1-quart canning jars with warm, soapy water, then rinse them clean. It’s vital they are spotless. Into the bottom of each clean jar, carefully place the aromatics: 1 spring of fresh dill, 4 peppercorns, 1 clove of garlic (cut in half to maximize flavor release), 1 bay leaf, and 1 black currant leaf. Next, gently pack as many whole tomatoes as you can fit into each jar without crushing them. The goal is to maximize space without damaging the fruit. Leave about an inch of headspace from the rim of the jar.
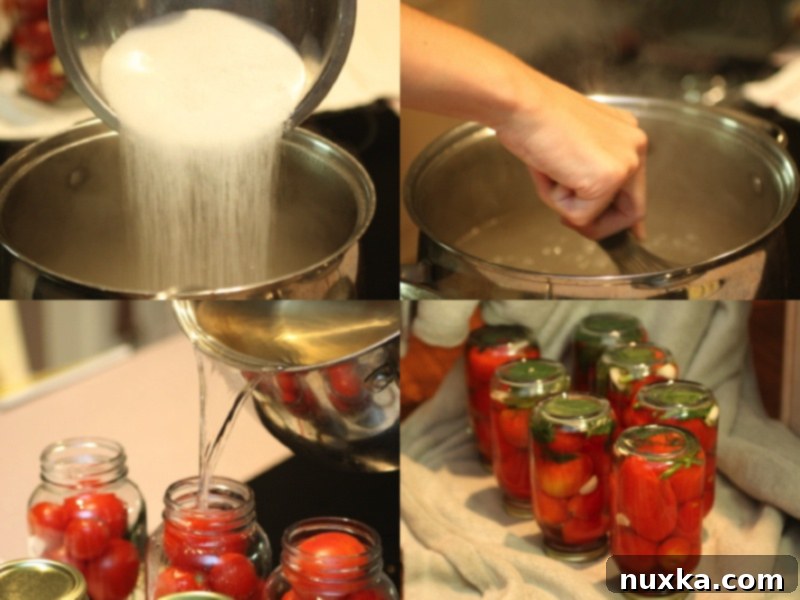
- First Hot Water Soak (Blanching): Once the water from step 1 is boiling, carefully and slowly pour it over the packed tomatoes and aromatics, filling each jar to the very top, ensuring all tomatoes are completely submerged. Immediately cover each jar with its lid and secure tightly. This initial hot water soak helps to pre-cook the tomatoes slightly, draws out air, and begins to soften them, preparing them for better brine absorption in the next stage.
- Insulate and Rest for Vacuum Sealing: With extreme caution and using heatproof gloves for safety, carefully turn each sealed jar upside down onto a large, thick, warm blanket or several layers of towels. Cover the jars completely with the blanket, ensuring they are well insulated. Allow them to sit undisturbed in this position for approximately 20 minutes. This slow cooling process aids in creating a strong vacuum seal as the jars cool and also further softens the tomatoes evenly.
- Prepare the Flavorful Brine (Syrup): After the 20-minute resting period, carefully open each jar and pour the hot water that was inside them back into the large pot used in step 1. To this reclaimed water, add 2 cups of vinegar, 1 1/2 cups of sugar, and 9 tablespoons of KOSHER salt. Stir the mixture well to ensure the salt and sugar fully dissolve. Bring this seasoned liquid to a vigorous, rolling boil. This is the crucial stage where your pickling brine develops its signature sweet, tangy, and savory profile. Remember, using KOSHER salt is absolutely crucial for clear brine and optimal flavor; do not substitute with regular table salt or sea salt, as their additives can spoil the outcome.
- Final Seal and Overnight Cooling: Once the seasoned brine (syrup) is boiling, immediately and carefully pour it back into the jars, filling them completely to the top and ensuring all tomatoes and aromatics are fully submerged. Quickly affix the lids to the jars, securing them tightly. Turn the newly sealed jars upside down once more onto the blanket and allow them to sit, completely wrapped and insulated, overnight. This extended slow cooling period is vital for creating a robust vacuum seal, which is essential for safe, long-term preservation of your pickled tomatoes.
- Storage and Maturation for Optimal Flavor: The next morning, inspect your jars to ensure a proper seal (the lid should be concave and not flex when pressed). Turn the canned tomatoes upright. Store them in a cool, dark place, such as a pantry, cellar, or cool cupboard. For the flavors to fully develop and meld into that perfect tangy, sweet, and savory balance, it is absolutely essential to allow these pickled tomatoes to mature for at least 30 days (preferably a month or longer) before opening. This waiting period ensures the marinade properly infuses the tomatoes, yielding the best possible taste and texture.

Tips for Success and Scaling Your Recipe
To ensure your batch of Ukrainian pickled tomatoes is a resounding success, yielding perfect, flavorful jars every time, consider these expert tips and guidelines for scaling your recipe:
- Tomato Selection is Key: As mentioned, smaller, firmer tomatoes are your best choice for pickling whole. Their dense flesh holds up well to the pickling process, preventing them from becoming mushy. If you opt to use slightly larger tomatoes, you might need to use bigger jars or fit fewer tomatoes per quart jar. A clever trick for larger tomatoes is to puncture them a few times with a clean needle or toothpick before packing. This helps them absorb the brine more effectively and prevents them from bursting during the hot water soak.
- The Importance of Kosher Salt: We cannot stress this enough – seriously, do not deviate from using kosher salt. The purity of kosher salt, free from anti-caking agents and iodine, makes a noticeable difference in the clarity, taste, and overall quality of your brine. It helps maintain the natural color of the tomatoes and prevents cloudiness in the pickling liquid.
- Patience is a Virtue (The Maturation Period): The 30-day waiting period is not merely a suggestion; it’s a crucial step for flavor development. The longer the tomatoes sit in the brine, the more depth, complexity, and harmonious balance of flavors they will acquire. Mark your calendar for their ‘opening day’ – it’s worth the wait!
- Ensuring a Proper Seal: After the overnight cooling process, it’s vital to check your jar lids. The center of the lid should be concave (curved inwards) and should not flex or ‘pop’ when pressed. This indicates a strong vacuum seal, essential for safe long-term storage. If a lid does pop up or doesn’t feel securely sealed, it means the jar hasn’t sealed properly. These jars are still perfectly fine to eat but should be refrigerated immediately and consumed within a few weeks, as they are not shelf-stable.
Scaling the Recipe for More Jars:
This recipe is meticulously designed for approximately 7 (1-quart) jars, yielding a generous batch of delicious pickled tomatoes. If you are blessed with an even larger harvest or simply wish to stock up your pantry more extensively, here’s a simple and effective guideline for adjusting and scaling the brine to match your needs:
For every additional 3 lbs of tomatoes you add to your batch, proportionally increase your brine ingredients by:
- 1 liter of water
- 2/3 cup of vinegar
- 1/2 cup of sugar
- 3 tablespoons of KOSHER salt
Remember to also increase the number of dill sprigs, peppercorns, garlic cloves, bay leaves, and black currant leaves proportionally for each extra jar you plan to fill. This ensures that every jar maintains the perfect balance of flavors and spices.
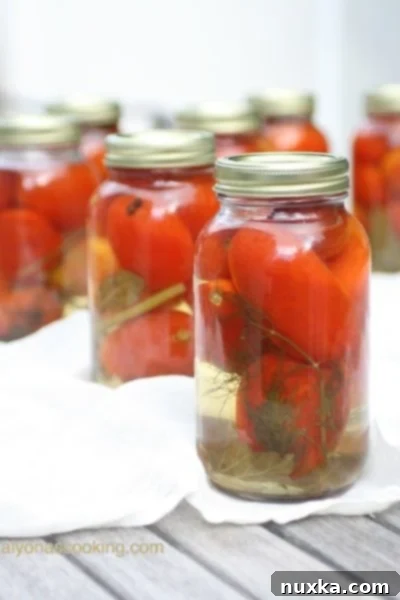
Serving Suggestions for Your Tangy Tomatoes
Once your Ukrainian pickled tomatoes have matured to their peak flavor, they are ready to elevate a wide variety of dishes and become a star on your table. Their vibrant tanginess and balanced sweetness make them incredibly versatile. Here are some delightful ways to enjoy them:
- Classic Side Dish: The most traditional way to serve them is alongside a generous helping of creamy mashed potatoes, roasted meats (like pork or beef), or grilled chicken. Their bright, acidic profile beautifully cuts through the richness of these hearty dishes, offering a refreshing contrast.
- Enhance Your Charcuterie Boards: Add these beautifully vibrant tomatoes to any charcuterie or cheese board. They provide a vital tangy, acidic element that pairs wonderfully with savory cured meats, robust aged cheeses, and crusty bread, making your platter more dynamic and visually appealing.
- Vibrant Additions to Salads & Bowls: Chop them up and toss them into your favorite green salads, pasta salads, or grain bowls for an extra burst of flavor, unique texture, and a pop of color. The brine can even be used as a flavorful base for salad dressings!
- Elevate Sandwiches & Wraps: Slice these pickled tomatoes and layer them into sandwiches, sub rolls, or wraps. Their zesty kick and juicy texture will transform a simple meal into something much more exciting and flavorful.
- Simple Appetizer: Sometimes, the best way to enjoy a delicacy is in its simplest form. Serve them chilled, on their own, perhaps with a sprinkle of fresh dill or a drizzle of good quality olive oil, as a delightful and refreshing appetizer.
- Don’t Forget the Brine: True aficionados know that the brine is just as delicious as the tomatoes themselves! Enjoy it as a savory, refreshing drink, especially if you believe in its traditional tummy-soothing or hangover-curing properties. It’s a taste experience not to be missed!
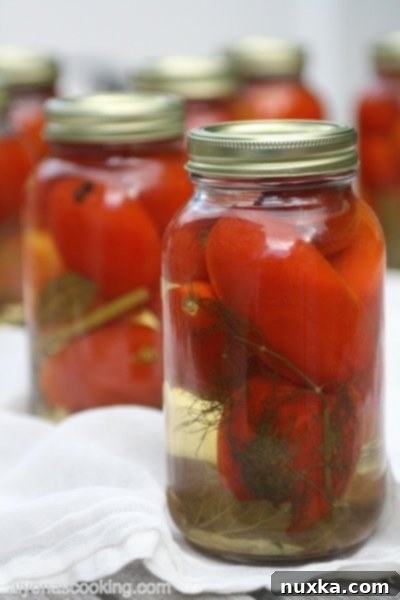
Conclusion: A Taste of Ukrainian Heritage in Every Jar
Making your own Ukrainian pickled tomatoes is a truly rewarding experience that connects you to a rich culinary heritage and the timeless art of food preservation. The process, while requiring a bit of patience and careful attention to detail, yields a preserve that is bursting with complex, layered flavors—tangy, sweet, and perfectly savory. From the satisfying crunch of a beautifully whole tomato to the delightful, invigorating sip of its distinctive brine, these homemade pickles are a testament to the simple yet profound joy of preserving nature’s bounty.
Whether you’re looking to stock your pantry with delicious homemade staples, create thoughtful and unique gifts for loved ones, or simply savor a traditional Eastern European delicacy, this authentic recipe is a must-try. Embrace the tradition, enjoy the hands-on process of canning, and get ready to impress your family and friends with a truly unforgettable taste of Ukraine, bottled with love and tradition. Happy canning, and may your pantry always be full!
Rate
Pin
Ukrainian Pickled Tomatoes (Canned)
Ingredients
Canning:
-
8 lbs tomatoes
-
7 springs fresh dill
-
28 peppercorns
-
7 cloves garlic cut in half
-
7 1 quart jars
-
7 black currant leaves
Syrup:
-
3 liters water
-
2 cups vinegar
-
1 1/2 cups sugar
-
9 tbsp KOSHER salt
Instructions
-
In a large pot bring 3 liters of water to a boil.
-
Prep the jars by washing with warm water; wipe clean. Then place 1 spring of fresh dill, 4 peppercorns, 1 clove of garlic, 1 bay leaf, 1 black currant leaf, and as many tomatoes as you can fit in each jar.
-
Once the water has boiled pour to the top of each assembled jar and quickly cover and secure tightly. Place the jar upside down on a big warm blanket; cover and allow to sit for 20 minutes. (Use heatproof gloves.)
-
After 20 minutes pour out the water that was inside the jars back into the pot. Season the water with 2 cups of vinegar, 1 1/2 cup of sugar, and 9 tbsp of KOSHER salt and bring to a boil. (Not regular salt or sea salt it must be kosher.)
-
Pour the seasoned water (syrup) back into the jars and quickly seal jars with lids, securing tightly. Turn upside down again onto a blanket and allow to sit wrapped in the blanket overnight.
-
Store canned tomatoes upwards in a cool place and open at least 30 days after jarring for the marinade to set into the tomatoes properly.
