Your Ultimate Guide to Sourdough Starter: Buy, Make, Feed & Bake Perfect Bread
Embarking on the rewarding journey of sourdough baking begins with a healthy, active sourdough starter. Whether you’re a seasoned baker looking to enhance your craft or a beginner eager to explore the world of artisanal bread, having a reliable starter is the foundational step. This comprehensive guide will walk you through everything you need to know, from where to purchase a vibrant, established sourdough starter to how to create one from scratch, along with essential tips for feeding, maintaining, and using it in your favorite recipes.
Many home bakers find immense joy in cultivating their own sourdough starter – a living culture of wild yeast and beneficial bacteria that acts as a natural leavening agent. While the process of making a starter from just flour and water can be a fulfilling seven-day (or often longer) endeavor, sometimes you just want to jump straight into baking. That’s why I’m thrilled to offer my very own, highly active sourdough starter, meticulously fed weekly and ready to bring your baking dreams to life. This eliminates the initial waiting period, allowing you to enjoy fresh sourdough faster.
With a thriving sourdough starter in hand, a world of delicious recipes opens up. Some of my absolute favorite sourdough creations include these delightfully chewy Sourdough Bagels, hearty Whole Wheat Sourdough Bread, and wonderfully textured Sourdough English Muffins! The unique flavor profile, satisfying chewiness, and improved digestibility that sourdough imparts to baked goods are truly unparalleled, making the effort of maintaining a starter incredibly worthwhile for any home baker.
For those interested in how to make sourdough starter from scratch, rest assured I’ll cover that in detail within this guide. However, for many, the desire to bypass the initial waiting period and potential pitfalls of creating a new starter is strong. Due to numerous requests and overwhelming interest from my wonderful readers on social media, I’ve decided to offer my own established sourdough starter for sale. This means you can skip the week-long (or longer) creation process and dive straight into baking with a vigorous, bubbly, and proven starter. Each purchase comes with comprehensive care instructions to ensure your success, making your sourdough journey as smooth as possible.
What Is Sourdough Starter and Why Is It So Popular?
Sourdough starter is a living, fermented culture of flour and water, housing a symbiotic colony of wild yeasts and beneficial lactic acid bacteria (LAB). This ancient leavening method significantly predates commercial yeast by thousands of years. Our ancestors, dating back to biblical times, relied on this natural fermentation process to make their bread rise, often simply by reserving a portion of their previous dough to leaven the next batch. As Galatians 5:9 eloquently puts it, “A little leaven leavens the whole lump of dough.”
Historically, maintaining a sourdough starter was an integral part of daily life for home bakers. This reserved chunk of dough would ferment, becoming active and robust, much like the commercial yeast we know today. In modern baking, we typically start by creating or acquiring a culture and then diligently feed it to keep it alive and potent for our bread recipes. This living culture works just as effectively as a piece of leavened dough, lending unparalleled flavor, texture, and often improved digestibility to almost any recipe that calls for yeast or sourdough starter. The complex fermentation process breaks down starches and can make nutrients more bioavailable, offering health benefits beyond taste.
The popularity of sourdough has surged in recent years, driven by a growing interest in natural foods, gut health, and the desire for more authentic, artisanal baking experiences at home. Sourdough not only offers a distinct tangy flavor and a wonderfully chewy crumb but also improves the nutritional value and shelf life of baked goods. The fermentation process breaks down complex carbohydrates and gluten (though it does not make it gluten-free), often making sourdough bread easier to digest for many people compared to commercially yeasted bread. It truly connects us to a timeless tradition of baking.
Where To Buy Sourdough Starter: Get Started Baking Today!
Following a popular sourdough giveaway and sharing numerous delightful sourdough recipes on my social media channels, I was genuinely overwhelmed by the sheer volume of inquiries about purchasing my starter. The interest from readers like you has been truly inspiring, highlighting a real demand for reliable, active sourdough starters!
Given that I meticulously maintain a substantial, thriving gallon of sourdough starter, I realized I could easily share its goodness with others. This led to my decision to offer it for sale, providing a legitimate and reliable source for a high-quality, active starter. You can find out where to buy my sourdough starter here. The product listing includes detailed care and feeding instructions, ensuring you have all the information needed to keep your new starter happy and healthy from day one. Please note, I have a limited number of spots available each month to ensure the quality and freshness of every batch, ensuring you receive a premium product ready to perform.
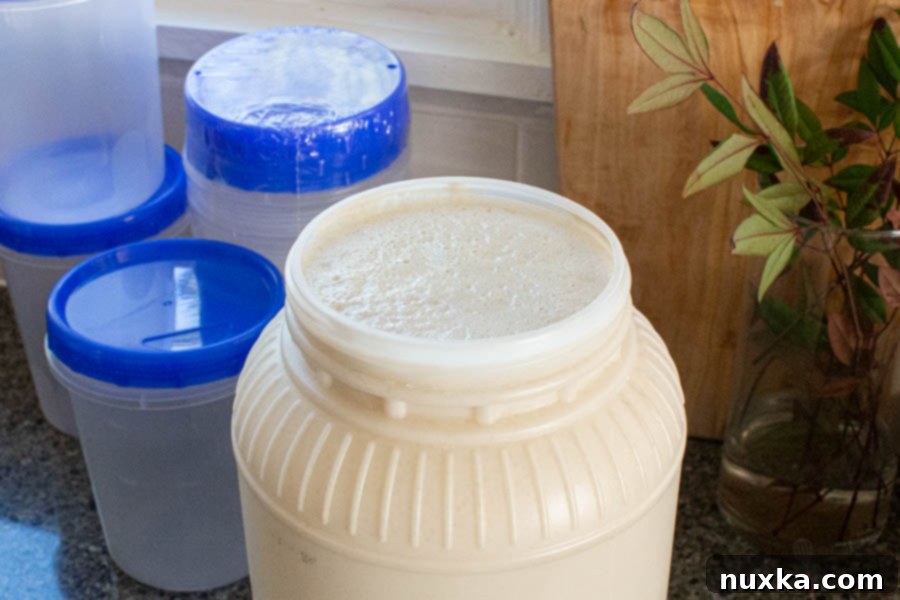
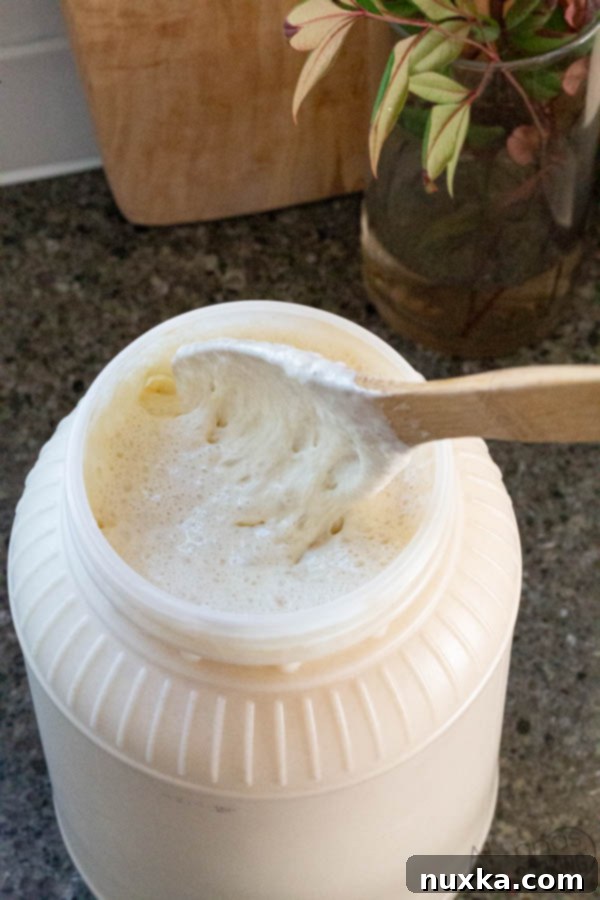
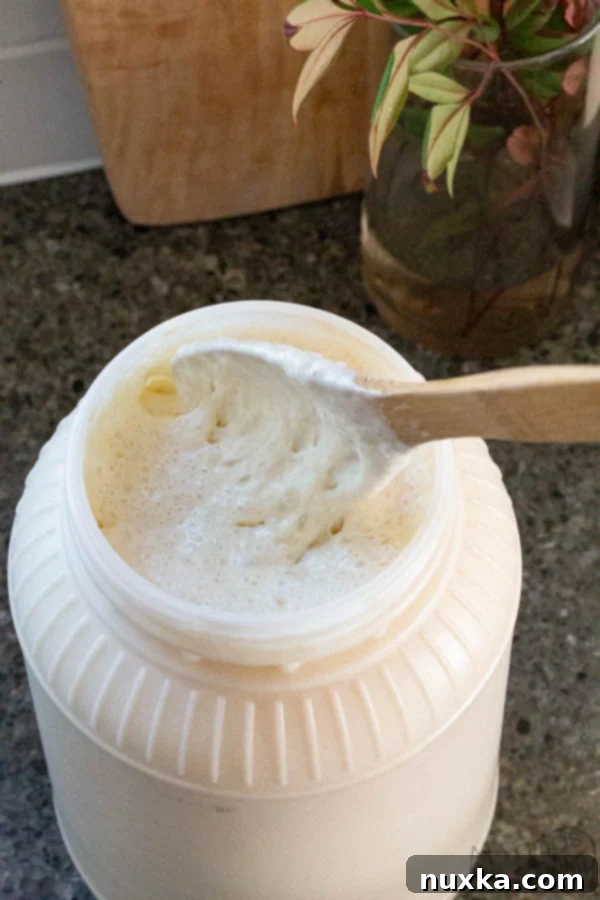
This particular sourdough starter boasts an incredible lineage, having been carefully passed down through generations from a renowned Mennonite baker in Wisconsin. It is, without a doubt, the most active, bubbly, and consistently foamy starter I’ve ever had the pleasure of working with. It’s so vigorous that it has occasionally overflowed its container after a good feeding – a true testament to its vitality and strength!
What makes this starter truly exceptional, beyond its rich history, is its ease of care. The feeding instructions I provide are designed to be straightforward and fuss-free, making it perfect for both beginners taking their first steps in sourdough and experienced bakers seeking a low-maintenance culture. You might wonder why I don’t typically share “discard” recipes. The truth is, this starter is so incredibly alive and robust for bread recipes that I rarely have any “true” discard. If I ever find myself with an abundance, I simply share it with a friend, use it to bake extra batches of bagels, or make bread for the freezer. This ensures no precious starter goes to waste and you can always make the most of your active culture!
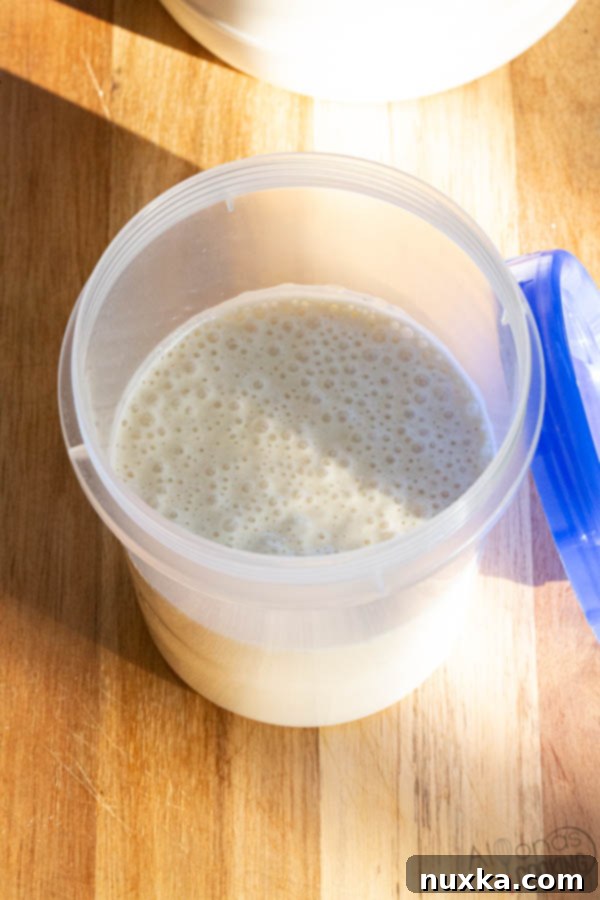
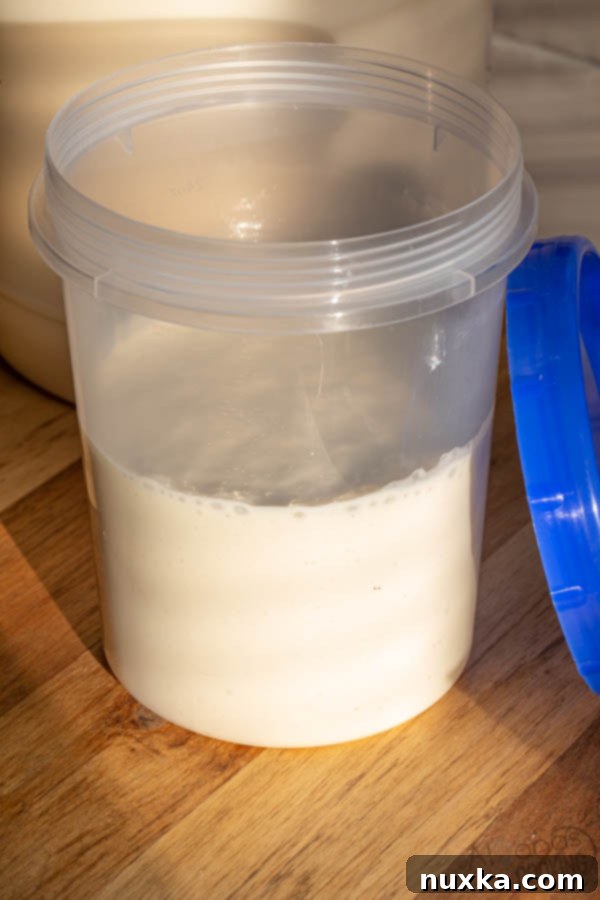
Each customer receives a generous 16 oz of active sourdough starter, securely packaged in a durable plastic container and shipped with express delivery. This expedited shipping ensures your starter arrives promptly, maintaining its peak activity and readiness for its next feeding, minimizing any stress to the culture. For all your burning questions about sourdough starters, including detailed instructions on how to make your own, be sure to visit my comprehensive Q&A section below.
Q&A: All Your Sourdough Starter Questions Answered
How To Feed Sourdough Starter for Optimal Health?
Proper feeding is the cornerstone of a healthy, active sourdough starter. For the larger volume of starter I typically maintain (around 1-2 quarts), I feed it with a generous heaping cup of unbleached flour and a scant cup of warm water. I lean towards a slightly higher flour-to-water ratio because, over time, a starter can become runnier due to the lactic acid bacteria (LAB) forming during fermentation. This slightly thicker consistency helps maintain its robustness and prevents it from becoming too liquid. However, once you receive your 16 oz starter, you’ll need to adjust the quantities: feed it with a heaping 1/2 cup of unbleached flour and a scant 1/2 cup of warm water. I don’t rely on a precise scale for daily feedings, as the starter’s strength is quite forgiving and visual cues are often sufficient.
A general guideline for feeding is to maintain a ratio that allows for significant growth, typically between 1:1:1 to 1:2:2 (starter:flour:water) by weight or a slightly thicker consistency by volume. For every cup of existing starter, aim to feed it with a heaping 1/4 cup of flour and a corresponding amount of water. For a 16 oz starter, this translates to roughly 1/2 cup of flour and water. Adjust slightly based on your starter’s consistency – it should resemble a thick pancake batter. The presence of Lactic acid bacteria, often referred to as Lactobacillus, can sometimes manifest as a blackish or reddish film on the surface of your starter, especially after it has been stored in the fridge. This is a natural protective layer and is generally not a sign of spoilage, unless accompanied by fuzzy mold. Simply stir it back into the starter before feeding. While some bakers prefer to drain it, I always incorporate it, as it’s part of the beneficial culture. The beauty of this sourdough starter is its resilience; it doesn’t demand precise, scientific formulas, making it wonderfully approachable to maintain.
Note: I consistently use high-quality, unbleached flour for my feedings, specifically King Arthur Unbleached All-Purpose Flour, which yields fantastic results and supports vigorous activity.
How Often To Feed Sourdough Starter to Keep It Alive?
Understanding how often to feed your sourdough starter is crucial for its longevity and activity. If stored in the refrigerator, your sourdough starter should be fed approximately every 2-3 weeks, even if you don’t have immediate baking plans. To do this, simply remove the cold starter from the fridge, add your usual feeding amount (as described above), give it a good stir to incorporate everything, and then place it back into the fridge. This regular refreshment helps to maintain a healthy and active starter, preventing it from becoming too sluggish or developing an overly acidic aroma.
For starters kept at room temperature (if you’re baking very frequently), daily feedings are usually necessary, or even twice a day in very warm environments. The frequency of feeding ultimately depends on storage temperature and how quickly your starter consumes its food. Colder temperatures slow down the metabolic activity of the yeasts and bacteria, meaning they consume their “food” (flour) at a much slower rate. This is why refrigeration extends the feeding cycle considerably. Always observe your starter: if it starts to smell strongly of alcohol (a sign it’s very hungry) or develops an unusual discoloration beyond the normal dark film, it’s time for a feeding. Consistency in feeding is key to a thriving starter.
Can I Use Sourdough Starter Straight From The Fridge?
For certain “discard” sourdough recipes, where the leavening power isn’t the primary requirement (like crackers, pancakes, or some quick breads), you can often use a sourdough starter directly from the refrigerator without an active feeding. However, if your sourdough starter has been recently fed (within the last 2-3 days) and has shown signs of activity before being refrigerated, it might still pass the “float test” and be ready for use without needing to come to room temperature or be fed again immediately. This depends heavily on its initial strength and the duration of refrigeration.
For premium results in recipes where active leavening is essential, such as bread, I highly recommend feeding your starter overnight and allowing it to become fully active at room temperature. This ensures maximum rise and a superior crumb in your final product. Not sure if your starter is truly active and ready to work its magic? Perform the simple “float test.” Drop a small dollop (about a teaspoon) of your starter into a glass of cold water. If it floats to the top, it’s active and brimming with gas bubbles, indicating it’s ready to be incorporated into your recipes. If it sinks, it likely needs another feeding and more time to activate before it’s ready for baking leavened goods. Always err on the side of a well-fed, active starter for best results.
Ready To Try Your First Sourdough Bread Recipe with Starter?
There’s nothing quite like the satisfaction of baking your first loaf of sourdough bread from scratch. This no-knead Artisan loaf recipe is perfect for beginners and truly highlights the unique capabilities of your sourdough starter. Here’s a simple guide to get you started:
- Mix Dry Ingredients: In a medium bowl or a large food-safe container, combine your chosen unbleached flour (aim for a good quality bread flour for best results) and salt. Whisk them together thoroughly to ensure even distribution.
- Combine Wet & Dry: In a separate small bowl, gently dissolve your active sourdough starter in warm water. Once combined, stir this wet mixture into your dry flour and salt until just incorporated. A wooden spoon or spatula works well for this. Don’t overmix; a shaggy dough with no dry pockets is perfectly fine at this stage.
- First Fermentation (Bulk Rise): Cover the bowl with plastic wrap or a damp towel to prevent drying out, and allow the dough to ferment for approximately 3 hours at room temperature. During this crucial time, the sourdough starter will begin its work, developing flavor, strength, and gas bubbles. You should observe some bubbling and a noticeable increase in volume.
- Shape & Score: Gently turn the dough out onto a lightly floured surface, being careful not to deflate all the precious air bubbles. Shape it into a round loaf. Transfer the shaped loaf to a piece of parchment paper. If desired, score the top of the loaf with a sharp razor blade or knife to allow for controlled expansion during baking and to create a beautiful aesthetic. Place the loaf (on its parchment) into a proofing basket (banneton) or a bowl lined with a floured towel while your Dutch oven pre-heats in the oven.
- Bake: Preheat your oven to 450°F (232°C) with your Dutch oven inside for at least 30 minutes to ensure it’s piping hot. Carefully transfer the loaf (still on its parchment) into the hot Dutch oven. Bake, covered, for 30 minutes. Then, remove the lid and bake for an additional 15-20 minutes, or until the crust is deeply golden brown and the internal temperature reaches 200-210°F (93-99°C). Allow it to cool completely on a wire rack before slicing for the best texture and flavor development – patience here is key!
Enjoy the incredible satisfaction of your first delicious, homemade sourdough loaf!
How To Use Sourdough Starter Beyond Bread?
Many new sourdough enthusiasts wonder what else they can create with their active starter besides classic bread. The versatility of sourdough starter is truly incredible! You can use it in virtually any recipe that calls for yeast or other leavening agents, transforming ordinary dishes into something extraordinary. Imagine starting your day with fluffy sourdough pancakes or crispy sourdough waffles, giving your breakfast a delightful tang. Transform your routine with delicate sourdough crepes or hearty sourdough biscuits. For lunch or dinner, your starter can elevate pizza dough, create flaky croissants, or even be used in savory crackers or pasta. The fermentation not only adds a wonderful depth of flavor but also often improves the texture and digestibility of these baked goods. Don’t limit yourself to just bread; experiment and explore the endless possibilities that an active sourdough starter brings to your kitchen!
What Is The Best Container To Store Sourdough Starter In?
Choosing the right container for your sourdough starter is important for its health, your convenience, and safety. The best container provides ample room for the starter to grow and breathe. While glass jars are popular for their transparency and aesthetic appeal, a sturdy plastic food container with a loosely fitting lid is often preferred, especially by experienced bakers. This is because glass jars can accidentally break (due to pressure buildup or temperature changes), potentially ruining your entire starter and creating a messy, even dangerous, situation. Plastic containers are more forgiving and less prone to breakage, making them a safer choice, especially if you plan to store a large volume or transport your starter.
An excellent and often overlooked option is a clean, repurposed container, such as a large plastic container from mayonnaise, pickles, or yogurt, provided it’s food-safe and thoroughly cleaned. Whatever you choose, it’s crucial never to fill your starter container to the brim. Always leave a significant amount of headspace – at least a quarter to a third of the container empty – to accommodate the starter’s significant growth and expansion after feeding. This prevents messy overflows and ensures your starter has enough air circulation, which is vital for the health of the wild yeasts and bacteria. Remember, a happy starter needs space to thrive!
How Do You Make Sourdough Starter From Scratch?
Creating your own sourdough starter from scratch is a deeply rewarding process, though it requires patience and consistent attention. It typically takes anywhere from 7 to 21 days for a new starter to become robustly active and ready for baking. Here’s a basic guide to get you started:
Day 1: Initial Mix – In a clean glass jar or food-safe container, combine 1 cup (approximately 120-125g) of unbleached all-purpose or bread flour with 1 cup (240ml) of warm, filtered water (chlorine can inhibit starter growth). Stir well until there are no dry lumps and the mixture resembles a thick pancake batter. Cover loosely with a lid or plastic wrap (allowing some air exchange) and leave it at a comfortable room temperature (ideally 70-75°F / 21-24°C).
Days 2-7+: Daily Feedings – Every 24 hours, discard about half (or all but a few tablespoons) of your starter. Then, feed the remaining starter with 1 cup of fresh unbleached flour and 1 cup of warm water, mixing thoroughly. Continue this daily feeding routine. You might not see much activity for the first few days, which is normal. Around day 3-5, you might observe some small bubbles and a slightly sour smell, which could then wane. Don’t despair! This is often a crucial phase where different types of bacteria are establishing themselves.
Signs of Activity & Float Test: Continue feeding daily. Eventually, you’ll notice consistent, significant bubbling, a distinct tangy aroma (like ripe fruit or yogurt), and the starter will visibly rise and fall between feedings, usually doubling in size within 4-8 hours after a feed. To confirm it’s truly active and ready for baking, perform the float test: drop a small dollop into cold water; if it floats, it’s ready. If it sinks, it needs more time and feedings. Remember, as I’ve mentioned before, I often prefer a slightly higher flour-to-water ratio to create a thicker starter, which can sometimes prevent it from thinning out excessively as lactic acid bacteria develop. Experiment to find what works best for you and your environment!
Can Sourdough Starter Go Bad? And How to Revive a Dormant Starter?
Yes, sourdough starter can certainly go “bad” or, more accurately, become very weak, dormant, or develop undesirable characteristics if neglected. A common sign that your starter is long overdue for a feeding is a strong, pungent smell resembling rubbing alcohol or nail polish remover. This indicates that the yeast has consumed all available food and is producing alcohol as a byproduct. While it’s generally not “bad” in a harmful sense (it won’t make you sick if consumed, but it won’t leaven bread), it means its leavening power is severely diminished, and it needs immediate attention.
Keeping an active sourdough starter requires consistent care. If your starter has been neglected for three weeks or more, it will definitely need to be revived before it’s ready for baking. Don’t worry, most starters are incredibly resilient! To revive it, remove your starter from the fridge, discard most of it (leaving just a few tablespoons), and begin feeding it 1-2 times a day with fresh flour and water. Keep it at room temperature. This re-feeding process can take anywhere from 2 to 5 days, or even longer for very neglected starters, until it becomes consistently active, bubbly, and passes the float test again. As mentioned earlier, a blackish or reddish film on the surface is often Lactic acid bacteria (Lactobacillus) and is usually harmless; simply stir it back in before feeding, and it will often disappear as the starter becomes active again. However, if you see fuzzy, colored mold (green, pink, black), it’s best to discard the entire starter and begin anew. Patience and consistent feeding are key to bringing your starter back to life and maintaining its strength!
How To Store Sourdough Starter for Long-Term Maintenance?
Maintaining a sourdough starter doesn’t have to be a daily chore. The most common and effective way to store sourdough starter for regular bakers is in the refrigerator. Cold temperatures significantly slow down the fermentation process, allowing you to feed it less frequently. Every time I plan to bake with my sourdough starter, I like to remove it from the fridge at least a day in advance and feed it. To ensure my starter is at its peak activity for baking, I often feed it 2-3 times (once overnight, then again the next morning, and sometimes even a third time later that day) at room temperature before using it in a recipe. This multi-feeding approach builds up its strength and ensures maximum leavening power, resulting in lighter, airier bread.
While I prefer to bring my starter to room temperature for a few days when actively baking, for long-term storage or when not baking frequently, it should always be kept refrigerated. This helps conserve its energy and reduces the need for constant feedings. If you anticipate a very long break from baking (weeks or months), you might consider alternative storage methods like drying your sourdough starter. Dried starter can be stored indefinitely and rehydrated later, though it takes time and several feedings to revive its full activity. This particular starter thrives on a simple flour and water diet; if you were using starters with other ingredients like potato flakes, yeast, wine, or grape juice, the feeding and maintenance schedules might differ significantly, so always follow specific instructions for those types of cultures.
When Is Sourdough Starter Ready to Use?
Knowing when your sourdough starter is at its prime for baking is absolutely essential for successful results. A starter is generally considered “ready” when it has been brought to room temperature (if refrigerated) and has received one or two active feedings. The most telling signs of an active and ready starter are visible: it will foam and rise significantly in size, often doubling or even tripling its volume, within a few hours after feeding. You should also observe many small, consistent bubbles throughout the culture and a pleasant, tangy aroma, reminiscent of yogurt or fresh fruit, rather than a strong alcoholic smell.
Beyond visual cues, the most reliable test is the “float test.” To perform this, gently scoop a small dollop of your fed, bubbly starter and drop it into a glass of cold water. If the dollop floats to the top and remains there, it signifies that your starter is full of trapped carbon dioxide gas, indicating it’s highly active and ready to provide excellent lift to your baked goods. This means the yeast is metabolizing rapidly and producing ample gas. If it sinks, it may need a little more time, warmth, or another feeding to reach its peak activity. Always use an active starter for leavened bread to ensure a good rise and open crumb structure.
Best Flour For Sourdough Starter: What To Use?
The type of flour you use for your sourdough starter can significantly influence its activity, flavor, and texture. I consistently achieve the best results and maintain the highest activity in my starter using white unbleached flour for my feedings. My personal favorite is King Arthur Unbleached Special Patent flour; it simply works fantastically, consistently producing a vigorous and bubbly starter every time. Unbleached all-purpose flour or unbleached bread flour are also excellent choices for feeding a starter, as they provide a good balance of nutrients and are readily available.
While some bakers prefer to use rye flour or whole wheat flour for their starters due to their high nutritional content, which can sometimes boost initial activity, I’ve found white unbleached flour consistently delivers the most predictable and robust results for this specific starter, yielding a milder flavor profile. Rye and whole wheat flours can impart a stronger, more complex flavor to the starter and may lead to a looser consistency due to their different protein and fiber compositions. Ultimately, the “best” flour is often a matter of personal preference and what yields the most consistent activity for your specific starter culture. The key is to use a high-quality, unbleached flour and avoid bleached flours, as the chemical bleaching process can interfere with the natural microbes beneficial to your starter’s health and vitality. Experiment to find your starter’s favorite!
Essential Sourdough Starter Tips for Success:
- Avoid Freezing: I strongly advise against freezing your sourdough starter. While some methods exist, freezing can often kill the delicate balance of living bacteria and yeast, severely diminishing the strength and vitality of your culture upon thawing and revival. Refrigeration is the preferred, much gentler method for slowing activity.
- Ask Questions: Don’t hesitate to leave a comment below for any other troubleshooting questions or if you encounter unexpected issues with your sourdough journey. I’m here to help and guide you!
- Yeast Conversion: If a recipe calls for commercial yeast and you want to use your active sourdough starter instead, a general conversion rule is: for every Tablespoon of dry active or instant yeast, use approximately 1/2 cup of active sourdough starter. Keep in mind that sourdough fermentation is inherently slower, so you’ll need to adjust your proofing and rising times accordingly, often extending them.
- Hungry Starter Warning: If your starter emits a strong, alcoholic, or acetone-like smell, it’s a clear sign that it’s very hungry and long overdue for a feeding. Feed it promptly to restore its balance and vitality. Neglecting this can lead to a sluggish or dormant starter.
- Cleanliness is Key: Always use clean jars, containers, and utensils when handling your sourdough starter to prevent the introduction of unwanted bacteria or mold. A clean environment supports a healthy culture.
- Temperature Matters: The ambient temperature of your kitchen significantly impacts your starter’s activity. Warmer temperatures (70-75°F / 21-24°C) promote faster fermentation and more vigorous activity, while cooler temperatures slow it down considerably. Adjust feeding schedules or storage locations based on your environment.
- Patience is a Virtue: Sourdough baking, especially making a starter from scratch, requires patience. Don’t get discouraged if things don’t go perfectly on your first try. Every starter is unique, and learning its rhythm and how it responds to your care is an integral and joyful part of the sourdough journey.
- Hydration Matters: While volume measurements are given, consistency is key. Your starter should always resemble a thick, yet pourable, pancake batter after feeding. Adjust flour or water slightly if it feels too stiff or too thin.
