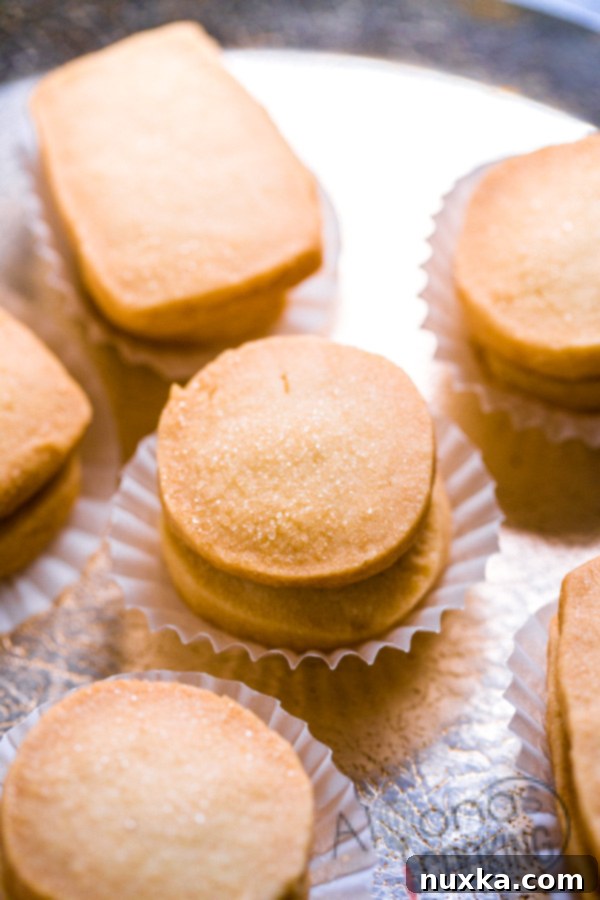
The Ultimate 3-Ingredient Butter Cookies Recipe: Easy, Crispy & Delicious Homemade Treats
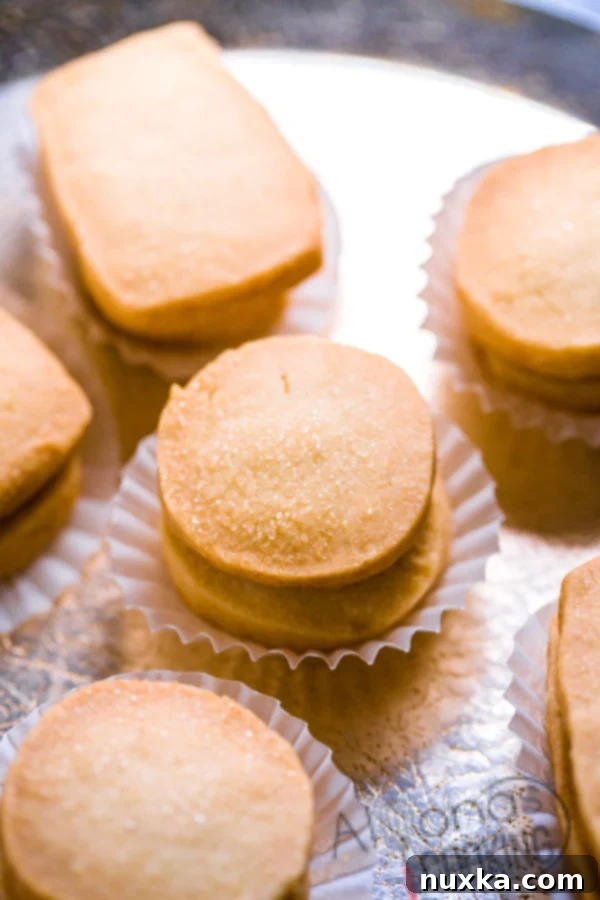
Imagine biting into a golden, perfectly crunchy butter cookie that melts in your mouth, tasting exactly like those beloved treats from the classic metal tins. What if we told you that achieving this delightful experience requires only three simple ingredients and minimal effort? Yes, it’s true! Our incredible 3-ingredient butter cookies recipe is here to bring that nostalgic, bakery-quality flavor right into your kitchen with maximum reward and absolute ease.
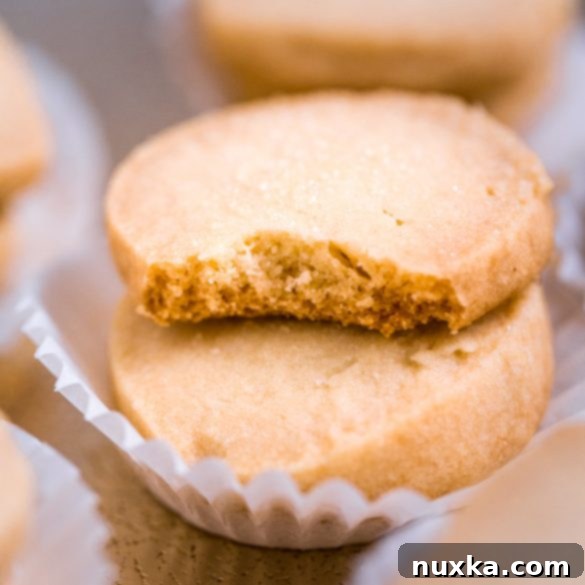
These homemade butter cookies are frequently compared to the iconic Danish butter cookies found in store-bought tins – and for excellent reasons! Their rich, deeply buttery flavor, combined with a satisfying crisp texture, makes them an instant favorite for anyone who tries them. Whether you’re looking for the perfect treat for holiday gatherings, a thoughtful homemade gift, or simply a sweet indulgence to accompany your afternoon tea or coffee, this recipe yields a generous batch. So, whether you plan to share them with loved ones, stash them away for yourself, or freeze some for future cravings, you’ll be well-stocked with these delightfully simple yet spectacular cookies.
The true beauty of this recipe lies in its elegant simplicity. Once your rich, buttery dough is prepared, you’ll have the joy of shaping it into logs – feel free to get creative with round or prism styles! These logs are then chilled until firm, a crucial step for achieving perfect, uniform slices that hold their shape during baking. My mother-in-law, for instance, prefers to roll out her dough and use cookie cutters to make various fun shapes, which is another fantastic option. As long as you maintain a moderate thickness for your dough, any shape will yield these wonderfully buttery results. If you cherish the exquisite taste of those classic Danish butter cookies, then this super simple, incredibly satisfying recipe is an absolute must-try!
The Undeniable Appeal of These 3-Ingredient Butter Cookies
You might be pondering, “Can a cookie made with just three ingredients really be *that* good?” The answer, without a doubt, is a resounding yes! The magic behind their exceptional flavor and delightful texture lies in the careful selection of high-quality core ingredients and a straightforward, time-tested technique. These cookies aren’t merely easy to make; they offer a host of compelling reasons to become your new favorite:
- Incredibly Flavorful: The high proportion of butter is the star here, ensuring a rich, luxurious, and deeply satisfying taste that truly shines through with every bite.
- Perfectly Crispy Yet Tender: They deliver that quintessential delightful snap when you first bite into them, immediately followed by a tender, melt-in-your-mouth experience that leaves you wanting another.
- Remarkably Versatile: Enjoy them in their pure, unadorned glory, sprinkle them with a touch of extra sugar for sparkle, or unleash your creativity with dips, glazes, and festive decorations.
- Economical and Accessible: Utilizing only three common pantry staples makes this an incredibly affordable indulgence, proving that the best treats don’t need exotic ingredients.
- Impressive & Effortless: These cookies possess a refined look and taste that suggests hours of intricate baking, yet they come together surprisingly quickly and easily, making you look like a baking pro!
While you’re exploring delicious cookie recipes, don’t forget to check out our Chewy Peanut Butter Cookies for another delightful homemade treat that’s sure to please!
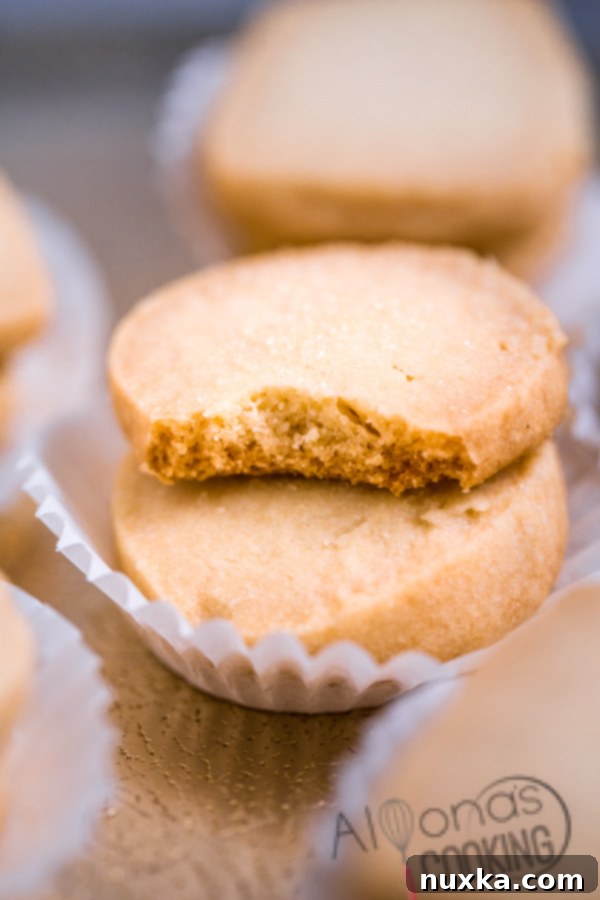
The Simple Yet Essential Ingredients for Your Homemade Butter Cookies
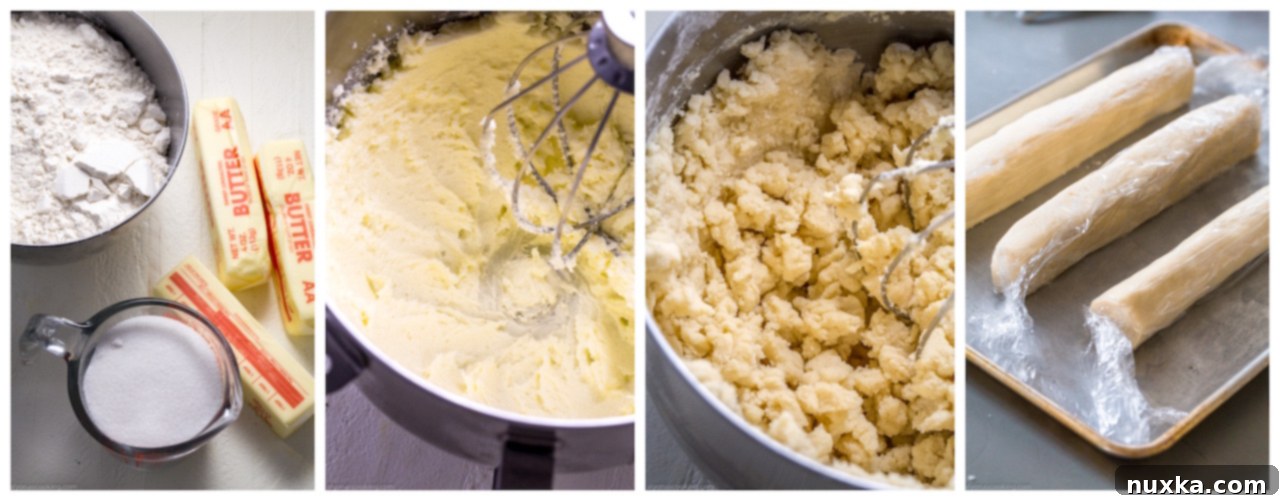
Crafting these irresistibly delicious cookies relies on just three fundamental ingredients. The secret to their exceptional flavor and delightful texture lies not only in the ingredients themselves but also in using them correctly. Let’s take a closer look at what you’ll need to create this simple masterpiece:
Ingredients for 3-ingredient butter cookies:
- 4 sticks (1 pound) of unsalted butter, softened: Butter is undeniably the star of this recipe. It’s responsible for the incredibly rich flavor and the tender, melt-in-your-mouth texture that defines these cookies. Opting for unsalted butter gives you precise control over the overall salt content of your cookies. Crucially, ensure your butter is softened to true room temperature (it should yield slightly when pressed, but not be greasy or melted). This proper consistency is vital for successful creaming with sugar, which in turn creates a light, airy dough.
- 1 cup of granulated sugar: Beyond just sweetening the cookies, granulated sugar plays a significant role in their structural integrity, contributing to their desirable crispness and helping to achieve those beautiful golden-brown edges. When creamed vigorously with the butter, the sugar crystals cut into the butter, creating tiny air pockets. These air pockets expand during baking, resulting in a lighter and more delicate cookie texture.
- 4 cups of all-purpose flour: All-purpose flour provides the essential structure that holds these cookies together. It’s perfectly suited for this recipe, yielding a cookie with a tender yet firm crumb that resists crumbling too easily. While not strictly necessary, some bakers prefer to sift their flour before adding it, which can sometimes lead to an even lighter and more uniform texture in the final product.
Mastering the Art: How to Make Homemade 3-Ingredient Butter Cookies
Follow these detailed, easy-to-understand steps to bake a batch of homemade butter cookies that will not only impress everyone but also become a cherished staple in your baking repertoire!
How to make homemade 3-ingredient butter cookies:
- Cream the Butter and Sugar to Perfection: Begin by placing the properly softened unsalted butter and the granulated sugar into a large mixing bowl. Using an electric mixer (either a handheld model or a stand mixer fitted with the paddle attachment), beat these two ingredients together on high speed. Continue mixing for approximately 3 to 5 minutes. During this crucial creaming process, you’ll observe a remarkable transformation: the mixture should become visibly pale in color, incredibly light, and wonderfully fluffy in texture. This step effectively incorporates air into the butter, which is absolutely essential for achieving the delicate, tender texture characteristic of these cookies. Remember to pause and scrape down the sides and bottom of the bowl frequently to ensure all ingredients are thoroughly combined and evenly aerated.
- Gently Incorporate the Flour: Once your butter and sugar mixture is light and fluffy, reduce your mixer speed to low. Gradually add the all-purpose flour to the bowl, a little at a time. Continue mixing only until the flour is just incorporated and the mixture begins to resemble large, coarse crumbs. At this precise point, stop the mixer immediately. Overmixing the flour can overdevelop the gluten, which will inevitably lead to tough, chewy cookies – and we want tender crispness! Transfer the crumbly mixture to a clean work surface or continue working in the bowl, and gently knead it by hand just until the dough comes together into a cohesive, smooth ball. It should be pliable but avoid overworking it.
- Shape and Chill the Dough for Structure: Divide the unified dough into three equal portions. On your clean work surface, gently roll or press each portion into a long, thin log. You have creative freedom here: opt for a classic round shape, or choose a rectangular/prism style for square cookies, depending on your desired final presentation. Once shaped, tightly wrap each dough log in plastic wrap. This step is vital as it prevents the dough from drying out and helps it maintain its carefully crafted form. Place the wrapped dough logs into the freezer for a minimum of 30 minutes, or until they become sufficiently firm to slice cleanly and easily. This chilling period is absolutely crucial for preventing the cookies from spreading excessively during baking and for ensuring those beautifully uniform slices.
- Slice, Sugar, and Bake to Golden Perfection: While your dough is chilling and firming up, pre-heat your oven to 350°F (175°C). Prepare your baking sheets by lining them with parchment paper or a silicone baking mat. Once the dough logs are firm and ready, carefully unwrap one. Using a sharp knife, slice the log into uniform 1/4-inch thick rounds (or squares, if you opted for a rectangular log). Arrange the sliced cookies on your prepared baking sheet, ensuring you leave about an inch of space between each cookie to allow for slight expansion during baking. For an added touch of sweetness and a beautiful, glistening sparkle, generously sprinkle the tops of the cookies with additional granulated sugar before they go into the oven. Bake for approximately 20-25 minutes, or until the centers appear white or very lightly golden and the edges turn a beautiful, rich golden brown. Keep a watchful eye on them, as oven temperatures can vary significantly. Once baked to perfection, remove them from the oven and allow them to cool on the baking sheet for a few minutes before carefully transferring them to a wire rack to cool completely.
Expert Tips & Frequently Asked Questions for Your Perfect Butter Cookies
Do I have to freeze the butter cookie dough?
If your intention is to create beautifully uniform slice-and-bake cookies from logs, then yes, freezing the dough is not just highly recommended, but almost essential for the best results. Freshly prepared dough, especially one rich in butter, is typically quite soft and can be sticky, making it incredibly challenging to slice uniformly and precisely. Chilling the dough, particularly by placing it in the freezer for approximately 30 minutes, firms it up considerably. This increased stability allows you to cut neat, even 1/4-inch thick slices without them deforming or squishing. A firm dough also plays a vital role in preventing excessive spreading during baking, ensuring your cookies maintain their lovely shape and achieve that signature crisp edge and tender center.
Can I use salted butter instead of unsalted butter?
While unsalted butter is generally the preferred choice in most baking recipes because it grants you complete control over the precise salt content, you can certainly use salted butter if that’s what you have on hand. However, it’s crucial to be mindful that using four sticks (a full pound) of salted butter might result in cookies that are noticeably saltier than the intended delicate balance. A practical compromise would be to use a mix, perhaps half unsalted and half salted butter, or just one stick of salted butter complemented by three sticks of unsalted. If you do opt for all salted butter, consider omitting any additional salt you might typically add to other recipes, and be aware that the overall flavor profile will shift slightly. The ultimate goal is to avoid overly salty cookies that overpower the delicate, rich butter flavor that makes these treats so special.
Can I freeze these butter cookies after they’ve been baked?
Absolutely! These delightful butter cookies freeze wonderfully once they’ve been baked, making them perfect for advance preparation or simply having a stash of treats on hand. To freeze, first ensure that the cookies have cooled completely to room temperature. Then, arrange them in a single layer on a baking sheet and flash freeze them for about 30 minutes until they are solid. This initial freezing step prevents them from sticking together. Once firm, transfer the frozen cookies to an airtight freezer-safe bag or container, separating layers with parchment paper if you’re stacking them. They can be stored in the freezer for up to 2-3 months without losing quality. When you’re ready to enjoy them, simply take them out and let them thaw at room temperature. The texture and flavor remain excellent after freezing and thawing, making them a fantastic make-ahead option.
Can I freeze the unbaked cookie dough for later?
Yes, freezing the unbaked cookie dough is an absolutely fantastic option for convenient meal prep or for those moments when you crave fresh, warm cookies but are short on time! After you’ve shaped your dough into logs and wrapped them tightly in plastic wrap (as instructed in step 3), you can place them directly into the freezer. For prolonged storage and to protect against freezer burn, you might want to add an extra layer of aluminum foil around the plastic-wrapped dough logs. The unbaked dough can be stored in the freezer for up to 3 months. When you’re ready to bake, simply take a log out, let it sit at room temperature for about 10-15 minutes (or slightly longer if it’s exceptionally solid) to make it easier to slice. Then, slice the dough and bake as directed in the recipe. This method offers the ultimate flexibility, allowing you to enjoy fresh, warm, homemade cookies whenever the mood strikes!
How should I store baked butter cookies to keep them fresh?
Once your butter cookies have completely cooled down after baking, store them in an airtight container at room temperature. This will help them maintain their delightful crispness and fresh flavor for up to a week. For optimal freshness and to prevent any unwanted softening, it’s best to keep them away from direct sunlight, excessive heat, or areas with high humidity.
Can I add flavor variations to these classic cookies?
While the inherent beauty of this recipe lies in its pure, unadulterated buttery flavor, you can certainly add subtle variations to personalize them and suit your taste! For an extra aromatic touch, consider stirring in a teaspoon of vanilla extract or almond extract during the butter and sugar creaming stage. Fresh citrus zest (such as lemon or orange) also pairs wonderfully, adding a bright note that complements the rich butter. For a more festive or decadent touch, you could dip the cooled cookies in melted chocolate and then sprinkle them with nonpareils, finely chopped nuts, or even a dash of sea salt. The possibilities for customization are truly endless!
Rate
Pin
3 Ingredient Butter Cookies
Ingredients
-
4 sticks of unsalted butter softened
-
1 cup sugar
-
4 cups all-purpose flour
Instructions
-
In a large mixing bowl beat the butter and sugar over high speed until pale and fluffy (about 3-5 minutes.)
-
Mix in the flour over low speed until mixture resembles large crumbs. Lightly knead by hand until dough comes together.
-
Transfer dough to a work surface and cut into three equal parts. Shape each portion into a long thin log (either circle or rectangular shape.) Wrap and place into the freezer for 30 minutes or until firm to slice.
-
Pre-heat oven to 350°. Once the dough has hardened slice 1/4″ thick slices and place onto a baking sheet, sprinkle tops with a generous amount of granulated sugar and bake for 20-25 minutes or until centers look white and edges look golden.
Notes

Share Your Culinary Creations with Us!
We absolutely love seeing your baking triumphs and hearing about your experiences in the kitchen! When you make these delightful 3-ingredient butter cookies, please don’t hesitate to share your culinary journey with our community. Leave a comment below to tell us how they turned out, rate the recipe to help other aspiring bakers, and be sure to tag your mouth-watering pictures with #alyonascooking on Instagram. Happy baking, and we hope you thoroughly enjoy these simple yet spectacularly delicious homemade treats!
