The Ultimate Chewy Chocolate Chip Cookies: Your Go-To Homemade Recipe
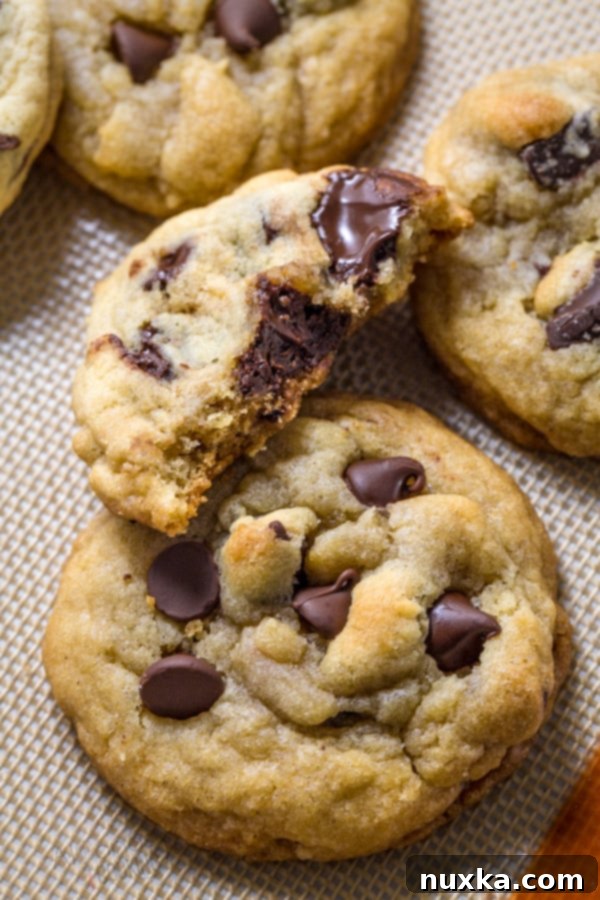
Welcome to your new favorite chocolate chip cookie recipe! Crafted from simple, everyday ingredients, these cookies promise a delightfully chewy texture with every bite. This comprehensive guide includes step-by-step photos, essential tips, and all the secrets you need to bake the most delicious cookies your family and friends will ever taste.
A Timeless Classic: My Journey to the Perfect Chewy Chocolate Chip Cookie
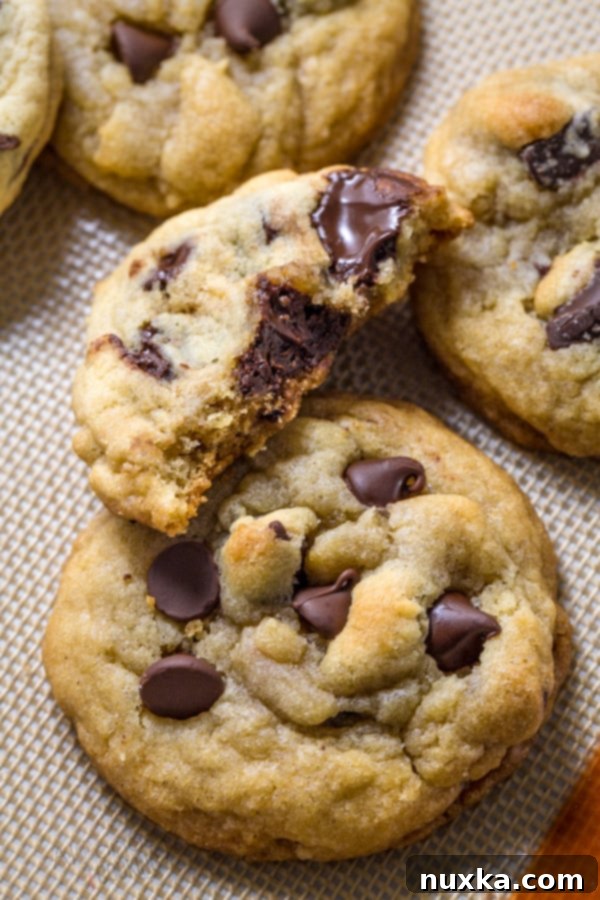
Long before the era of widespread food blogs and viral recipes, I stumbled upon what would become my absolute favorite chocolate chip cookie recipe. Years have passed, countless recipes have been tested, but I consistently return to this tried-and-true classic. It’s a recipe I initially adapted from Hershey’s Perfect Chocolate Chip Cookies, and over time, I’ve refined and enhanced it to create what I proudly call my ultimate chewy chocolate chip cookie recipe. This isn’t just a recipe; it’s a nostalgic journey, a testament to simple ingredients yielding extraordinary results, and now, it’s ready to become your ultimate favorite too!
What sets this recipe apart is its consistent ability to produce cookies that are perfectly golden on the outside, incredibly soft and chewy on the inside, and packed with melty chocolate goodness. We’ll delve into the precise measurements, the art of mixing, and crucial baking techniques that guarantee success every single time. Get ready to fill your kitchen with the irresistible aroma of freshly baked chocolate chip cookies!
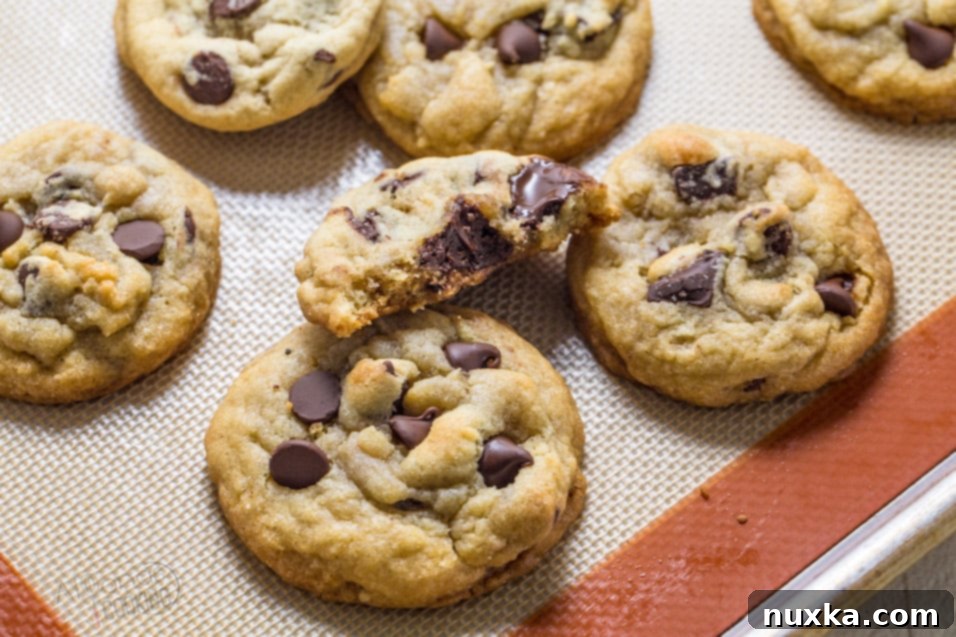
Essential Equipment for Baking Perfect Cookies
Having the right tools can make all the difference in your baking experience and the final outcome of your cookies. Here’s a list of the equipment I highly recommend for making these chewy chocolate chip cookies, ensuring consistent results and a smoother process:
- Purple Cookie Scoop: A heavy-duty cookie scoop is a game-changer for uniform cookie size, which leads to even baking. Unlike cheaper alternatives, a good quality scoop won’t click out of place, making your prep faster and less frustrating. Consistent cookie sizes not only look professional but also prevent smaller cookies from overbaking while larger ones are still raw.
- Silpat Mats: These non-stick silicone baking mats are incredibly versatile and a joy to use. They ensure your cookies bake evenly, prevent sticking, and make cleanup a breeze. Beyond cookies, they’re fantastic for baking breads, pastries, and more, offering a reliable non-stick surface without the need for parchment paper or greasing.
- Large Cookie Sheets: Investing in large baking sheets is essential for efficiency. They allow you to bake more cookies at once, reducing the total baking time and helping to prevent overcrowding, which can lead to unevenly baked cookies. Make sure to have at least two so you can rotate them in and out of the oven.
Rate
Pin
Chewy Chocolate Chip Cookies
Ingredients
Chewy Chocolate Chip Cookies:
-
16 oz unsalted butter
-
2 cups brown sugar
-
1 1/2 cups granulated sugar
-
4 large eggs
-
1 tsp pure vanilla extract
-
1 tsp salt
-
2 tsp baking soda
-
5 cups all-purpose flour
-
3 cups semi-sweet chocolate chips
Instructions
How to Make Chewy Chocolate Chip Cookies:
-
 Preheat your oven to 380°F (195°C). In a large mixing bowl, using an electric mixer, cream together the softened butter and both brown and granulated sugars until the mixture is light and fluffy. This step is crucial for incorporating air and achieving a tender crumb. Next, add the vanilla extract and crack in the eggs one at a time, beating well after each addition until fully incorporated. Finally, gradually beat in the dry ingredients – flour, baking soda, and salt – mixing just until they are combined. Be careful not to overmix the dough, as this can lead to tough cookies. Gently fold in your semi-sweet chocolate chips by hand.
 -
 Using your trusty cookie scoop, portion out the dough. For truly thick and uniform cookies, roll each scooped portion into a smooth ball between your palms. This helps them bake evenly and prevents overly flat cookies.
 -
 Place the dough balls onto your prepared baking sheet (lined with a Silpat mat or parchment paper), ensuring they are spaced at least 3 inches apart. This generous spacing is important to prevent them from spreading into each other as they bake.
 -
 Bake for approximately 11 minutes. Keep an eye on them; you want the edges to be lightly golden and set, but the centers should still look slightly soft and underbaked. This is the secret to achieving that irresistible chewiness. Remove from the oven and let them cool on the baking sheet for a few minutes before transferring them to a wire rack to cool completely. Cooling on the sheet allows them to set further without becoming hard.
Notes for Perfect Chocolate Chip Cookies
To Freeze Cookie Dough: Freezing cookie dough is a fantastic way to have fresh, warm cookies anytime! Roll your cookie batter into individual balls, then flash freeze them on a baking sheet until solid. Once frozen, transfer the dough balls into a freezer-safe zip-top bag or airtight container. They can be stored for up to 3 months. When cravings strike, simply place the frozen cookie balls on a prepared baking sheet and bake for 11-13 minutes (a minute or two longer than fresh dough), without thawing.
For extra chewy chocolate chip cookies: Want to amplify that delightful chewiness? Before baking, pinch off a small piece of cookie dough and place it directly on top of your rolled cookie dough balls. As the cookies bake, these additional dough pieces will melt and meld, creating extra layers and pockets of chewiness that elevate the texture.
For extra chocolatey cookies: If you love seeing prominent pools of chocolate in your cookies, here’s a trick: immediately after removing the cookies from the oven, gently press a few extra chocolate chips onto the warm, soft surface of each cookie. The residual heat will slightly melt them, making them look beautifully gooey and bakery-perfect, as if they were baked that way.
Note on Batch Size: This recipe yields a generous batch of approximately 10 dozen cookies. If this is more than you need, I highly recommend utilizing the refrigerator or freezer storage tips above. This allows you to enjoy freshly baked cookies over an extended period without waste. The dough can be stored in the fridge for up to 6 days.
Nutrition per serving

Frequently Asked Questions About Chewy Chocolate Chip Cookies (Q&A)
What makes a cookie chewy?
The secret to a truly chewy cookie largely lies in its sugar content, especially the ratio of brown sugar to granulated sugar. Brown sugar contains molasses, which contributes moisture and a richer, softer texture that stays chewy even after cooling. A higher overall sugar content acts like a crystal structure, holding onto moisture and giving that desired texture. Additionally, slightly underbaking cookies so that their centers are still soft when pulled from the oven is key. As they cool, the residual heat finishes the baking process, resulting in a perfectly tender and chewy interior.
Why are my cookies flat and spread out?
Flat cookies are a common baking dilemma, often caused by a few factors. Too much butter, or butter that is too soft or melted, can cause cookies to spread excessively. Butter that is too warm will not hold enough air when creamed, leading to a flatter cookie. Conversely, too little flour can also make them spread. Other culprits include an oven that isn’t hot enough (causing butter to melt before the cookie sets), using old or inactive leavening agents (baking soda/powder), or simply having an imbalanced ratio of ingredients. Precision in measurement and proper chilling of the dough can often solve this issue.
How do you keep chocolate chip cookies soft?
To ensure your chocolate chip cookies remain wonderfully soft, there are a few expert techniques to employ. First, avoid overbaking; pull them from the oven when the edges are just set and lightly golden, but the centers still look slightly underdone. The residual heat will continue to cook them without making them hard. Once cooled, store them in an airtight container while they are still slightly warm to trap moisture. A popular old trick is to place a half-slice of plain bread or a tortilla in the container with the cookies – the cookies will absorb moisture from the bread, keeping them soft. Also, recipes that incorporate shortening or margarine tend to yield softer cookies because these fats remain softer than butter even when chilled.
How to prevent hard chocolate chip cookies:
Hard and crispy cookies are often the result of overbaking, or an imbalance in your ingredient ratios. Baking them for too long at too high a temperature dries out the moisture, leading to a crunchy texture. Additionally, an incorrect proportion of fat (like too much butter, which can make them spread thin and crisp) or sugar (which, when excessive, can crystallize and harden) can contribute to this issue. The key is to follow the recipe closely, monitor your oven, and remove cookies when they are just beginning to set. Proper chilling of the dough can also help maintain structure and prevent excessive spreading and crisping.
How do you get perfect looking cookies?
Achieving those photogenic, bakery-style chewy chocolate chip cookies isn’t just about taste; presentation matters! The way you prepare your cookie dough before baking significantly impacts the final look:
- Roll into Balls: After scooping your cookie dough, take an extra moment to gently roll each portion into a smooth ball. This method helps the cookies maintain a thicker, more uniform shape as they bake, rather than spreading out too thinly.
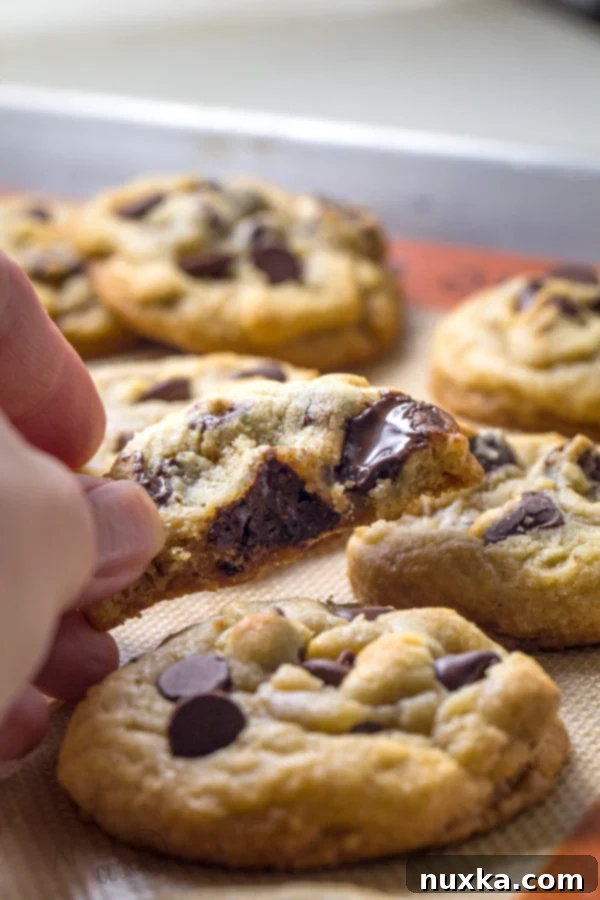
- For Extra Chewy Texture: To create those appealing crinkles and an even chewier bite, pinch off a small piece of dough (about 1/2 teaspoon) and place it directly on top of your rolled cookie dough ball before baking. As the cookie bakes, these layers will meld beautifully, creating a more textured and visually appealing finish – exactly how the cookies in these photos were made!
- Show Off Chocolate Chips: For that irresistible, melty chocolate chip appearance, once your cookies are fresh out of the oven and still warm, gently press a few extra chocolate chips onto their soft tops. The warmth will cause them to slightly melt and adhere, making them look as if they baked perfectly into the cookie’s surface.
Big batch chocolate chip cookies:
If you’re going to put in the effort to bake, why not make it count? Preparing a large batch of chocolate chip cookie dough is a smart investment of your time. This allows you to enjoy freshly baked cookies whenever the craving strikes, without the need to start from scratch. Whether you portion and freeze it for months down the line or keep some in the fridge for a week’s worth of quick treats, having this dough on hand is a fantastic way to ensure you always have homemade goodness at your fingertips. This recipe is perfectly scaled for a large batch, making it ideal for meal prep for your sweet tooth!
Can you freeze cookie dough?
Absolutely, freezing cookie dough is one of the best baking hacks! To do so, simply roll your prepared dough into individual balls. Arrange them on a baking sheet lined with parchment paper and flash freeze for about an hour until they are solid. Once firm, transfer the frozen dough balls into an airtight freezer bag or container. They will keep beautifully for up to three months. When you’re ready for a warm cookie, just pull out as many as you need and bake them straight from the freezer. You might need to add an extra minute or two to the baking time compared to fresh dough.
Can you make homemade refrigerator dough like Nestle?
Yes, you can certainly make a convenient batch of chocolate chip cookie dough to store in your fridge, similar to store-bought varieties! I frequently prepare large quantities of this dough to keep on hand for whenever I desire fresh, warm cookies. However, there’s one important consideration: an all-butter cookie dough tends to become very hard and difficult to scoop when thoroughly chilled. To achieve that scoop-easy consistency typical of refrigerator dough, I recommend substituting some or all of the butter with shortening or margarine. These fats have a different melting point and texture, ensuring the dough remains pliable and easy to portion directly from the refrigerator.
Pro Tips for Your Best Chewy Chocolate Chip Cookies
- Shape for Thickness: Always roll your cookie dough batter into neat balls. This simple step is crucial for achieving thick, evenly baked cookies that have that desirable chewy center. For an even more enticing texture, place a small, extra piece of dough on top of each rolled ball before baking to create extra crinkles and chewiness.
- Refrigerate Dough: This cookie batter keeps exceptionally well in the fridge for up to 4 days. Chilling the dough not only deepens the flavors but also helps prevent excessive spreading during baking. When you’re ready to bake, use a heavy-duty ice cream scoop to easily portion out the chilled dough.
- Flavor with Salted Butter: If you prefer to simplify your ingredients and enhance the flavor profile, you can omit the added salt from the recipe and use salted butter instead. Just be mindful of the salt content in your butter and adjust to taste, ensuring a perfectly balanced sweet and salty cookie.
- Upgrade Your Chocolate: For an elevated chocolate experience, consider chopping your favorite high-quality chocolate bar into chunks instead of using pre-made chocolate chips. This provides varying sizes of chocolate pieces that melt beautifully and offer a richer, more complex chocolate flavor and texture throughout your chewy cookies.
