How to Cook Bacon in the Oven: 3 Easy Methods for Perfect Crispy Results (Less Mess!)
Tired of grease splattering all over your stovetop when cooking bacon? Look no further! Learning how to cook bacon in the oven is a game-changer, offering a convenient, mess-free, and consistently delicious way to prepare this breakfast favorite. Whether you’re making a few slices for yourself or a large batch for a crowd, oven-baked bacon simplifies the process, leaving you with perfectly crisp strips every time.
The beauty of oven-baked bacon lies in its versatility. You can use almost any type of bacon you prefer, be it robust thick-cut bacon, leaner center-cut bacon, or my personal favorite, uncured bacon, which offers a nitrate-free option. While the method remains largely the same, be aware that cooking times may vary slightly depending on the thickness and type of bacon you choose. At our house, crispy bacon is always a hit, and I adore how effortlessly the oven delivers those irresistible results. While countless guides exist, I’m excited to share my top three go-to methods, perfectly suited for different needs and time constraints.
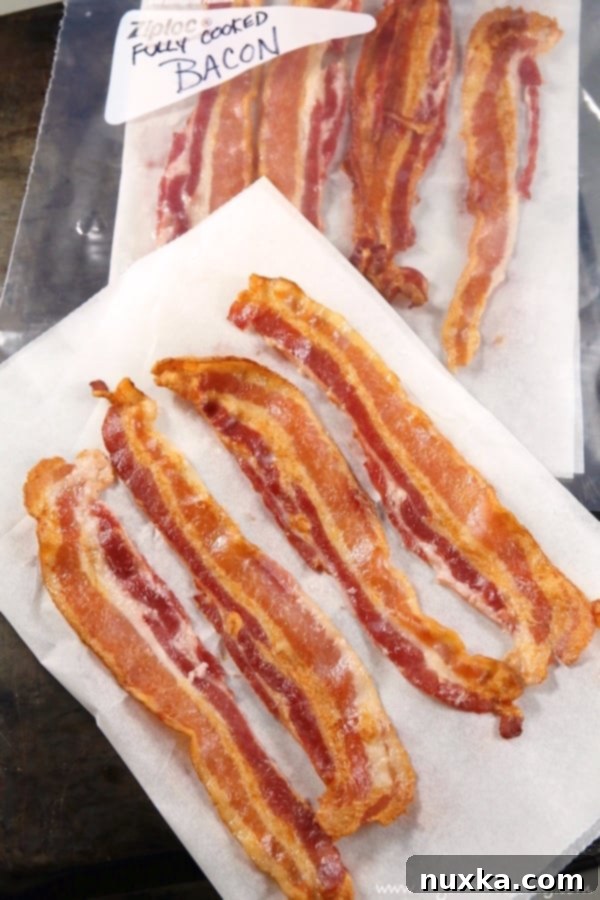
Once you master these simple techniques for baking bacon, you’ll find countless uses for it. These Bacon Egg and Cheese Sandwiches, for instance, become incredibly easy to whip up for a quick and satisfying breakfast or brunch. Oven-baked bacon isn’t just a side dish; it’s a versatile ingredient that elevates many recipes.
Why Oven-Baked Bacon is the Best Choice
Baking bacon in the oven is by far the most efficient and enjoyable way to achieve uniformly crisp slices, especially when you need to cook for a larger group. Gone are the days of standing over a hot stove, constantly flipping slices and dodging grease splatters that inevitably cover your countertops. Let’s be honest, who wants to spend precious morning minutes on cleanup when you could be enjoying a delicious breakfast?
As someone who regularly feeds a family of eight, I can attest to the sheer convenience of this method. When faced with the task of preparing a substantial amount of bacon, opting for baked bacon is a no-brainer. It frees up stovetop space for other dishes like eggs or pancakes, and the hands-off cooking means you can focus on other kitchen tasks or simply relax. Trying to make breakfast complicated often leads to skipping essential components like bacon, which is truly a missed opportunity for a delightful meal.
I actually learned this fantastic method long before food blogging became widespread. My sister-in-law, who used to cook for a large community of elderly residents at a senior living monastery, introduced me to it. Watching her effortlessly arrange dozens of bacon slices on sheet pans to bake in the oven was a revelation. That moment fundamentally changed my approach to cooking bacon, making it infinitely better and simpler.
Method 1: The Cold Oven Start for Perfectly Crisp Bacon (My Go-To)
This method has become my absolute favorite, particularly during warmer months when I prefer to keep the oven on for the shortest possible time. It’s incredibly efficient and yields perfectly crisp bacon without any fuss. The key here is starting with a cold oven, which allows the bacon to gradually heat up and render its fat evenly, preventing burning and ensuring that ideal texture.
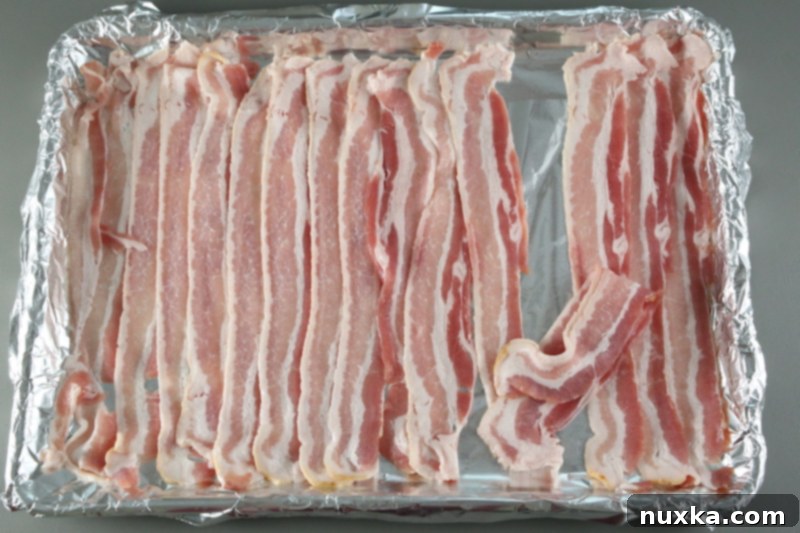
Here’s how you do it: Begin by lining a large sheet pan with aluminum foil for incredibly easy cleanup – no scrubbing sticky pans later! Arrange your bacon slices in a single layer on the prepared sheet pan. Don’t worry if they touch or slightly overlap; as the bacon cooks and shrinks, it will create enough space. Place this sheet pan into a cold oven, then turn the oven on to 400°F (200°C).
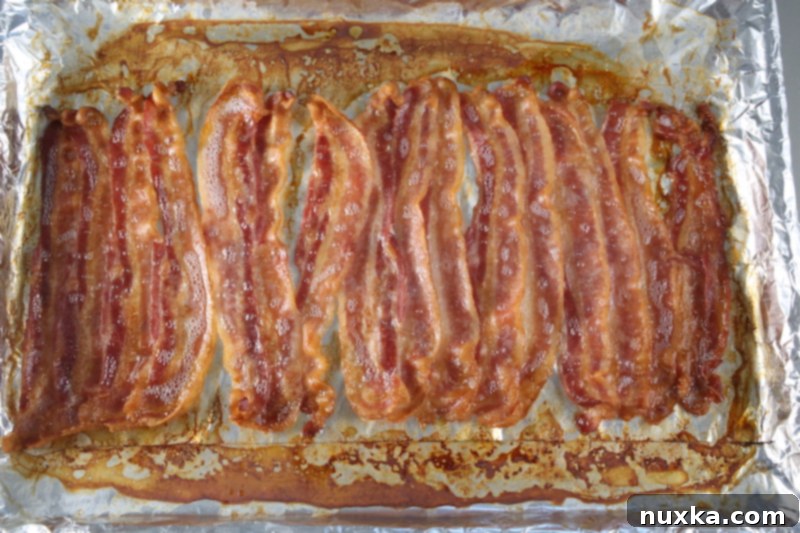
The magic happens as the oven preheats. By the time your oven reaches its target temperature of 400°F, your bacon will be nearly, if not entirely, done. This gradual heating process is what prevents the bacon from seizing up too quickly and helps achieve that consistent, perfect crispness. It’s a genius technique that ensures even cooking and less chance of burning. This streamlined approach allows you to tend to other dishes, like preparing those baked potatoes or other breakfast components, while the bacon takes care of itself. I picked up this brilliant tip from Christine’s Notebook YouTube channel, and it has revolutionized my kitchen efficiency.
Method 2: Traditional Oven-Baked Bacon (Preheated Oven)
While the cold oven method has won me over for its energy efficiency, this traditional preheated oven method is still a fantastic and reliable way to achieve delicious oven-baked bacon, and it’s how I cooked bacon for many years. It produces consistently great results, especially if you prefer to have your oven at temperature before adding food.
For this approach, you’ll first need to preheat your oven to 400°F (200°C). As with all oven methods, line a sturdy sheet pan with aluminum foil or parchment paper to ensure effortless cleanup. Arrange your bacon strips in a single layer across the lined pan. If you’re cooking a full pack, a slight overlap at the edges is usually fine as the bacon will shrink considerably. Bake the bacon until it reaches your desired level of crispness and the fat has fully rendered. This typically takes anywhere from 25 to 40 minutes, depending on several factors: the thickness of your bacon slices, whether you prefer it slightly chewy or extra crispy, and the specific calibration of your oven. Remember to keep an eye on it, especially towards the end of the cooking time, to prevent over-crisping or burning.
Method 3: Broil Bacon for a Quick Crisp
Broiling bacon is undeniably one of the fastest ways to cook bacon, making it ideal when you’re in a real hurry and need a batch cooked quickly for a crowd. The intense, direct heat from the broiler cooks bacon in mere minutes, transforming it into a wonderfully crisp delight.
To broil bacon, begin by lining a large sheet pan with aluminum foil for easy cleanup, as bacon grease can become quite hot under the broiler. Arrange all of the bacon slices in a single layer on the pan. Don’t hesitate to let them slightly overlap on the edges or even crimp them up if you need to fit more slices onto a single pan; the shrinkage will accommodate this. Position your pan on the middle to top rack of your oven, ensuring the bacon isn’t too close to the heating element but still receives direct heat. Turn your broiler on high, and cook until the bacon is perfectly crisp. This method is incredibly fast, often taking only 4 to 10 minutes, with the exact time depending on your broiler’s strength and the proximity of the bacon to the heat source. Because of its speed, it is absolutely crucial to keep a very close eye on the bacon throughout the broiling process to prevent it from burning. Bacon can go from perfectly crisp to charred in a matter of seconds!
Can You Freeze Cooked Bacon? The Ultimate Meal Prep Hack
Absolutely! Freezing cooked bacon is an incredible time-saver and a practice I embraced frequently for meal prep. It ensures you always have delicious bacon ready at a moment’s notice, making busy mornings or last-minute recipe additions a breeze. Here’s how I optimized the process for maximum convenience and freshness.
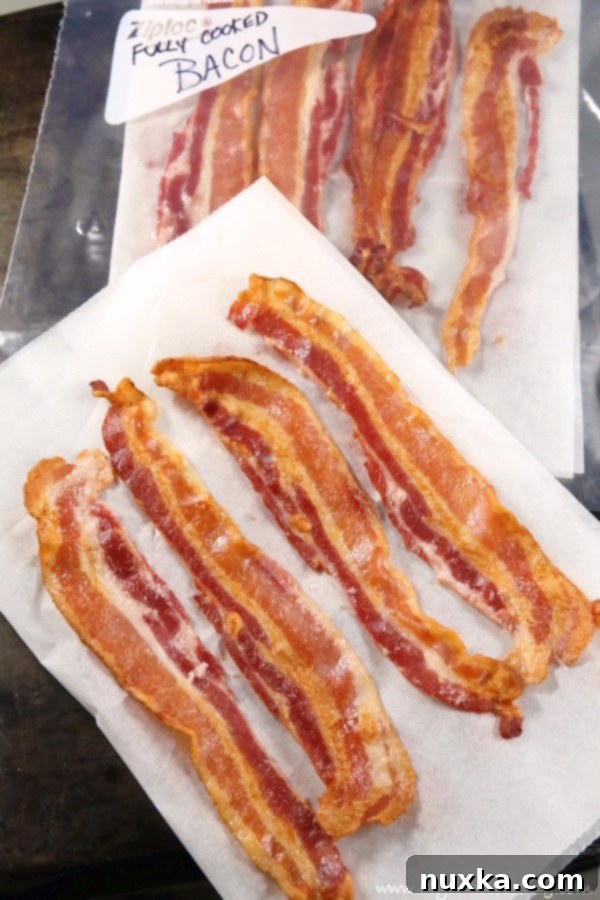
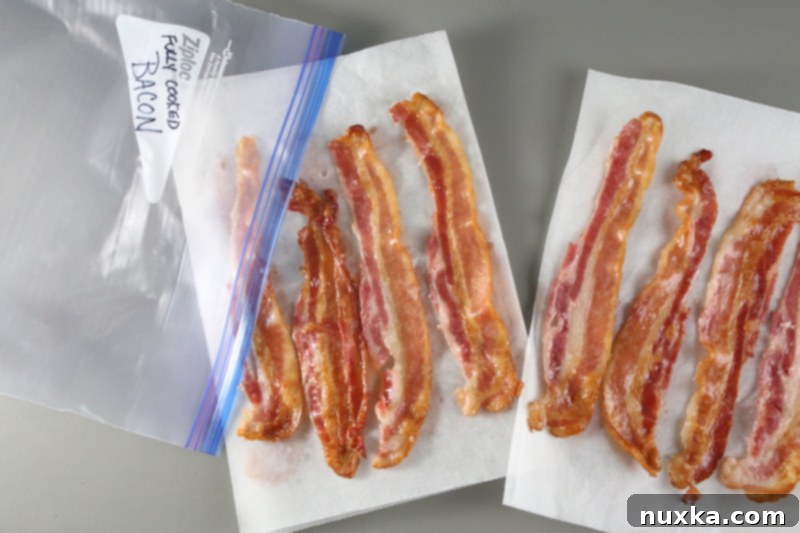
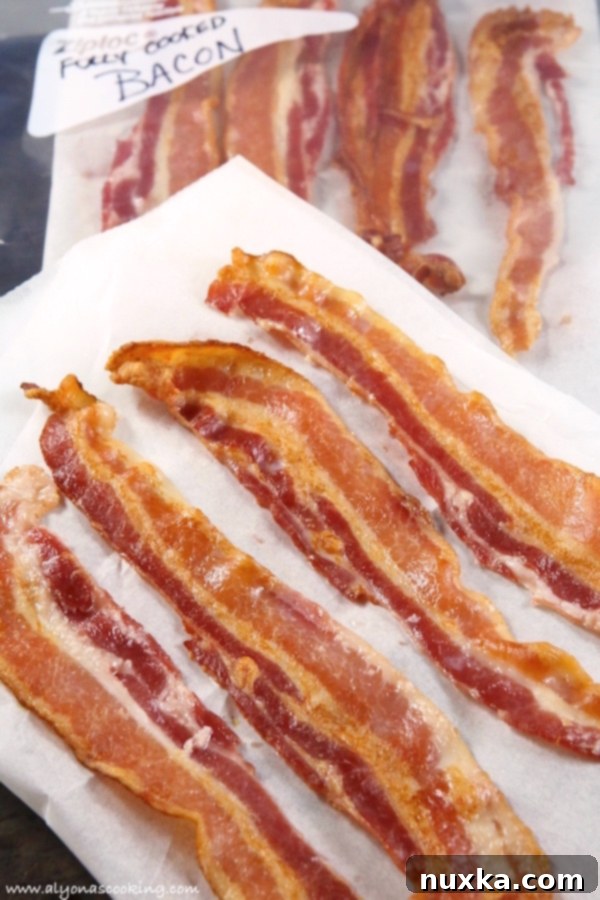
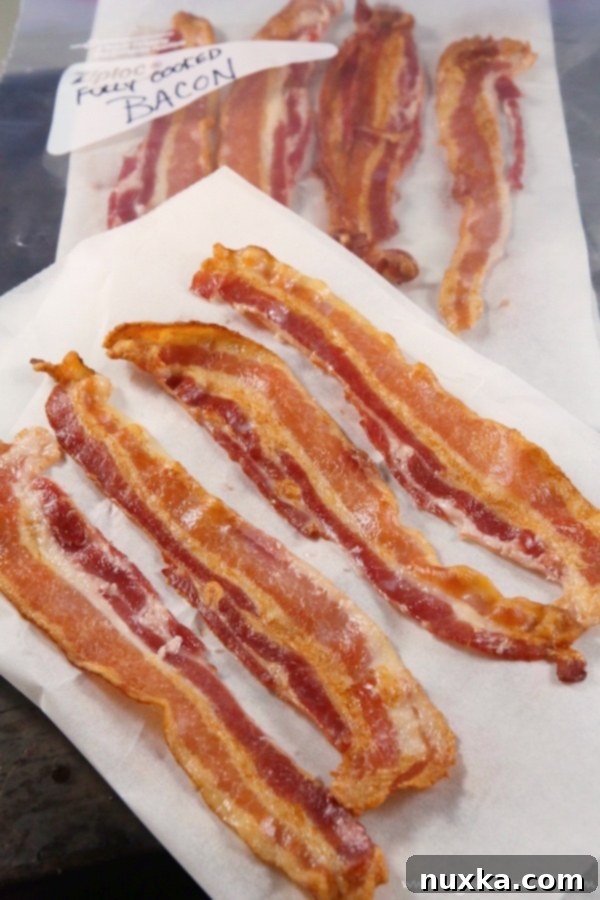
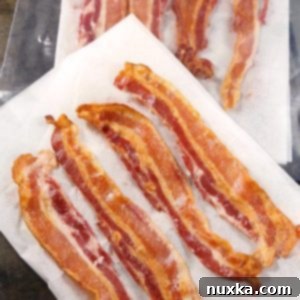
I would start by cutting sheets of parchment paper in half, making them roughly the width of a gallon-sized freezer bag. After cooking the bacon to my desired crispness and allowing it to cool completely (this is crucial to prevent condensation and ice crystals), I would arrange 4-5 bacon slices in a single layer on each piece of parchment paper. These parchment-separated layers would then be stacked neatly and carefully slid into a gallon-sized freezer bag. This technique prevents the slices from sticking together, allowing you to easily grab just the amount you need.
Frozen cooked bacon keeps exceptionally well in the freezer for over 3 months, and even up to 6 months in a deep freezer, without significant loss of quality or flavor. When you’re ready to use it, simply pop a few slices into the microwave for about 30 seconds (or slightly longer for more slices). They emerge perfectly reheated and ready to be used in anything from sandwiches and salads to wraps, or as a garnish for soups and baked potatoes. This ingenious method ensures that pre-cooked bacon is always on hand, streamlining your cooking process and adding that irresistible smoky flavor whenever inspiration strikes.
How To Make Homemade Bacon Bits: Zero Waste, Maximum Flavor
Bacon bits are a fantastic addition to salads, baked potatoes, scrambled eggs, or even as a topping for casseroles. Making them at home is not only easy but also a great way to utilize any leftover or extra-crispy bacon, ensuring zero waste. There are a couple of simple ways to create your own flavorful bacon bits:
- From Frozen Bacon: If you’ve frozen oven-baked bacon slices, you can easily turn them into bits. While the bacon is still semi-frozen (which makes cutting much easier and less greasy), chop it into small pieces. You can then reheat these chopped bacon pieces on a dry skillet over medium heat for a few minutes, stirring occasionally, until they are perfectly crisp and warmed through. This method gives you control over the texture.
- From Over-Baked Bacon: Sometimes, bacon might accidentally get a little crispier than intended. Don’t throw it away! This is actually perfect for making bacon bits. Once the over-baked bacon has cooled completely, it will be quite brittle. Simply crumble it with your hands; it will flake apart effortlessly. These ready-to-use crumbles can then be stored in an airtight container in the fridge for a few days or frozen for longer storage, providing a quick flavor boost to any dish.
Pro Chef Tip for Bacon Perfection

Pro-tip: For bacon that’s delightfully chewy yet tender, bake until it’s just golden brown and still slightly pliable. It will firm up and achieve a perfect chewy-crisp texture as it cools. If you’re aiming for that irresistible, extra-crispy bacon, consider placing a wire cooling rack directly over your foil-lined baking sheet. This allows air to circulate around each strip and the rendered fat to drip away, resulting in uniformly crispy bacon without any soggy spots.
Mise en Place: Essential Equipment & Ingredients for Perfect Bacon
Equipment:
- Rimmed Baking Sheet: This is absolutely essential! A rimmed pan prevents rendered bacon fat from spilling over into your oven, saving you from a smoky mess and potential fire hazard.
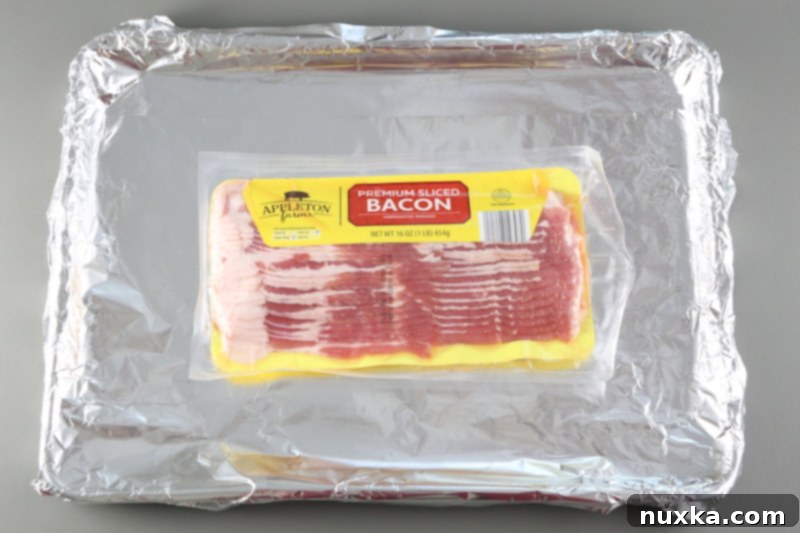
- Aluminum Foil or Parchment Paper: Line your baking sheet for incredibly easy cleanup. Foil is great for higher heat and containing fat, while parchment works well for less stick and easy removal.
- Wire Rack: For those who crave ultimate crispness, placing a wire rack on top of your lined baking sheet allows fat to drip away and promotes even air circulation, resulting in exceptionally crispy bacon.
- Gallon-sized Freezer Bags: Perfect for neatly storing your pre-cooked bacon, ensuring it stays fresh and ready for reheating.
Main Ingredient for Oven-Baked Bacon:
- Bacon: The star of the show! I personally love to buy hickory-smoked uncured bacon that contains no nitrates, often found under the “Never Any” brand at stores like Aldi. However, feel free to use your favorite smoky-flavored bacon. Conventional cured bacon, peppered bacon, or even turkey bacon will work with these methods, though cooking times may require slight adjustments.
Important Note: The thickness of your bacon slices will significantly impact cooking time. Thick-sliced bacon will naturally take longer to crisp up at an oven temperature of 400°F (200°C) compared to standard or thin-cut bacon. Always account for a few extra minutes of baking time and check for doneness frequently when using thicker cuts.
Step-by-Step Guide: How to Bake Bacon (Preheated Oven Method)
For those who prefer a traditional approach, this method guarantees beautifully cooked bacon. Remember, the general principles apply to all oven methods for great results!
-
Prepare Your Oven and Pan: Begin by preheating your oven to 400°F (200°C). While the oven heats, line a large, rimmed baking sheet with aluminum foil. The rim is crucial to contain the rendered fat, and the foil makes cleanup almost non-existent.

-
Arrange and Bake: Lay the bacon strips in a single layer on the prepared pan. If you’re cooking a full pack and need more space, it’s perfectly fine to let them slightly overlap on the edges or even crimp them; bacon will shrink significantly as its fat renders. Place the pan into your preheated oven and bake for approximately 20-25 minutes. The exact time will depend on how crispy you prefer your bacon and the thickness of the slices. Keep an eye on it, especially after the 15-minute mark, adjusting time as needed.

-
Separate and Cool: Once the bacon is cooked to your liking, carefully remove the pan from the oven. If any bacon strips overlapped, use kitchen tongs to separate them while they are still hot. This prevents them from sticking together as they cool and become firm. Allow the bacon to cool completely on the pan, or transfer to a plate lined with paper towels to absorb excess grease.

-
For Freezing (Optional): To prepare for freezing, cut sheets of parchment paper (approximately 15×10 inches) in half. Stack about 4-5 cooled bacon strips onto each piece of parchment paper. Then, neatly stack these parchment-separated portions and slide them into a gallon-sized freezer bag. This allows you to easily grab individual servings later. Frozen bacon can be stored for up to 3 months in a standard freezer or an impressive 6 months in a deep freezer.
-
Reheating Instructions: To reheat frozen bacon, simply place the desired number of slices onto a microwave-safe plate in a single layer. Microwave for 30-60 seconds, depending on your microwave’s power and the number of slices. Using a microwave cover is recommended to prevent any residual grease splatter. For immediate use, cooked bacon can also be stored in an airtight container in the refrigerator for up to a few days. Freeze any unused portions beyond that timeframe.
How To Render and Use Bacon Grease: A Flavorful Kitchen Staple
After cooking a batch of delicious bacon, don’t make the mistake of discarding the rendered fat! Bacon grease is a culinary treasure, especially when you use a nitrate-free bacon, which gives me extra peace of mind about incorporating its fat into my cooking. This savory byproduct has a relatively high smoke point, making it an excellent and flavorful cooking fat to keep on hand.
Bacon grease truly shines as a cooking medium. It imparts an incredible depth of smoky, savory flavor to whatever you cook in it. Use a dollop of bacon grease in a skillet anytime you might reach for cooking oil. It’s fantastic for frying sunny-side-up eggs, giving them a rich, golden edge. It’s also superb for sautéing a variety of vegetables like onions, bell peppers, or greens, adding an extra layer of deliciousness. You can even use it to sear meats, infusing them with a subtle, irresistible smokiness. However, be mindful of pairing; while its flavor is wonderful, it doesn’t complement every dish, so consider if the smoky essence will enhance your recipe.
Important Safety Note for Rendering Grease: Always use a heat-safe container to store hot bacon fat. Never pour hot bacon grease into plastic containers or directly down your drain. I’ve personally made the mistake of pouring it into a durable plastic measuring cup only to discover the lining burned off – a lesson learned the hard way! To properly render and store bacon grease, carefully pour the hot fat drippings from your pan into a glass jar or a ceramic saucer. If you prefer a very clean fat, you can line a fine mesh sieve with a piece of paper towel or cheesecloth to filter out any small bacon particles, but for many, these tiny bits add extra flavor and aren’t a concern.
Q&A: Your Top Bacon Questions Answered
What is Uncured Bacon, and How Does it Compare to Cured Bacon?
The term “uncured bacon” can be a bit misleading. It actually means that the bacon was not treated with synthetic curing agents like sodium nitrate or sodium nitrite. Instead, it is cured using natural ingredients that contain nitrates, such as celery powder or beet juice, which convert into nitrites during the processing. So, while it’s still “cured” in a sense, it avoids the synthetic additives.
Cured vs. Uncured Bacon: The primary difference lies in the curing process and the specific ingredients used. Traditionally cured bacon uses synthetic nitrates and nitrites (often listed as “pink curing salt”) to preserve the meat, inhibit bacterial growth, and maintain its characteristic pink color and flavor. Uncured bacon, on the other hand, relies on natural sources of nitrates found in vegetables like celery or beets, often with an added starter culture, to achieve a similar preserving and flavoring effect. Both types offer delicious results, but many people prefer uncured bacon for its more natural ingredient profile, especially if they are trying to limit synthetic additives in their diet.
How Long Does It Take to Cook Bacon in the Oven for Optimal Crispness?
I find that 400°F (200°C) is the perfect oven temperature for bacon. It provides a steady heat that effectively renders the fat from the pork belly while simultaneously crisping it to perfection. However, the exact cooking time for oven-baked bacon can vary significantly. It truly depends on several factors:
- Your Oven’s Calibration: Ovens can vary widely in their actual temperature compared to what they display.
- Bacon Thickness: Thin-cut bacon will cook much faster than thick-cut bacon.
- Desired Doneness: Do you prefer slightly chewy, perfectly crisp, or extra-crispy bacon?
- Bacon Brand: Different brands may have varying fat-to-meat ratios and curing processes.
Typically, bacon will bake for anywhere from 15 to 25 minutes at 400°F. I highly recommend checking the bacon after the 15-minute mark, and then every 3-5 minutes thereafter, until it reaches your desired level of crispness. It’s important not to walk away, as bacon can go from perfectly cooked to over-crispy very quickly once the fat has largely rendered. For thick-cut bacon, you might need an additional 5-10 minutes.
How Does Air-Fryer Bacon Compare to Oven-Baked Bacon?
While I own and appreciate my air fryer for many tasks, I still largely prefer the oven method for cooking bacon, especially when preparing more than a few slices. The air fryer is undeniably quick and convenient for smaller portions.
If you’re cooking bacon for just one or two people, or simply need a few slices, the air fryer is an excellent option. You can usually cook bacon until crisp at 360°F (180°C) for about 7-9 minutes, flipping halfway through. It produces wonderfully crispy results with minimal cleanup, as the fat collects in the basket. However, the reality for me is that I often cook bacon by the entire pack to feed my family or for meal prep. The limited capacity of an air fryer basket means multiple batches would be required, making it far less efficient than a single large sheet pan in the oven. For high-volume cooking, the oven remains the superior choice for its ability to handle larger quantities evenly and simultaneously.
Expert Tips for Achieving the Best Oven-Baked Bacon:
- Double-Line for Easy Cleanup: For truly effortless cleanup, double-line your rimmed baking sheet with aluminum foil. Sometimes, a single layer of foil can develop tiny tears, allowing grease to seep through. A double layer provides extra protection, ensuring you can simply discard the foil and have a pristine pan underneath.
- Maximize Pan Space: If you’re baking a full pack of bacon but only have one sheet pan, don’t worry! You can overlap or gently crimp the bacon slices on the pan. As the bacon cooks and renders its fat, it will shrink, creating more space and still allowing for even cooking. This saves you from using and cleaning an additional pan.
- Batch Cook and Freeze: Take advantage of the oven’s capacity by cooking a large batch of bacon. Once fully cooked and cooled, freeze the bacon in parchment-separated layers within a freezer bag. This allows you to quickly reheat individual slices (just 30-60 seconds in the microwave!) whenever you need them, perfect for quick breakfasts or recipe additions.
- Homemade Bacon Bits from Crispy Bacon: To make your own bacon bits, intentionally bake some bacon until it’s extra crispy. Once cooled completely, it will be very brittle and easy to crumble with your hands. Store these homemade bacon bits in an airtight container for a flavorful topping for salads, soups, or baked potatoes.
- Don’t Overcrowd the Pan: While some overlap is acceptable, avoid severely overcrowding your baking sheet. Too many slices packed too tightly can steam instead of crisp, leading to less desirable results. Aim for a single layer or gentle overlap.
- Pat Bacon Dry (Optional but Recommended): For even crispier results, especially with thicker cuts, lightly pat your bacon slices dry with paper towels before placing them on the baking sheet. This removes excess moisture, promoting better browning and crisping.
- Monitor Closely: Regardless of the method, always keep a close eye on your bacon, particularly towards the end of the cooking time. Bacon can go from perfectly done to burnt very quickly, so vigilance is key to achieving that ideal crispness.
Rate
Pin
Oven Baked Bacon – 3 Easy Ways
Equipment
-
1 18×13 rimmed baking sheet
-
Aluminum foil
-
1 gallon-sized freezer bag (for freezing bacon)
-
Parchment paper
Ingredients
Main Ingredient:
-
12-16 oz uncured hickory smoked bacon (sliced)
Instructions
How to Bake Bacon:
-
Preheat the oven to 400°F (200°C). Line a rimmed baking sheet with aluminum foil.
-
Arrange the bacon slices into a single layer over the lined pan and bake for 20-25 minutes. For chewier bacon, bake until golden brown and slightly limp (check at 15 minutes); it will continue to crisp up as it cools. For extra crispy bacon or thick cut bacon, bake for an additional 5 minutes or to desired doneness.
To Freeze Fully Cooked Bacon:
-
Cut parchment paper to the width of a gallon-sized bag. Arrange cooked and cooled bacon pieces into a single layer over each piece of parchment paper (about 4-5 slices). Stack and place into a gallon freezer bag and freeze for up to 6 months.
Reheating instructions:
-
To reheat frozen bacon, place as many slices of frozen bacon as you need onto a plate in a single layer. Microwave for 30-60 seconds. Use a microwave cover to avoid grease splatter.
Notes
- If overlapping bacon, separate the cooked bacon slices from the oven with kitchen tongs while hot to prevent the bacon from sticking. I like to crimp up the bacon slices to avoid using another pan, this makes lots of room for the bacon and makes wavy bacon slices.
Nutrition per serving

With these three simple yet effective methods, you’re now equipped to master oven-baked bacon. Say goodbye to messy stovetops and unevenly cooked strips, and hello to consistent, crispy perfection every time. Whether you opt for the efficient cold oven start, the reliable preheated oven method, or the super-fast broiling technique, you’ll find that baking bacon is truly the superior way to prepare this beloved breakfast staple. Enjoy your perfectly cooked bacon, and happy cooking!
