Homemade Braided Apple Hand Pies: A Delicious & Flaky Recipe

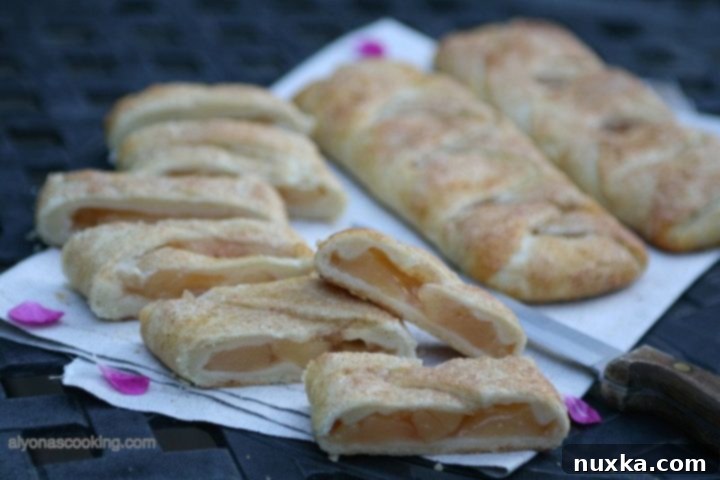
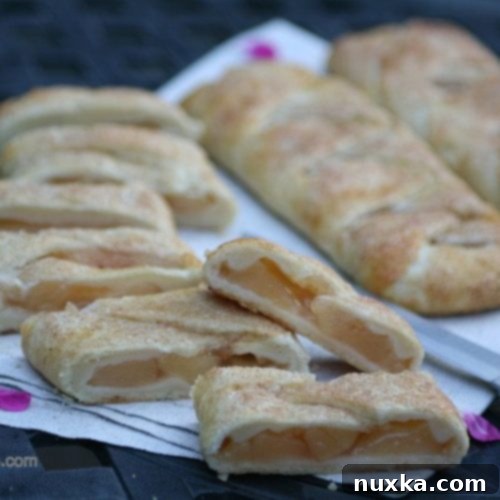
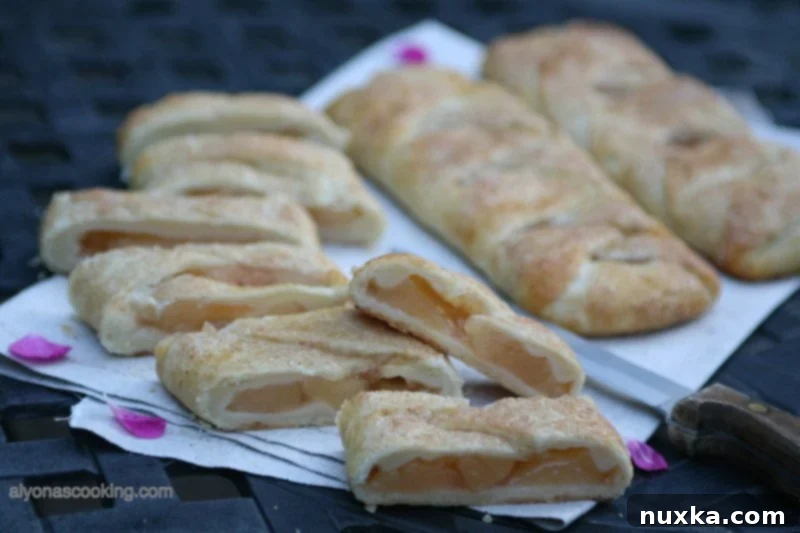
There’s something truly special about a perfect apple pie – the sweet, spiced apple filling, encased in a tender, flaky crust. But what if you could capture all that magic in a convenient, individual serving? That’s exactly the inspiration behind these delectable Braided Apple Hand Pies. Born from a delightful encounter with a mini apple pastry from Dunkin’ Donuts, this recipe offers all the comforting flavors of a classic apple pie, but in a charming, portable, and utterly irresistible braided form.
Forget the fuss of slicing a large pie, especially when you crave a personal sweet treat. These hand pies are not only beautifully presented with their intricate braided tops, but they also provide a perfectly portioned dessert experience. My initial encounter with those small bakery braids left such an impression that I knew I had to recreate them at home. While my homemade versions are a bit larger than the tiny Dunkin’ delights, they capture the essence perfectly: a wonderfully flaky pie crust cradling a luscious apple filling, all crowned with a glistening cinnamon sugar crust. The taste, I’m happy to report, is every bit as good, if not better, than the original inspiration. Perhaps one day I’ll venture into miniature versions, but for now, these generously sized braided hand pies are absolutely perfect for sharing (or keeping all to yourself!).
The Secret to a Flaky Crust: Homemade Dough Perfection
The foundation of any great pie is its crust, and these apple hand pies are no exception. While using store-bought pastry dough is always an option for convenience, I wholeheartedly recommend making your own for an unparalleled flaky texture and superior flavor. Don’t be intimidated by the idea of homemade dough; it’s surprisingly straightforward, especially when you follow a few key principles. The effort is minimal, but the reward of a truly flaky, buttery crust is immense and well worth the extra step.
My recipe for the dough requires some crucial chilling time, but the mixing process itself is quite simple. The most vital tip for achieving that perfect flakiness is to use very cold ingredients, especially butter. Grating the cold butter into the flour ensures that the butter remains in small, separate pieces, which then create those beautiful, airy layers as the pastry bakes. This technique minimizes handling and heat transfer, preserving the butter’s structure.
I strongly advise preparing the dough the night before you plan to bake these pastries. This extended refrigeration not only develops the flavor but, more importantly, makes the dough much easier to roll out without it sticking or tearing. It also contributes significantly to the dough’s ultimate flakiness by allowing the gluten to relax and the butter to firm up. Patience is a virtue in pastry making, so please allow ample time for the dough to chill properly before you proceed. This recipe yields enough dough for three delightful 8-inch braids, promising a truly rewarding baking experience. So, gather your butter and flour, and let’s embark on the journey of creating this incredible homemade pastry!
Ingredients for Braided Apple Hand Pies
For the Homemade Pie Dough:
- 1 ¾ cups all-purpose flour
- ½ tsp salt
- 1 ½ sticks (12 tablespoons) unsalted butter, very cold and cut into small pieces or grated
- ¾ cup ice-cold water (ensure no ice cubes are added, just the cold water)
For the Apple Filling & Topping:
- 1 (21oz) can apple pie filling (or homemade apple pie filling)
- 1 large egg, for egg wash
- 2 tsp water, for egg wash
- ¼ cup granulated sugar, for topping
- ¼ tsp ground cinnamon, for topping
Step-by-Step Instructions for Making Your Braided Apple Hand Pies
Part 1: Preparing the Flaky Pie Dough
Creating the perfect pie dough is the first crucial step for these hand pies. The key is to keep everything as cold as possible to achieve that desirable flaky texture.
- In a large mixing bowl, combine the all-purpose flour and salt. Whisk them together briefly to ensure the salt is evenly distributed throughout the dry ingredients.
- Take your very cold butter (which you’ve either cut into small pieces or grated for easier incorporation) and add it to the flour mixture. Using a pastry cutter, two knives, or your fingertips, work the butter into the flour until the mixture resembles a coarse meal with some pea-sized pieces of butter remaining. The goal is to keep the butter cold and distinct to create pockets of steam during baking, leading to flakiness. Avoid overworking the dough, as warmth from your hands can melt the butter and compromise the texture.
- Gradually add the ice-cold water to the flour and butter mixture. Stir with a wooden spoon or a sturdy spatula until just combined. The dough should come together but might still look a bit shaggy and not perfectly smooth. Be careful not to add too much water; just enough to bring the dough together into a cohesive mass. Remember, we only want the water, not ice cubes themselves.
- Gather the dough into a ball, gently flatten it into a disk, and wrap it tightly in plastic wrap. Refrigerate the dough overnight (or for a minimum of 8 hours). This chilling period is absolutely crucial: it allows the butter to firm up completely, preventing it from melting too quickly during rolling, and lets the gluten relax, which will make the dough much easier to roll out and incredibly flaky when baked.
Part 2: Assembling Your Braided Apple Hand Pies
Once your dough has had its beauty sleep in the refrigerator, it’s time to bring these hand pies to life!
- After the dough has chilled overnight, remove it from the refrigerator. On a lightly floured surface, gently shape the dough into an approximate 8-inch by 4-inch rectangle. Cut this rectangle into three equal pieces, each about 2 ½ inches wide. This will give you three individual portions for your hand pies.
- Working with one piece of dough at a time (keep the others wrapped and in the fridge if your kitchen is warm to prevent them from becoming too soft), roll it out into a thin 9-inch by 9-inch square. Aim for an even thickness throughout, approximately ⅛ inch thick, to ensure a tender and flaky crust.
- Very lightly mark the rolled-out square into three equal vertical strips, each approximately 3 inches wide. Use a knife to just score the surface; do not cut all the way through. These marks will serve as your guides for an even braid.
- Next, carefully remove the four outer corners of the dough, cutting them off so you are left with a central rectangle with strips extending from its sides. This step helps in creating the neat braided appearance.
- On the sides of the central dough, cut slanted lines inwards, creating strips for the braid. Be careful not to cut too far into the central filling area; only cut the outer portions. These strips should be roughly ½ to ¾ inch wide.
- Spoon about ⅓ of the canned apple pie filling down the center strip of the dough. Distribute it evenly, creating a neat mound, and leave a small border at the top and bottom of the filling to allow for proper sealing.
- Fold in the outer flaps (the top and bottom uncut portions) towards the filling and pinch down the corners firmly to seal the ends of the pie. This creates a secure base and prevents any filling from escaping during baking.
- Now for the braiding! Starting from one end, bring the cut strips over the filling one at a time, alternating from left to right, to form a beautiful braided pastry. Gently pinch the ends of each strip into the dough to seal them securely. This creates a visually appealing and securely sealed pie. Continue until all strips are used and the filling is fully enclosed.
- Once the braid is complete, trim off any excess dough from the ends and pinch down any openings to ensure the filling is fully enclosed and nothing leaks out during baking. Gently flatten and shape the pastry into an even, appealing braid.
- Place the finished braids onto a lightly floured tray or a baking sheet lined with parchment paper. Refrigerate the braids for at least 2 hours before baking. This final chill helps the pastry hold its intricate shape beautifully and contributes to an even flakier crust by allowing the butter to solidify again.
Part 3: Baking Your Golden Braided Apple Hand Pies
The final stage is to bake these beauties to golden perfection, creating a crunchy, sweet exterior and a warm, soft, spiced interior.
- After the assembled braids have chilled sufficiently, preheat your oven to 375 degrees F (190 degrees C). Prepare a baking sheet by lining it with parchment paper for easy cleanup and to prevent sticking.
- In a small bowl, beat one large egg with 2 teaspoons of water to create an egg wash. Carefully and generously brush the top and sides of each braided hand pie with this egg wash. This step is key for achieving a beautiful golden-brown sheen and helps the cinnamon sugar adhere to the crust.
- In another small bowl, combine ¼ cup of granulated sugar and ¼ teaspoon of ground cinnamon. Mix well. Sprinkle this mixture generously and evenly over the egg-washed braids. The cinnamon sugar will create a wonderfully sweet and crunchy topping that adds another layer of flavor and texture.
- Allow the braids to sit at room temperature for about 10 minutes before placing them into the preheated oven. This short rest allows the egg wash and cinnamon sugar to settle and adhere properly before baking.
- Bake for 20-30 minutes, or until the pastries are beautifully golden brown and the filling is bubbly. Baking time may vary slightly depending on your oven, so keep an eye on them towards the end. Once baked, transfer them to a wire rack to cool slightly before serving.
Tips for Perfect Braided Apple Hand Pies Every Time
- Keep it Cold: This is the golden rule for flaky pastry! Ensure your butter, water, and even your hands are as cold as possible when making the dough. If your kitchen is warm, you can pop the dough back into the fridge for 10-15 minutes if it starts to get too soft while you’re working with it.
- Don’t Overwork the Dough: Overworking develops gluten too much, leading to a tough crust instead of a tender, flaky one. Mix just until combined and handle gently.
- Even Filling Distribution: Spread the apple filling evenly down the center strip, leaving enough room at the edges and ends for proper sealing. Overfilling can lead to bursting during baking, ruining the beautiful braid.
- Secure Sealing: Pinch the dough firmly when sealing the ends and sides of the braid. A good seal prevents the delicious filling from bubbling out and creating a sticky mess. You can even use a fork to crimp the edges for extra security and a decorative touch.
- Double Chill for Success: Don’t skip the two chilling periods. The overnight chill for the dough is essential, and the second chill after assembling ensures the pies hold their intricate shape beautifully and bake evenly without spreading too much.
- Watch Your Oven: Ovens can vary widely. Keep an eye on your hand pies during the last 5-10 minutes of baking. If they’re browning too quickly on top, you can loosely tent them with aluminum foil to prevent over-browning while the crust finishes baking.
Variations & Serving Suggestions
These Braided Apple Hand Pies are fantastic as is, but feel free to get creative and customize them to your liking!
- Custom Fillings: While canned apple pie filling is incredibly convenient, you can easily use homemade apple filling, or explore other fruit fillings like cherry, peach, or mixed berry for seasonal delights. Just ensure your fruit filling isn’t excessively wet, as this might make the crust soggy. If using fresh fruit, you might need to pre-cook it slightly or toss it with a tablespoon of flour or cornstarch to absorb excess moisture.
- Add a Glaze: For an extra touch of sweetness and shine, drizzle a simple powdered sugar glaze (powdered sugar mixed with a little milk or lemon juice) over the cooled hand pies. This adds an elegant finish.
- Spice It Up: A pinch of nutmeg, allspice, or a tiny dash of cardamom can complement the cinnamon beautifully in your apple filling or cinnamon sugar topping, adding depth to the flavor profile.
- Serving Ideas: Enjoy these hand pies warm, perhaps with a generous scoop of vanilla bean ice cream or a dollop of fresh whipped cream for a more indulgent dessert experience. They also make a perfect grab-and-go breakfast treat or a delightful afternoon snack paired with a hot cup of coffee or tea. Their portability makes them ideal for picnics, potlucks, lunchboxes, or simply a sweet moment to yourself.
Storage Tips
To keep your delicious braided apple hand pies fresh, store any leftover baked pies in an airtight container at room temperature for up to 2-3 days. For slightly longer storage, you can refrigerate them for up to 5 days. You can gently reheat them in a toaster oven or a conventional oven (at 300°F/150°C for about 5-10 minutes) to bring back some of their crispness and warmth.
For longer-term storage, unbaked hand pies can be frozen. Once assembled and chilled according to the recipe, place them on a baking sheet and freeze until solid. Then, transfer them to a freezer-safe bag or container, separating layers with parchment paper, for up to 1 month. When ready to bake, you can either bake them from frozen, adding about 10-15 minutes to the baking time, or thaw them in the refrigerator first before proceeding with the egg wash and baking instructions. This is a great way to have fresh hand pies on demand!

Rate This Recipe
Pin Recipe
Braided Apple Hand Pies Recipe Card
Ingredients
For the Dough:
-
1 ¾ cups all-purpose flour
-
½ tsp salt
-
1 ½ sticks cold unsalted butter (12 tbsp), grated or cut into small pieces
-
¾ cup ice-cold water
For the Filling and Topping:
-
1 21oz can apple pie filling
-
1 large egg
-
2 tsp water (for egg wash)
-
¼ cup granulated sugar
-
¼ tsp ground cinnamon
Instructions
-
Prepare the Dough: In a large bowl, combine the flour and salt. Grate the cold butter into the flour, then use a pastry cutter or your fingers to cut the butter into the flour until the mixture resembles coarse meal with some pea-sized pieces of butter remaining.
-
Add the ice-cold water to the flour mixture and stir with a wooden spoon until just combined and the dough comes together. Cover the dough tightly with plastic wrap and refrigerate overnight (or for at least 8 hours).
-
Shape the Dough: After the dough has chilled overnight, remove it from the refrigerator. On a lightly floured surface, form the dough into an 8-inch by 4-inch rectangle. Cut it into three equal pieces, each approximately 2 ½ inches wide.
-
Working with one piece at a time, roll each piece of dough out into a thin 9-inch by 9-inch square. Keep unused dough chilled.
-
Prepare for Braiding: Lightly mark the square into three equal vertical lines, making three strips about 3 inches apart. Do not cut through; these are guides. Cut off the four outer corners of the dough.
-
Cut slanted lines into the sides of the dough, creating strips for braiding. Spoon about ⅓ of the apple pie filling down the center strip. Fold in the top and bottom outer flaps of the dough towards the filling and pinch the corners down firmly to seal.
-
Braid the Pies: Bring the cut side strips over the filling one at a time, alternating from left to right, to form a braided pastry. Pinch the ends of the strips into the dough to seal securely.
-
Trim off any excess dough and pinch down any openings. Slightly flatten and shape into an even braid. Place the assembled braids onto a lightly floured tray or parchment-lined baking sheet and refrigerate for at least 2 hours before baking.
-
Bake the Pies: After the dough has chilled, preheat your oven to 375°F (190°C). In a small bowl, beat 1 egg and 2 tsp water to make an egg wash. Brush the braids generously with the egg wash.
-
Combine ¼ cup granulated sugar and ¼ tsp ground cinnamon in a small bowl. Sprinkle this mixture over the egg-washed braids. Let the braids sit for about 10 minutes before placing them in the oven. Bake for 20-30 minutes, or until golden brown and bubbly.
