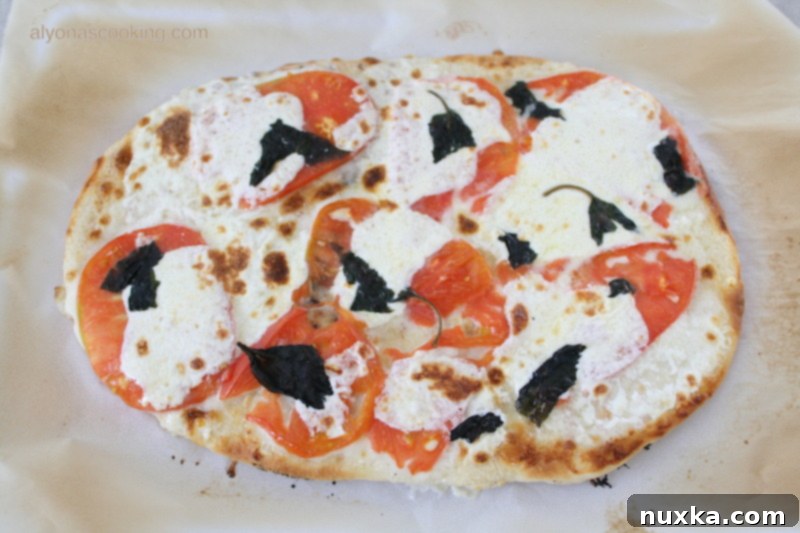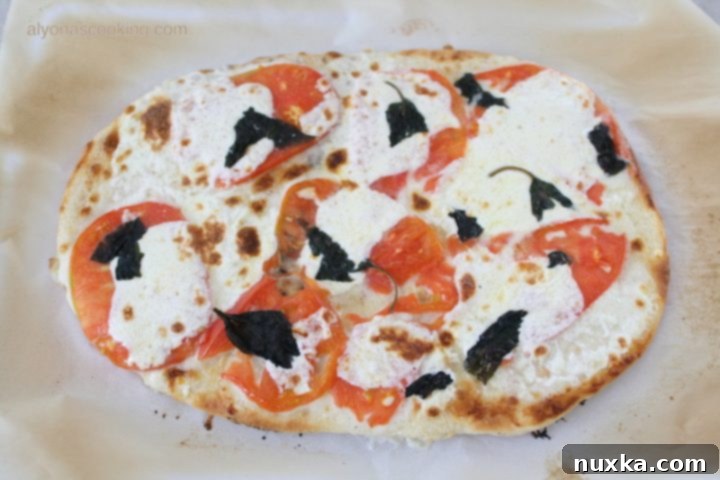
The Ultimate Guide to Perfectly Grilled White Pizza: A Gourmet Outdoor Experience
Prepare to elevate your pizza night with a culinary sensation that simply cannot be replicated in a conventional oven: Grilled White Pizza. This isn’t just a meal; it’s an experience, transforming a classic dish into something truly extraordinary. The magic happens on the grill, where the intense, direct heat works wonders on the pizza dough, creating a texture that is both incredibly fluffy on the inside and beautifully crisp on the outside, adorned with those coveted, smoky grill marks. The result is a gourmet taste that is as visually appealing as it is utterly delicious!
Many home cooks shy away from grilling pizza, assuming it’s overly complicated. However, with the right technique, it’s surprisingly straightforward and yields a superior pizza every single time. This detailed guide will walk you through each step, ensuring you achieve that perfect balance of a light, airy crust, perfectly melted cheese, and fresh, vibrant toppings. Say goodbye to soggy, uninspired oven-baked pizza and hello to a homemade masterpiece that will impress family and friends alike. Once you try grilled pizza, you may never go back to baking it in the oven.
Why Grill Your Pizza? Unlocking Unbeatable Texture and Flavor
The primary reason to choose grilling over traditional oven-baking for your pizza is the unparalleled texture and flavor it delivers. A conventional oven, no matter how hot, struggles to mimic the direct, radiant heat of a grill. When pizza dough hits a hot grill grate, it undergoes a rapid and remarkable transformation:
- Achieve a Crispy Exterior and Fluffy Interior: The high, direct heat instantly sears the outside of the dough, locking in moisture and creating a delightfully crispy, almost crackly crust. Simultaneously, the inside of the pizza dough quickly puffs up, resulting in a light, airy, and wonderfully chewy texture that’s reminiscent of a professional wood-fired oven. This crispy-chewy contrast is a hallmark of truly great pizza.
- Irresistible Grill Marks: Those distinct, slightly charred grill marks are not just for show; they add a subtle smokiness and a slight bitterness that beautifully complements the rich, creamy toppings. These visual cues are a signature of authentic grilled pizza and instantly elevate its appeal.
- Enhanced Flavor Profile: Beyond the captivating texture, grilling imparts a unique smoky flavor that subtly permeates the dough. This adds an incredible depth and complexity to your pizza that you simply can’t get from an indoor oven. This subtle charring and smoky essence elevates the entire dish, making it taste truly gourmet.
This recipe specifically yields three generous rectangular pizzas, each measuring approximately 15 by 10 inches. Our unique technique involves a crucial two-step cooking process: first, a quick grill of the dough to achieve those perfect grill marks and an initial fluffing, followed by a brief finish in the oven to perfectly melt the toppings. This innovative method prevents the delicate toppings from burning on the intense grill heat while ensuring the cheese is perfectly gooey and bubbly – the best of both worlds!
Essential Ingredients for Crafting Your Grilled White Pizza
A truly great pizza always starts with quality ingredients. For this classic grilled white pizza, we focus on fresh, vibrant flavors that shine through the elegant simplicity of the dish. While a comprehensive, detailed ingredient list is conveniently provided in the recipe card below, here’s a quick overview of the key components you’ll need to gather to begin your pizza-making adventure:
For the Homemade Pizza Dough: The Foundation of Flavor
Crafting your own pizza dough is often simpler than many people imagine, and it makes an enormous difference in the final product’s texture and taste. You’ll need just a few basic pantry staples:
- All-purpose flour: The backbone of our dough, providing structure.
- Warm water: Crucial for properly activating the yeast.
- Active dry yeast: The magical ingredient that makes our dough light and fluffy.
- Salt: Essential for enhancing the flavor of the dough.
- Sugar: A small amount aids yeast activation and helps the crust achieve a beautiful golden-brown color during grilling.
- Oil (preferably olive oil): Adds richness, elasticity, and contributes to a tender crumb.
Making your own dough allows for superior control over the texture and freshness, both of which are paramount for successful grilling. Even if you’re new to working with yeast, our step-by-step instructions will guide you confidently through the process.
For the Irresistible White Pizza Topping: A Symphony of Freshness
The inherent beauty of white pizza lies in its elegant simplicity and the way fresh, high-quality ingredients can create such profound flavor. Our carefully chosen toppings create a harmonious blend of creamy, fresh, and aromatic notes:
- White Sauce: The creamy canvas for our pizza. You can use your favorite homemade white sauce recipe (like a béchamel) or a good quality store-bought Alfredo sauce for convenience. For a lighter, brighter white pizza, a simple garlic-infused olive oil base can also be wonderfully delicious.
- Fresh Mozzarella Cheese: This is a non-negotiable! Opt for a ball of fresh mozzarella, thinly sliced. Its superior melt, delicate flavor, and creamy texture are absolutely essential for that perfect gooey bite and authentic white pizza experience. Avoid pre-shredded cheese, as it often contains anti-caking agents that hinder a smooth melt.
- Ripe Tomatoes: Thinly sliced large tomatoes add a burst of juicy freshness, a hint of acidity, and a beautiful pop of vibrant color. Roma tomatoes or other firm, ripe varieties work wonderfully for this purpose.
- Fresh Basil Leaves: A generous scattering of large, fresh basil leaves, ideally added just after the broiling process, provides an aromatic finish and a delightful touch of peppery sweetness that ties all the flavors together.
These simple yet powerful ingredients combine to create a classic, mouth-watering grilled white pizza that truly celebrates the art of outdoor cooking and fresh produce. Remember, freshness is key to maximizing the flavor of this exquisite dish!
Step-by-Step Guide: How to Master Your Grilled White Pizza
Follow these detailed instructions meticulously to create your grilled white pizza masterpiece from scratch. The process is thoughtfully divided into dough preparation, expert grilling techniques, and the final broiling step, ensuring a perfect and consistently delicious result every time.
1. Crafting the Perfect Pizza Dough
- Activate the Yeast: In a measuring cup or a small bowl, combine the specified amount of warm water with the dry yeast. Stir gently to dissolve, then let the mixture sit undisturbed for approximately 5-10 minutes. You’ll know the yeast is active and ready when the mixture becomes visibly foamy and bubbly on the surface. This indicates the yeast is alive and ready to work its magic.
- Combine Dry Ingredients: While the yeast is activating, add the all-purpose flour, sugar, and salt to the bowl of a stand mixer fitted with a dough hook attachment. Give these dry ingredients a quick whisk to ensure they are thoroughly combined and evenly distributed.
- Knead the Dough to Perfection: Pour the activated yeast mixture and the oil into the flour mixture in the stand mixer. Begin mixing on low speed, gradually increasing to medium-low. Allow the mixer to work its magic for a full 10 minutes. During this kneading process, the dough should come together and form a smooth, elastic ball, pulling away cleanly from the sides of the bowl. If you find the dough is too sticky, add a very small amount of additional flour (about a tablespoon at a time) until the desired consistency is achieved. Conversely, if it appears too dry, add a tiny bit more warm water.
- First Rise: Developing Flavor and Texture: Once the dough has formed a cohesive ball, lightly grease the mixer bowl or a separate clean bowl. Transfer the dough ball into the greased bowl, turning it once to ensure it’s lightly coated with oil on all sides. Cover the bowl tightly with plastic wrap or a clean kitchen towel. Allow the dough to rise in a warm, draft-free place for approximately one hour, or until it has visibly doubled in size. This crucial step is vital for developing the dough’s rich flavor and achieving that desired light, fluffy texture.
- Divide and Shape: Once the dough has successfully risen, gently punch it down to release the accumulated air. Transfer the dough onto a lightly floured surface. Using a sharp knife or dough scraper, divide the dough into three equal pieces. Neatly shape each piece into a smooth, compact ball.
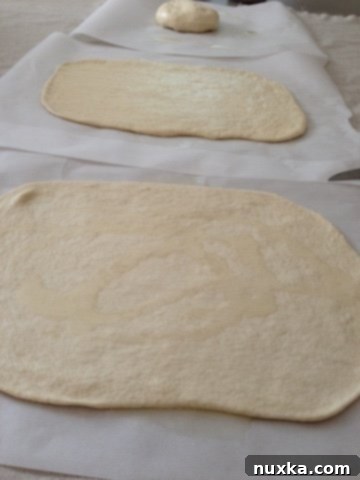
- Roll Out the Dough: Using a rolling pin, carefully roll out each individual dough ball into a rectangular shape, aiming for dimensions of roughly 15 inches by 10 inches. Strive for an even thickness across each piece of dough to ensure consistent cooking.
- Prepare for Second Rise: Place each rolled-out piece of dough onto its own piece of generously greased parchment paper. Lightly grease the tops of the dough with a little olive oil and sprinkle with a pinch of salt. This prevents them from drying out and adds a subtle flavor note to the crust.
- Second Rise: Allow these rolled-out dough pieces to rest and rise gently on their parchment papers for an additional 25 minutes. This brief second rise helps to further relax the gluten and encourages a lighter, airier crust texture during grilling.

2. Prepping Toppings and Preheating the Grill
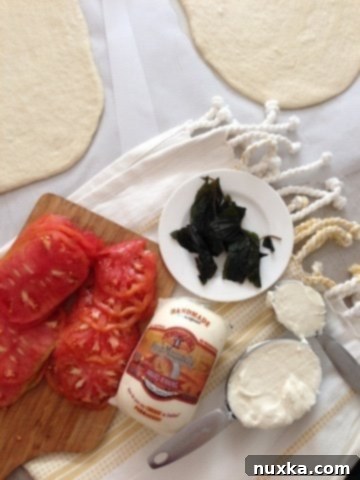
While your expertly prepared dough is enjoying its second rise, it’s the opportune moment to meticulously prepare your toppings and get your grill perfectly ready. Preheat your grill to medium heat, aiming for a consistent temperature around 300-350 degrees F (150-175 degrees C). For white pizza, the emphasis is on fresh, high-quality ingredients that truly shine:
- Ensure your fresh mozzarella is thinly sliced for optimal melting.
- Prepare your large tomatoes by slicing them into even, thin rounds.
- Have your vibrant fresh basil leaves ready for a fragrant garnish.
- Make sure your chosen white sauce (Alfredo or your homemade alternative) is easily accessible and ready to spread.
3. Grilling the Pizza Dough: The Heart of the Process
This is where the magic truly begins! Work diligently with one piece of dough at a time to ensure even cooking and prevent any overcrowding on the grill grates. Maintain consistent heat throughout this process.
- Careful Transfer to Grill: Gently place one piece of dough, still on its parchment paper, onto a large, flat tray. Carefully bring the tray containing the dough to your preheated grill.
- First Side Grill: With the grill thoroughly preheated to medium (around 300-350°F or 150-175°C), carefully slide the dough, parchment paper side up, directly onto the clean grill grates. Immediately and with utmost care, peel off the parchment paper, discarding it. Grill this first side of the dough for approximately one minute. Keep a very close eye on it during this crucial minute; you should observe small bubbles forming on the surface, and the underside will begin to develop those coveted, smoky grill marks. Do not leave the dough unattended, as it can burn very quickly on direct heat.
- Second Side Grill: Using a sturdy spatula or a pair of tongs, gently but confidently flip the dough over to grill the second side. Grill for another minute. The dough should not stick to the grill if it is adequately hot and the grates were properly cleaned and oiled. This quick, initial grill creates a stable, partially cooked base that is perfectly ready to receive your delicious toppings without becoming soggy or burnt.
- Stack Grilled Dough: Once both sides of the dough have been grilled to achieve a light golden hue and visible grill marks, carefully transfer the partially cooked dough to a large, clean tray. Repeat this precise grilling process for the remaining two pieces of dough. Remember to turn off the grill once all three pieces of dough are perfectly grilled.

4. Assembling and Broiling to Perfection: The Final Touches
Now it’s time to add your exquisite toppings and finish the pizza in the oven, ensuring a flawless melt and a golden crust.
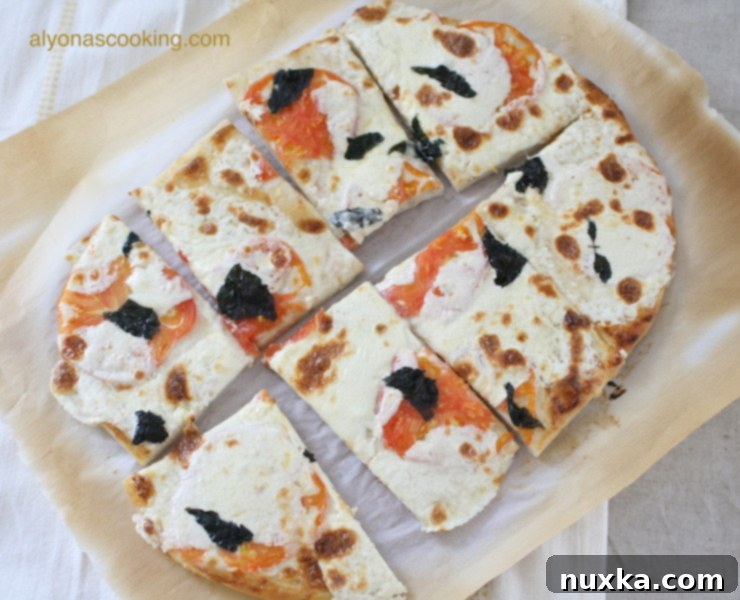
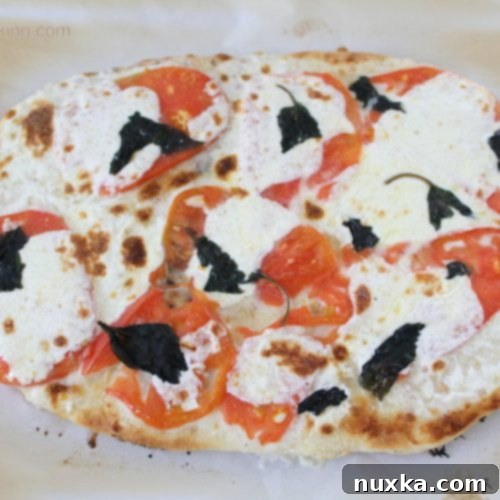
- Arrange Toppings: Preheat your oven broiler to high. Place one grilled dough piece back onto a clean piece of parchment paper on a baking sheet. Evenly spread approximately 1/3 cup of your chosen white sauce over the dough, ensuring good coverage. Then, artfully arrange the thinly sliced tomatoes and fresh mozzarella cheese over the sauce. Finish with a scattering of a few fresh basil leaves.
- Broil to Perfection: Carefully transfer the baking sheet to the middle rack of your preheated oven. Broil for approximately 7 minutes, or until the cheese is beautifully melted, bubbly, and slightly golden in spots, and the crust looks perfectly cooked and lightly browned. The exact broiling time may vary depending on your oven, so keep a watchful eye to prevent burning. Repeat this topping and broiling process for the remaining pizzas.
- Serve Immediately: Once the toppings have melted to absolute perfection and the pizza is bubbling enticingly, carefully remove it from the oven. Allow it to cool for just a minute or two before slicing into generous portions and serving. Savor the incredible aroma and the exquisite taste of your freshly homemade grilled white pizza!

Tips for a Crispier Crust and Convenient Freezing Options
We understand that pizza preferences can vary, and we’ve got you completely covered whether you desire a truly crispy crust or wish to make your delicious creations ahead of time and freeze them for later enjoyment. These tips will help you customize your grilled pizza experience.
Achieving an Extra Crispy Crust:
If your ideal pizza involves an even firmer, crispier crust, you can easily adjust the baking method slightly after the initial grilling. After grilling each piece of dough to obtain those essential grill marks and initial fluff, instead of immediately broiling, roll out each piece of dough an additional few inches longer than specified. Then, transfer them to a preheated oven set to 400 degrees F (200 degrees C) and bake for 10-15 minutes, or until the crust is beautifully golden brown and achieves your desired level of crispness. This slightly longer, consistent bake at a moderate temperature will yield a firmer, crunchier base without the risk of overcooking your delicate toppings. This method is a fantastic option for those who prefer a more substantial, cracker-like crust.
Freezing for Future Enjoyment:
One of the most appealing features of this grilled pizza recipe is how incredibly well it freezes, making it an excellent choice for efficient meal preparation, effortless entertaining, or simply for quick, delicious weeknight dinners. Here’s how to properly freeze and reheat your grilled pizzas:
- Cool the Dough Completely: After the initial grilling process (where you achieve those crucial grill marks and the dough puffs up), it is absolutely critical to allow the grilled dough to cool down completely to room temperature. This step is vital to prevent the formation of ice crystals, which can negatively impact the texture of the pizza upon reheating.
- Assemble Toppings (Unbaked): Once the grilled dough is thoroughly cooled, proceed to arrange all your preferred toppings (white sauce, cheese, tomatoes, etc.) on each pizza base. At this stage, do not bake them.
- Wrap and Freeze Securely: Cover each fully topped, unbaked pizza tightly with multiple layers of plastic wrap, and then with a layer of heavy-duty aluminum foil to create an airtight seal. This double-wrapping technique is essential to prevent freezer burn and maintain freshness. If you plan to freeze multiple pizzas, you can stack them with additional sheets of parchment paper in between to prevent sticking, provided you have adequate freezer space to keep them flat until solid. Freeze them flat until they are completely solid.
- Baking from Frozen: When you’re ready to indulge in a delicious frozen grilled pizza, preheat your oven to 400 degrees F (200 degrees C). Remove the pizza from all its wrapping and place it directly on a baking sheet or a preheated pizza stone. Bake for approximately 20 minutes, or until the toppings are nicely melted, bubbly, and the crust is golden brown and heated through. This convenience means you can enjoy gourmet grilled pizza any day of the week, with minimal effort!
Common Questions & Troubleshooting for Your Grilled Pizza Adventure
Even seasoned grill masters encounter challenges, but with these tips, your grilled pizza will be a consistent success:
- Why is my dough sticking to the grill? This is a common issue! Ensure your grill grates are meticulously clean and thoroughly oiled before placing the dough. Additionally, confirm that the grill is sufficiently hot. If the dough isn’t releasing easily after about a minute, it might need an extra 15-30 seconds to cook and firm up slightly on the surface.
- My dough burned too quickly! If your dough is charring excessively or burning before developing proper grill marks, your grill might be too hot. Reduce the heat setting to medium. Remember, the goal during the initial grilling phase is a quick sear and the development of attractive grill marks, not deep charring or burning.
- Can I use store-bought pizza dough? Absolutely! While our homemade dough recipe offers the best texture and flavor, a good quality, fresh store-bought pizza dough can certainly be used as a convenient alternative. Just follow the shaping, rising, and grilling steps as outlined in this guide.
- What if I don’t have a stand mixer? No stand mixer? No problem! You can easily knead the dough by hand. This will require about 15-20 minutes of vigorous kneading on a lightly floured surface until the dough becomes smooth, elastic, and passes the windowpane test (stretches thin without tearing).
- Can I add other toppings to my white pizza? Of course! White pizza is incredibly versatile. It pairs wonderfully with a variety of additional ingredients such as caramelized onions, sautéed spinach, dollops of creamy ricotta cheese, roasted garlic cloves, or even delicate slices of prosciutto (added just after broiling for best results). Feel free to experiment and customize your white pizza to suit your taste!
This comprehensive recipe transforms the humble pizza into an extraordinary grilled culinary delight, perfect for memorable summer evenings, casual gatherings, or anytime you crave that unique smoky flavor and an impossibly perfect crust. Don’t be intimidated by the grill; it’s easier than you think, and the delicious rewards are absolutely worth every moment of effort! We highly encourage you to try this method and discover your new favorite way to make pizza at home.
Rate
Pin
Grilled White Pizza
Ingredients
-
Pizza Dough:
-
3 1/2 cups of all-purpose flour
-
1 1/2 cups of warm water
-
1 1/2 tbsp of dry yeast
-
3/4 tbsp of salt
-
1 tsp of sugar
-
3 tbsp of oil
-
TOPPING INGREDIENTS:
-
1 1/4 cups of white sauce (your favorite white sauce recipe or alfredo sauce)
-
2 large tomatoes (thinly sliced)
-
10-15 large fresh basil leaves
-
1 16oz ball of fresh mozzarella cheese (thinly sliced)
Instructions
-
Combine warm water and yeast in a measuring cup and let sit until foamy (about 5-10 minutes).
-
In the bowl of a stand mixer, combine the flour, salt, and sugar. Add the activated yeast mixture and oil. Mix on low speed for 10 minutes, adding a little more flour if necessary until the dough forms a ball and no longer sticks to the sides of the bowl.
-
Cover the bowl and let the dough rise in a warm place for about an hour, or until it has doubled in size.
-
Remove the risen dough from the bowl and transfer it to a lightly floured surface. Cut the dough into three equal pieces and shape each into a smooth ball.
-
Roll out each dough ball into a 15″ by 10″ rectangle. Place each rolled-out dough piece onto a greased piece of parchment paper. Lightly grease the tops of the dough and sprinkle with a little salt.
-
Allow the dough to rise on the parchment papers for 25 minutes.
-
While the dough is rising, prepare all your pizza toppings (slice mozzarella, tomatoes, etc.) and preheat your grill to medium heat (approximately 300-350°F / 150-175°C).
-
Working with one piece of dough at a time, place the dough (with its parchment paper) onto a large tray and bring it to the grill.
-
Place the dough onto the preheated grill, top-side down, and immediately peel off the parchment paper.
-
Grill one side for about one minute, or until bubbles form and grill marks appear. Flip the dough using a spatula and grill the second side for another minute. Watch carefully to prevent burning.
-
Stack the grilled dough pieces on a large tray. Turn off the grill once all three pieces have been grilled.
-
Preheat your oven broiler. Place one grilled dough piece back on parchment paper on a baking sheet. Spread with approximately 1/3 cup of white sauce. Arrange with sliced tomatoes and fresh mozzarella cheese, then garnish with basil. Broil in the oven (middle rack) for about 7 minutes, or until the toppings are nicely melted and bubbly. Repeat for the remaining pizzas.
-
Carefully remove from the oven, slice, and serve your delicious Grilled White Pizza immediately!
