Ultimate Homemade Salsa Canning Recipe: Preserve Fresh Flavors All Year!
There’s nothing quite like the vibrant taste of homemade salsa, especially when it’s crafted from the freshest garden ingredients. Imagine being able to enjoy that incredible flavor long after the growing season ends. This ultimate homemade salsa canning recipe is your ticket to year-round freshness! Made with ripe tomatoes, zesty peppers, pungent onions, and a perfect blend of Mexican spices, this recipe isn’t just delicious – it’s also surprisingly easy, making it ideal for beginners eager to dive into the rewarding world of food preservation.
Canning homemade salsa allows you to capture the peak flavors of summer and store them safely on your pantry shelf, ready to be enjoyed whenever a craving strikes. Forget store-bought jars; once you taste this fresh, flavorful, and perfectly balanced homemade version, you’ll never go back. Get ready to transform your harvest into a staple condiment that will elevate countless meals and snacks!
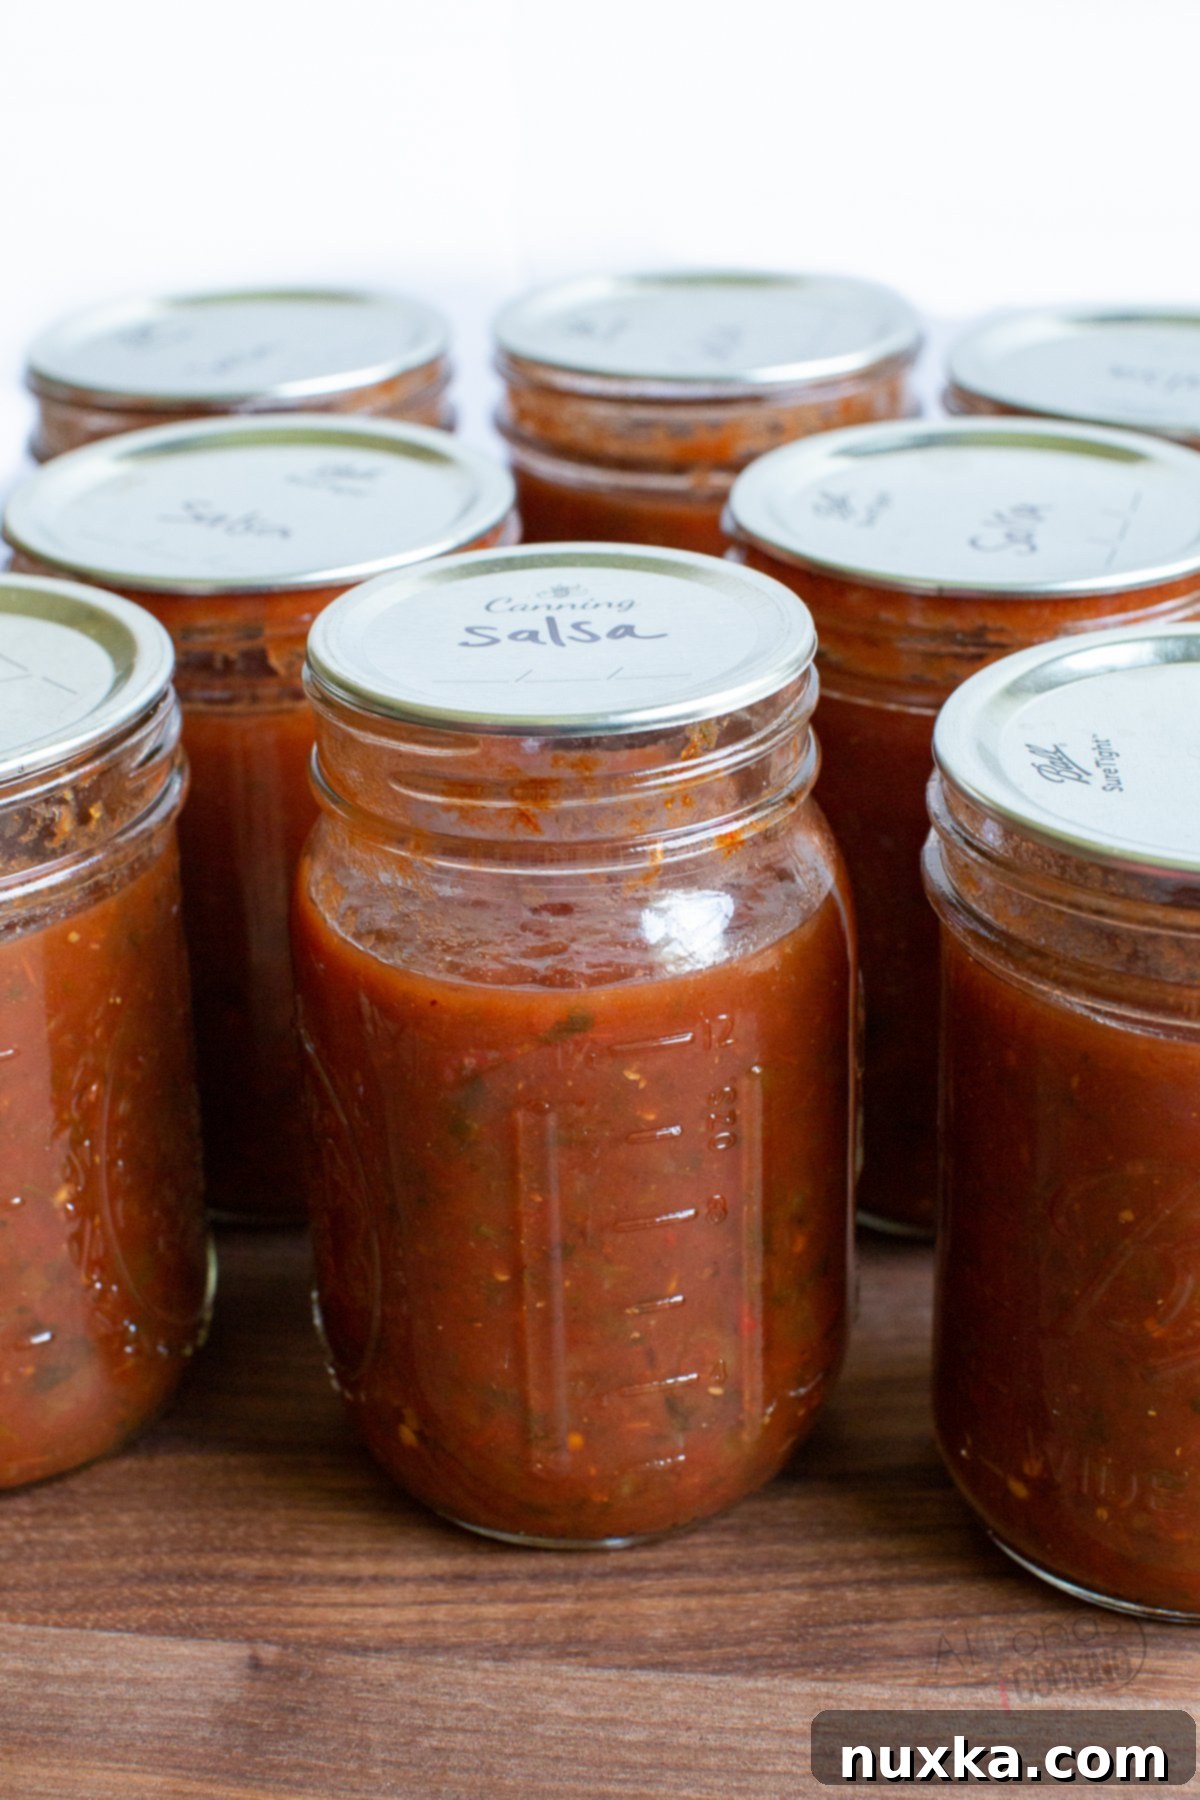
Homemade salsa isn’t just a delicious dip; it’s an incredibly versatile ingredient that can transform a wide array of dishes. Imagine topping a hearty Breakfast Casserole with a spoonful of your fresh, zesty salsa, or stirring it into a Dorito Taco Salad for an explosion of flavor. The possibilities are truly endless! Use it to brighten up classic Mexican dishes like enchiladas, or serve it alongside savory fiesta potatoes. For a quick and comforting meal, stir a generous amount into your favorite chili. It’s also an essential topping for chipotle-style burrito bowls with rice, or simply served with plain corn tortilla chips for an irresistible snack. This shelf-stable condiment is truly a kitchen must-have!
What is Salsa? Exploring its Rich History and Versatility
Salsa, meaning “sauce” in Spanish, is much more than just a dip. It’s a cornerstone of Mexican cuisine, traditionally served as an accompaniment to tortilla chips and a variety of Mexican dishes. Its origins date back to the Inca empire, where early versions were made with tomatoes, chili peppers, and other regional ingredients. Over centuries, salsa evolved, adapting to local tastes and available produce, eventually becoming the global sensation it is today.
While often associated with tacos, chips, and burritos, its culinary applications extend far beyond. You can effortlessly stir salsa into soups for an added layer of depth, pack it into savory burritos for a burst of freshness, or even use it as a base for meat dishes like flavorful salsa chicken. Beyond savory uses, sweet tomato-based fruit salsas, like our delightful Peach Mango Salsa, are absolutely incredible paired with fish, such as this exquisite Fish with Mango Salsa. Don’t limit yourself – use salsa as a vibrant condiment for taco pizza, a flavorful addition to scrambled eggs, or even as a base for marinades. Its dynamic flavor profile makes it an indispensable ingredient in any kitchen!
Canning Homemade Salsa: Your Gateway to Year-Round Flavor
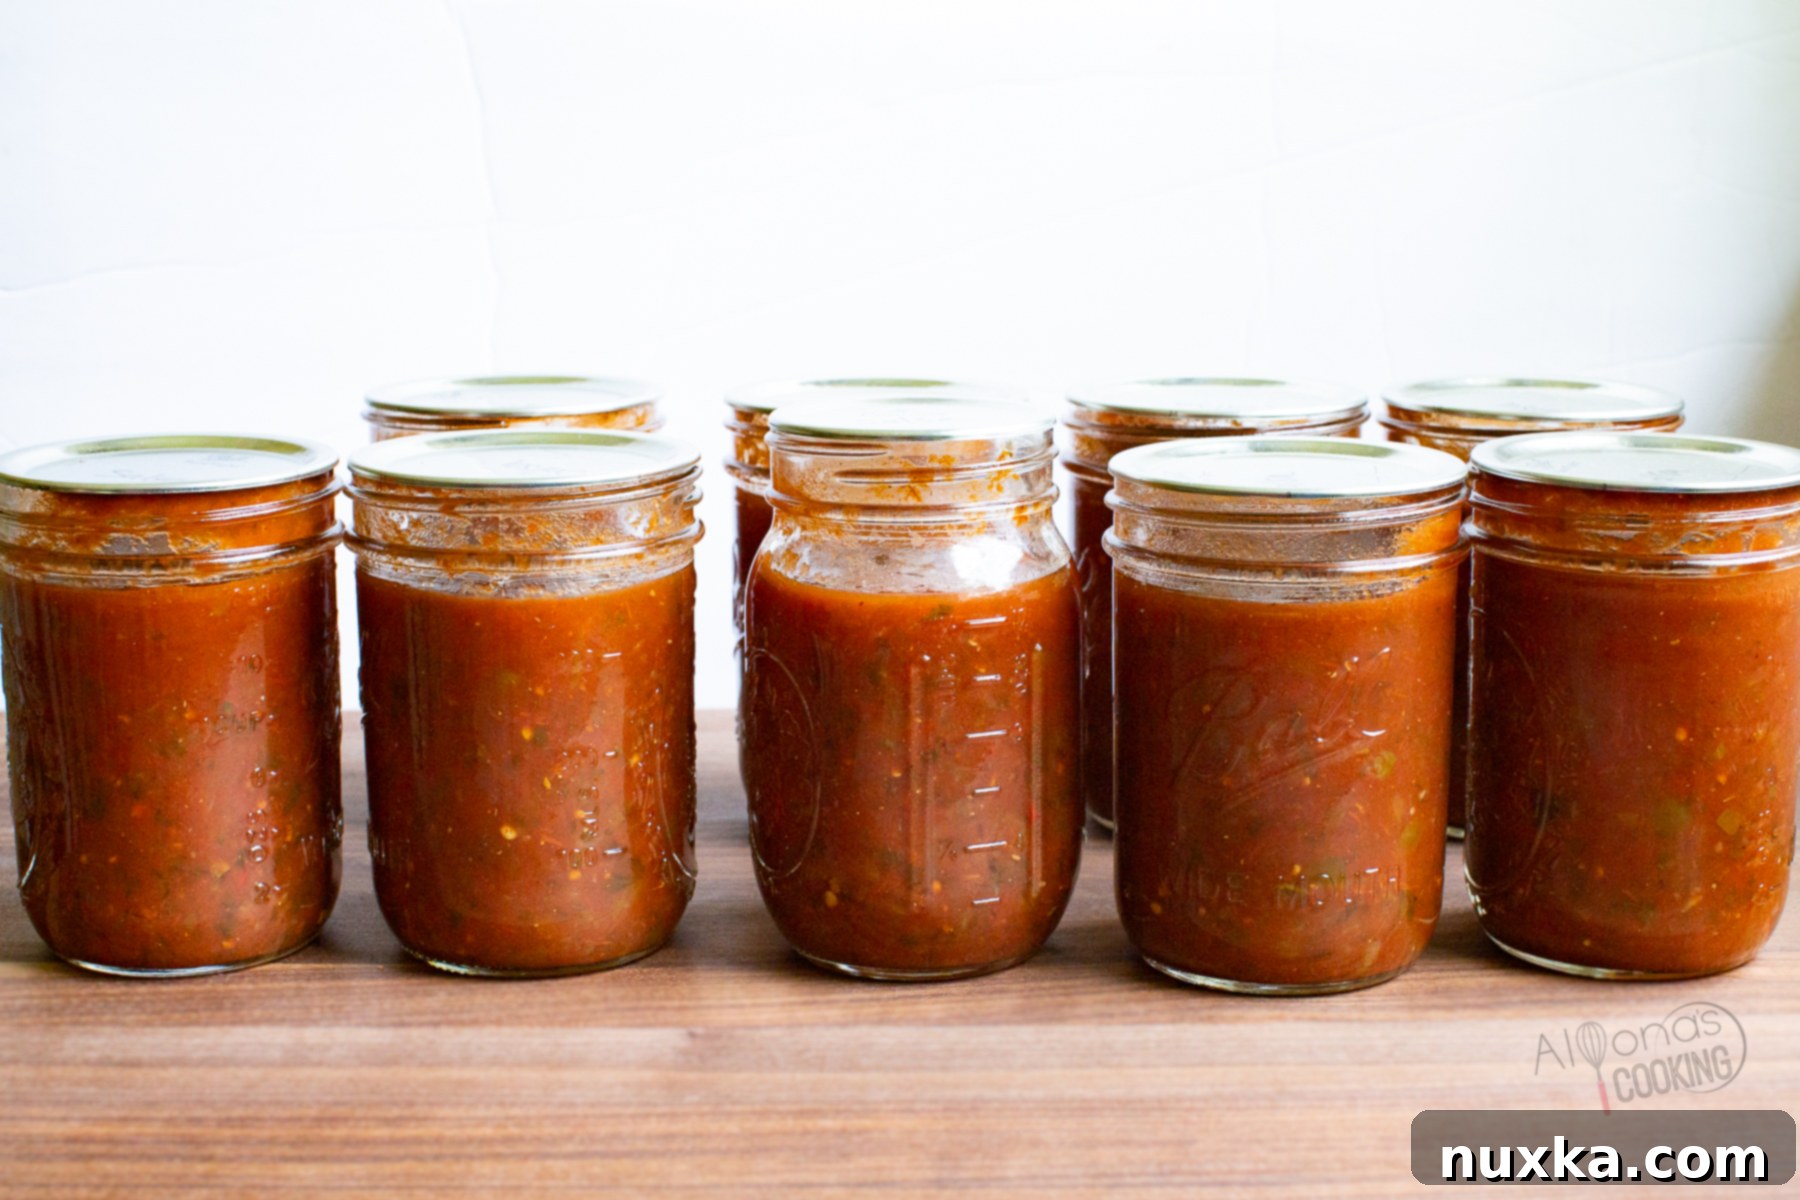
This isn’t just a salsa recipe; it’s the best salsa recipe for canning! Its exceptional flavor profile means you can capture the essence of peak-season freshness and enjoy it all winter long. The magic lies in the simple yet effective boiling water canning method, which allows you to open a jar of vibrant, homemade salsa any time of the year, regardless of what’s growing in your garden.
Canning salsa is a brilliant and economical method for food preservation. Thanks to the naturally high acidity of tomatoes, combined with the added vinegar in this recipe, salsa is perfectly safe for water bath canning. This eliminates the need for more complex pressure canning equipment, making it highly accessible for home cooks. Water bath canning provides an extended shelf life, allowing your delicious salsa to be stored in the pantry without refrigeration for months, even years. This process is similar to the trusted guidelines set by Ball canning, requiring a processing time of approximately 20 minutes.
My personal journey with this salsa began when a friend brought a jar to a church potluck, serving it alongside a fantastic breakfast casserole. One taste and I was hooked! It turned out she had been perfecting this recipe for over 15 years, and now I have the immense pleasure of sharing her time-tested secret with you. I’ve tried countless salsa recipes, from mild Picante styles to robust Tostitos-esque versions, but this one consistently stands out as a true keeper, delivering 100% satisfaction every single time. It’s truly a testament to the power of fresh ingredients and a well-balanced blend of spices.
Choosing the Best Tomatoes for Your Canned Salsa
The foundation of an exceptional salsa begins with the right tomatoes. For canning, “sauce tomatoes” like plum varieties (such as Roma, Amish Paste, or San Marzano) are often considered superior due to their meaty flesh, low seed content, and minimal water, which results in a thicker, richer salsa. However, don’t feel limited! Any large, robust homegrown tomato can yield fantastic results. High-yielding varieties from a single vine, like an “Early Girl,” or other off-the-vine varieties are excellent choices for their abundance and ease of preparation.
Heirloom tomatoes are also a wonderful option for the home gardener, as their non-hybrid nature allows you to save seeds year after year, preserving unique flavors and varieties. When selecting tomatoes, aim for larger sizes to simplify processing and canning – nobody wants to deal with a mountain of tiny cherry tomatoes! While this recipe focuses on red salsa, unripe green tomatoes are specifically prized for making vibrant salsa verde (green salsa) or tangy tomatillo salsa. For this particular red salsa recipe, any average-sized, ripe red tomato from your garden or farmer’s market will contribute beautifully to its overall flavor and texture.
Understanding Different Types of Salsa: Pico de Gallo vs. Canned Salsa & More
The world of salsa is diverse and delicious, and understanding the nuances between different types can enhance your culinary experience. Often, people wonder about the distinction between Pico de gallo and regular salsa, or what exactly Salsa Fresca entails. Let’s break it down:
- Pico de Gallo (Salsa Fresca): This literally translates to “rooster’s beak” and is a type of fresh salsa. It’s characterized by its raw, uncooked ingredients, typically diced tomatoes, onions, cilantro, and jalapeños, with a squeeze of lime juice. Its chunky texture and vibrant, raw flavors make it a favorite for scooping with chips or topping tacos where a fresh, crisp element is desired.
- Salsa (Canned Condiment Sauce): This term generally refers to a more processed sauce, often cooked, and designed for longer storage. The salsa we’re canning in this recipe falls into this category. It has a smoother, more integrated flavor profile due to the cooking process, making it perfect for dipping, cooking, or serving as a robust condiment.
- Restaurant-Style Salsa: Often found in your favorite Mexican eateries, this salsa is typically made from pureed canned tomatoes and chiles. It tends to have a smoother consistency than Pico de Gallo and often a more consistent, slightly smoky flavor profile due to the use of roasted or canned ingredients.
- Salsa Ranchera: This is a distinctive roasted tomato salsa, where tomatoes and sometimes chiles are roasted before being blended. The roasting process imparts a deep, smoky, and slightly sweet flavor that sets it apart.
Each type offers a unique “umami” flavor and texture, serving different purposes in the kitchen. However, for sheer convenience and the ability to savor that fresh garden taste year-round, my ultimate favorite is undoubtedly this style of canned salsa made with fresh tomatoes.
Essential Salsa Ingredients: Building Layers of Flavor
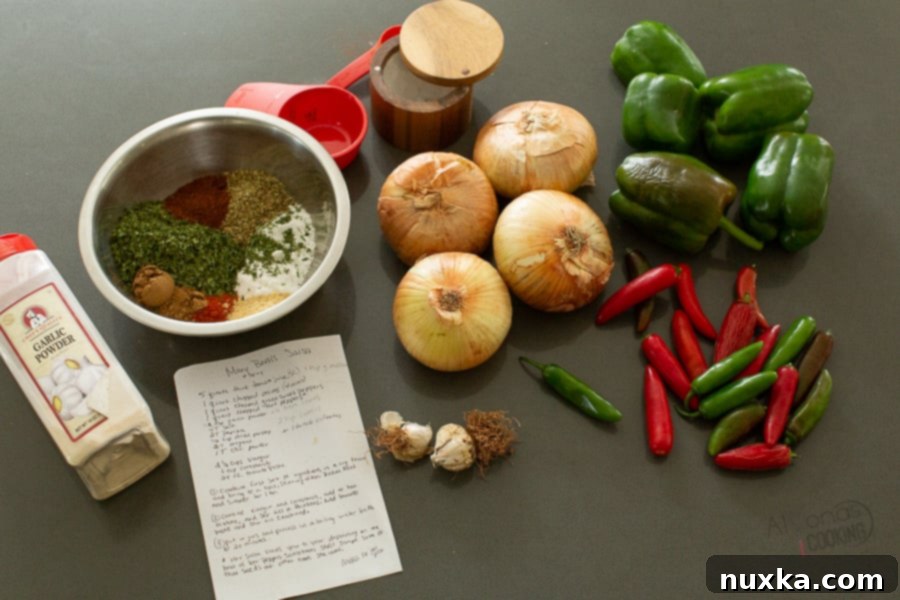
The beauty of this salsa recipe lies in its use of foundational, fresh ingredients that, when combined with key spices, create an explosion of authentic Mexican flavor. You’ll start with a robust tomato base, complemented by plenty of fresh green peppers and vibrant jalapeños.
- Tomato Base: Your journey begins with good quality tomatoes. While fresh is ideal, you can also use high-quality canned tomatoes or even bottled tomato juice. The key is to get a rich, flavorful tomato pulp. Towards the end of the cooking process, we’ll introduce tomato paste, which acts as a fantastic natural thickener, giving your salsa that perfect body.
- Onions: Onions provide a crucial pungent and aromatic base. For a batch of this size, you’ll need approximately 4-5 medium-large onions, yielding about a quart of finely chopped goodness. They mellow beautifully during cooking, infusing the salsa with a sweet and savory depth.
- Green Bell Peppers: These “sweet peppers” add a crisp, fresh flavor and a beautiful green hue without any heat. I prefer the green variety for salsa as they are unripe and offer a slightly less sweet, more earthy flavor compared to their red or orange counterparts, which can sometimes dominate the spice profile.
- Hot Peppers: This is where you control the heat! Jalapeño peppers are a classic choice, offering a moderate kick. For this recipe, I used a mix of homegrown jalapeños, some green and some ripened to red, which adds complexity. If you prefer a milder salsa, opt for poblano peppers, which have a very gentle heat. For those who crave intense spice, consider habanero or Serrano peppers, but be warned – Serranos are significantly hotter than jalapeños!
- Garlic: Both fresh garlic cloves and a touch of dried garlic powder are used here. Fresh garlic provides a sharp, aromatic burst, while garlic powder offers a more mellow, integrated flavor that complements the other spices beautifully.
- Mexican Spices: A thoughtful blend of spices is what transforms a simple tomato mixture into authentic Mexican salsa. This recipe utilizes garlic powder, salt (preferably pickling or sea salt), paprika for color and subtle sweetness, cumin for its distinctive earthy warmth, dried parsley, oregano for herbaceous notes, ground mustard for a slight tang, and chili powder for a foundational spicy depth. If available, a bunch of fresh or frozen cilantro adds an unbeatable fresh, bright finish.
- White Distilled Vinegar: Beyond flavor, vinegar is a critical ingredient for safe canning. White distilled vinegar, with its consistent 5% acidity, lowers the pH of the salsa, making it safe for water bath canning. This acidity prevents the growth of harmful bacteria and contributes to the salsa’s tangy profile.
Note: To achieve a truly hot salsa, don’t hesitate to incorporate more potent chili peppers like habanero, ghost peppers, or your personal favorite super-hot variety. Always adjust to your preferred spice level!
How To Make Homemade Salsa for Canning: A Simple Step-by-Step Guide
You don’t need any special “salsa classes” to master this homemade salsa recipe for canning. It’s designed to be straightforward, even for beginners! The key is to start with high-quality fresh ingredients and invest in a sturdy, heavy-bottomed stockpot. I highly recommend using a 24-quart Stockpot, which is perfectly sized to handle a bushel of tomatoes. While smaller pots work for smaller batches, a large stockpot is invaluable for processing generous quantities efficiently.
- Prepare Your Fresh Tomatoes: Begin by thoroughly washing all your fresh tomatoes. Trim away any rough skins, stems, or bruised spots. Then, quarter them and place them directly into your large stockpot. There’s no need to peel or de-seed them for this recipe – the seeds and pulp contribute to the salsa’s rich flavor and thick texture, especially when blended.
- Cook Down and Blend Tomatoes: Place the stockpot over medium heat and bring the quartered tomatoes to a gentle boil. As they heat, they will soften and release their juices, becoming mushy. Once they’ve reached this soft consistency, use an immersion (stick) blender directly in the pot to blend the tomatoes until smooth, creating a thick tomato pulp. If you don’t have a hand blender, you can carefully transfer batches of the cooked tomatoes to a standard blender and puree them, then return the pulp to the stockpot.
- Add Vegetables and Spices, Then Simmer: To the blended tomato base, add your pre-chopped onions, green bell peppers, hot peppers (like jalapeños), minced fresh garlic, and all the dry spices (garlic powder, sea salt, paprika, cumin, dried parsley, oregano, chili powder, and ground mustard). Stir everything together thoroughly. Bring the mixture back to a boil, then reduce the heat to a gentle simmer. Allow the salsa to cook down for approximately 1 hour, stirring occasionally to prevent sticking and ensure even cooking. This simmering process allows the flavors to meld and intensify.
- Thicken with Tomato Paste: After the initial hour of simmering, stir in the tomato paste. This will further thicken the salsa, giving it a rich, substantial consistency that’s perfect for canning. Add the fresh or frozen cilantro (if using) and stir to combine. Bring the salsa back to a final boil to ensure it’s piping hot before canning.
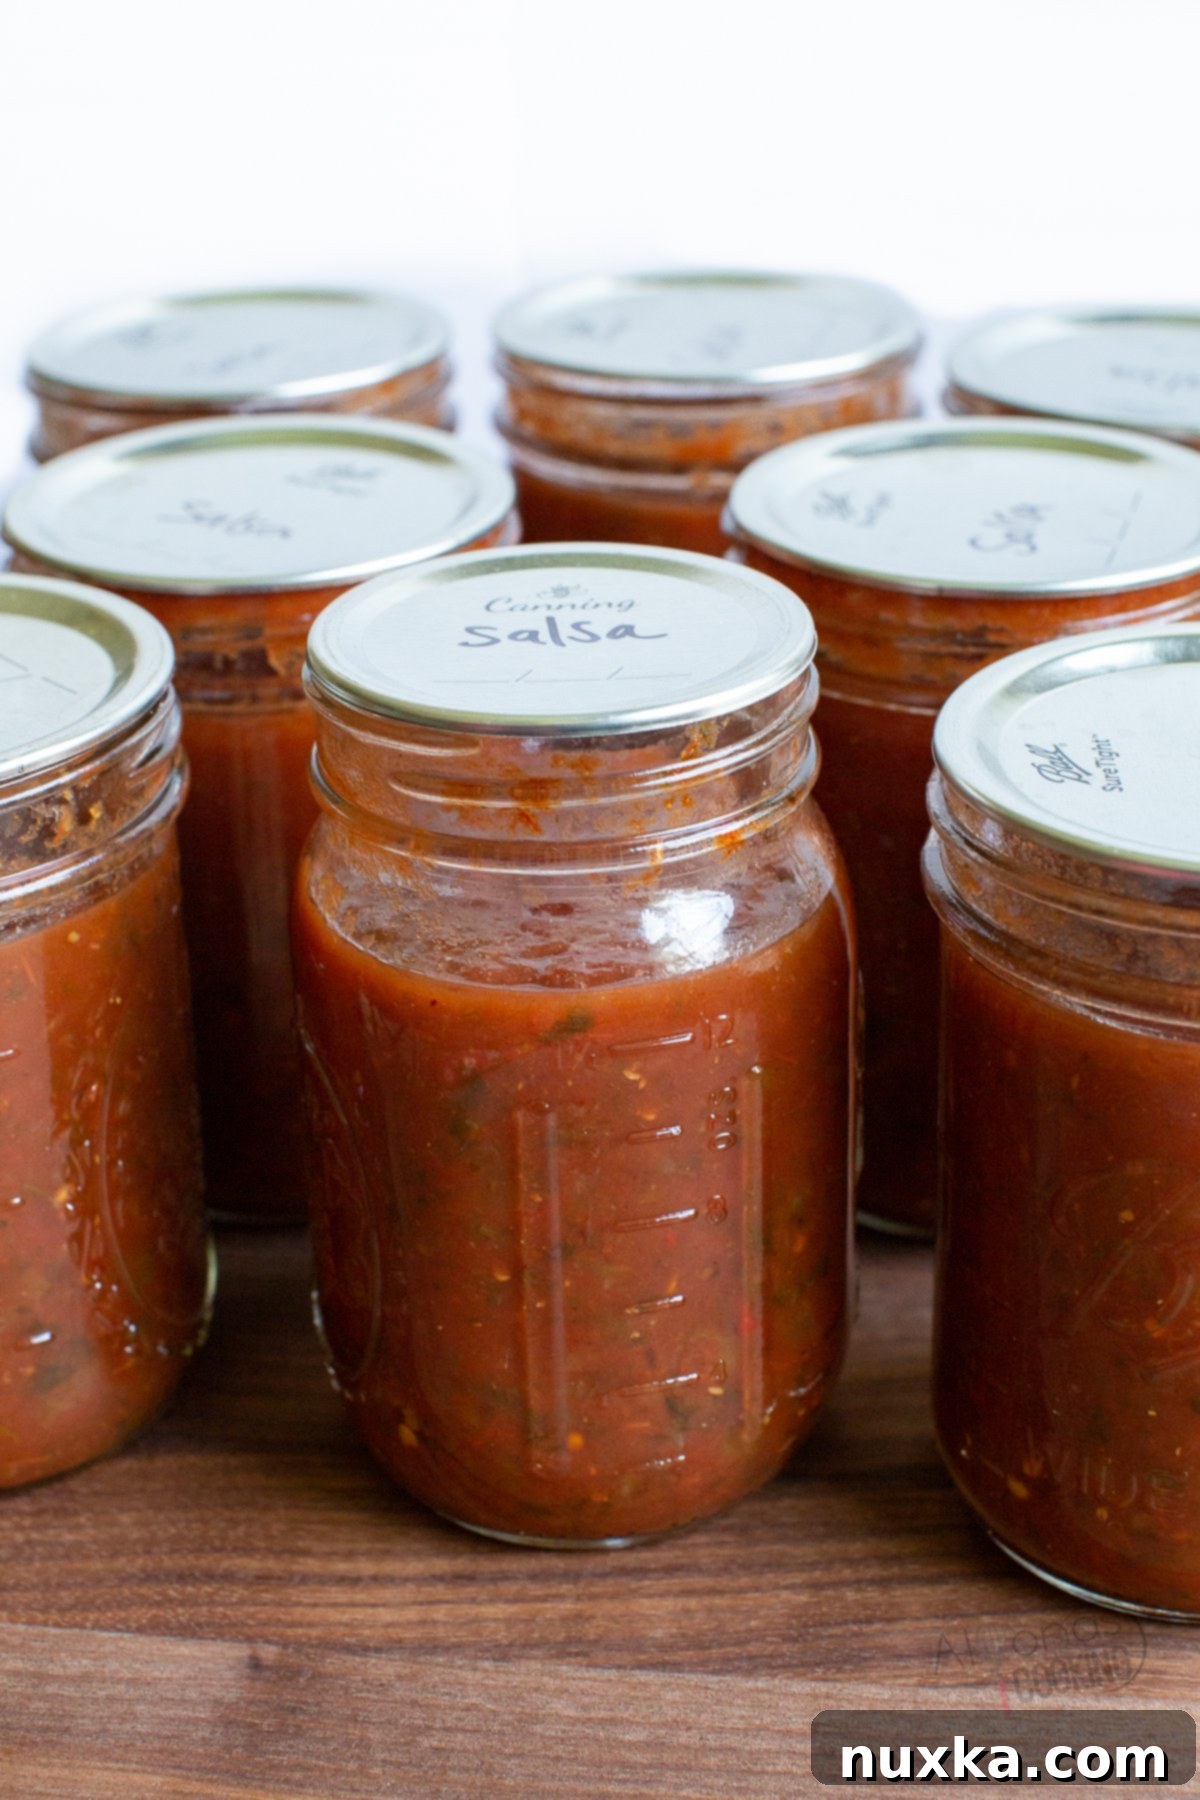
- Pack and Process Jars: While your salsa is simmering, prepare your canning jars. Ensure they are clean and warm. Carefully ladle the hot salsa into the prepared pint-sized canning jars, leaving about 1/2 inch of headspace (the space between the top of the food and the rim of the jar). Wipe the rims clean, center the lids, and apply the bands finger-tight. Place the filled jars into a boiling water canner, ensuring they are fully submerged by at least 1 inch of water. Bring the water to a rolling boil and process the jars for 20 minutes. After processing, remove the jars and let them cool undisturbed for 24 hours to ensure a proper seal.
Tip: For incredibly easy prep, consider pre-chopping all your onions and peppers the night before. Store them in airtight containers in the fridge, and you’ll save significant time on canning day. Another useful tip if you prefer a less hands-on approach is to cook the salsa overnight in a large roaster or slow cooker on a low heat setting. This allows the flavors to develop beautifully without constant supervision.
How Long is Canned Salsa Good For? Maximizing Shelf Life and Ensuring Safety
One of the most appealing aspects of canning salsa is its impressive shelf life. Once properly processed and sealed through the boiling water bath method, your homemade salsa can be safely stored on the pantry shelf for 1 to 5 years, or even longer in optimal conditions, without any need for refrigeration. This preservation method makes it an excellent addition to your emergency food supply or simply a convenient way to enjoy garden-fresh flavor whenever you wish.
After you open a jar of canned salsa, its shelf life naturally shortens. Once opened, it should be stored in the refrigerator and is typically good for several months, provided it remains free of spoilage. To determine if opened salsa in the fridge has gone bad, rely on your senses. First, check for any visible mold growth on the surface, which might appear as white dots or fuzzy patches. Next, give it a good smell. Spoiled canned condiments usually develop a sharp, strong, and unpleasant odor – often described as sour, yeasty, or overly pungent, akin to a wild plant with a very sharp, off-putting smell. If you observe any mold or detect an abnormal, strong scent, it’s always best to err on the side of caution and discard the salsa immediately.
Can You Freeze Salsa? An Alternative Preservation Method
While canning offers the longest shelf life for pantry storage, freezing is an excellent alternative if you prefer not to can or if you have a batch of salsa that didn’t seal properly. Homemade salsa, even if not processed in a water bath, can be frozen successfully to extend its freshness.
To freeze cooked and cooled salsa, simply ladle it into freezer-safe bags or containers. For convenience and easy use later, I recommend freezing salsa in 2-cup increments. This portion size is comparable to a standard 16 oz bottle of store-bought Pace salsa, making it a practical measurement for future meals. When properly stored in a deep freezer, frozen salsa can maintain its quality and flavor for up to 6 months. To use, simply thaw in the refrigerator overnight or gently warm from frozen in a saucepan. The texture might be slightly softer after thawing due to the water content of the tomatoes, but the flavor will remain delicious.
Essential Equipment for Successful Salsa Canning
While making salsa from scratch is certainly doable with basic kitchen tools, having a few specialized pieces of equipment can make the canning process significantly easier, safer, and more efficient. The two most critical tools for this salsa recipe are a large, heavy-duty pot for cooking the salsa and a reliable blender for achieving the perfect consistency. Here’s a comprehensive list of everything you’ll need for a smooth canning experience:
- 24-quart Stockpot: This is the exact size I use and highly recommend for cooking large batches of salsa. Its generous capacity allows you to process a substantial amount of tomatoes without worrying about overflow, and a heavy bottom ensures even heating and prevents scorching.
- 42-quart Stockpot (for water bath): This extra-large stockpot is incredibly handy for the water bath canning process, especially when you’re processing a dozen or more jars at a time. It provides ample space for jars and water circulation and often comes with a heavy-duty wire rack to keep jars off the bottom and prevent rattling.
- Hand Blender (Immersion Blender): An immersion blender is a game-changer for this recipe! It allows you to blend the cooked tomatoes directly in the large cooking pot, eliminating the need to transfer hot liquids to a traditional blender, saving time and reducing mess.
- Pint Mason Jars: These are the perfect size for storing salsa portions. Pint jars are convenient for everyday use and fit well in most water bath canners. Remember to have plenty of new lids and clean bands on hand.
- Jar Lifter Tongs and Funnel: These canning specific tools are super helpful and make the entire process much safer. A jar lifter allows you to safely place and remove hot jars from the canner, preventing burns. A canning funnel makes it easy to fill jars without spilling, ensuring clean rims for a proper seal.
- Headspace Tool and Bubble Remover: While not explicitly listed, a headspace tool helps ensure you leave the correct amount of space at the top of the jar for a proper seal. A bubble remover (often a plastic spatula or thin wooden stick) helps release trapped air bubbles from the salsa before sealing, which is crucial for safe canning.
Delicious Ways To Use Your Homemade Canned Salsa
Having jars of this delicious salsa ready on your pantry shelf is a true culinary convenience. This versatile salsa canning recipe can be pulled out any time of day to elevate snacks or complement a cooked meal. Here are some fantastic and flavorful ways to serve your homemade salsa:
- Classic Chips and Salsa: The simplest and often most satisfying way to enjoy your salsa. Serve it with your favorite corn tortilla chips for an unbeatable snack or appetizer.
- Inside a Homemade Wrap: Create a hearty and fresh meal by wrapping salsa inside a warm homemade flour tortilla with fluffy black beans and perfectly cooked rice. Add some cheese and avocado for extra goodness.
- Salsa Chicken: A fantastic weeknight dinner! Simply combine your canned salsa with boneless, skinless chicken breasts or thighs in a crockpot or slow cooker. Cook on low until the chicken is tender and easily shredded. Serve over rice or in tacos.
- Sweet & Spicy Fruit Salsa: For a delightful twist, stir in canned corn, diced pineapple, or peaches into a small bowl of your homemade salsa just before serving. This creates a vibrant fruit-flavored salsa that’s wonderful with grilled fish or pork.
- Chipotle-Style Bowl Topping: Elevate your homemade Chipotle bowl or burrito with a generous dollop of your fresh, zesty salsa. It adds brightness and a kick.
- Creamy Mexican Dip: Mix your salsa with an equal part of sour cream or plain Greek yogurt for an incredibly easy and delicious creamy Mexican dip. Perfect for parties or a rich snack.
- Top Grilled Meats & Quesadillas: Spoon this vibrant sauce over chicken quesadillas, grilled chicken, steak, or even fish tacos for an instant flavor upgrade.
- Flavor Booster for Soups and Stews: A spoonful or two of salsa can add a fantastic depth of flavor and a touch of heat to chili, tortilla soup, or any other savory stew.
Frequently Asked Questions About Canning Salsa
What is a Water Bath in Canning?
Is it Necessary to Sterilize Jars Before Canning Salsa?
Is Homemade Salsa Healthy?
Expert Salsa Canning Tips for Success:
- Portion for Gifting: Consider processing some of your homemade salsa in half-pint jars. These smaller portions make excellent thoughtful gifts for friends, family, or neighbors, allowing them to taste your delicious home-preserved efforts!
- Handle Unsealed Jars: If, after 24 hours, you find that any of your salsa jars have not sealed properly (the lid still flexes when pressed down), don’t discard the salsa! Simply refrigerate it and consume it within a few weeks, or transfer it to freezer-safe containers and freeze it.
- Achieving Chunky Salsa: For a more rustic, chunky salsa, resist the urge to blend it completely smooth. You can blend the majority of the cooked tomatoes, but reserve about one-third of them, dicing them finely and adding them back into the puree before simmering. This creates a delightful texture contrast.
- Efficient Chopping: Save significant prep time by using a food processor to chop all your peppers and onions. This ensures consistent sizing and speeds up the initial stages of cooking.
- Protect Your Hands: This is a crucial warning! Always, always wear gloves when de-seeding or chopping jalapeño peppers (or any hot chili peppers). The capsaicin (the compound responsible for the heat) can cling to your skin and cause a prolonged, intense burning sensation if it comes into contact with sensitive areas like your eyes or face.
- Jalapeño Relief Tips: If, despite precautions, your hands do sting from handling hot peppers, here are some quick relief methods: rub your hands thoroughly in cooking oil (capsaicin is oil-soluble), apply aloe vera gel, or soak them in dairy products like milk or yogurt. The fat and casein in dairy can help neutralize the capsaicin. I’ve also found that simply holding your hands under cold running water for a sustained period can offer temporary relief.
- Blender Benefits: Utilizing a hand (immersion) blender to puree your fresh tomatoes directly in the pot is a game-changer. It eliminates the need for blanching or specialized, expensive equipment like a food mill, simplifying the process dramatically while still achieving a smooth base.
- Flavorful Tomatoes: Our easy salsa recipe stands out because there’s no need to laboriously de-seed or peel the tomatoes. The pulpy flesh and seeds remain in the sauce, contributing to its authentic flavor and natural thickness. Using a blender ensures a thick, well-incorporated pulp.
- Checking for a Proper Seal: After your processed jars have cooled for a full 24 hours, test the seal by pressing down on the center of each lid. If the lid pops up and down with a clicking sound, it indicates that a vacuum seal has not formed properly. In such cases, the jar is not shelf-stable and needs to be refrigerated for immediate consumption or frozen.
- Acidity for Safety: Salsa is safe to can using the boiling water bath method because of its high acidity level (low pH). Tomatoes are generally considered high-acid food items, typically having a pH below 4.6. However, variations in ripeness and tomato type can affect this. For consistently safe canning of ripe or underripe tomato varieties, it’s essential to include additional acid, such as the white distilled vinegar, as specified in this homemade salsa recipe. This ensures the pH remains safely low enough for water bath processing.
- Choosing the Right Salt: For successful and safe canning, always use pickling salt, pure sea salt, or any salt that contains no anti-caking agents or iodine. These additives can cause your canning liquid to become cloudy or affect the texture of your preserved foods.
More Delicious Sauce & Dip Recipes:
If you love making your own condiments and sides, be sure to check out these other fantastic recipes from our collection!
- Simple Guacamole Recipe
- Chipotle Guacamole Recipe
- Avocado Spread
- Taco Bell Quesadilla Sauce (Creamy Jalapeño Sauce)
- Peach Mango Salsa
- Subway Chipotle Southwest Sauce
- Kefir Ranch Dressing Recipe
- Eel Sauce (without Mirin)
- Canned Marinara Sauce
- Spaghetti Meat Sauce Recipe
- Pizza Sauce Recipe (Dominos Copycat)
- Instant Alfredo Sauce Mix
Homemade Canning Salsa Recipe
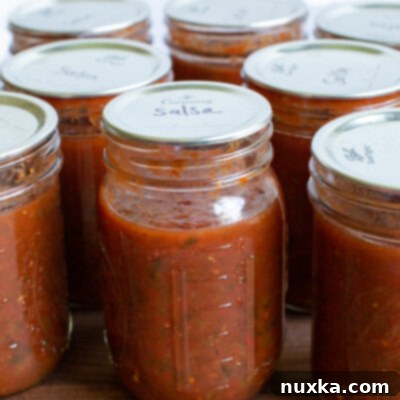
Homemade Canning Salsa Recipe
Equipment
- 1 24-quart stockpot
- 1 42-quart stockpot (for water bath canning, with rack)
- 1 hand blender (or standard blender for tomato pulp)
- 14 pint-sized canning jars (with new lids and bands)
- Jar lifter tongs and canning funnel
Ingredients
Main Ingredients:
- 12.5 pounds fresh, ripe tomatoes (yields approx. 5 quarts thick tomato juice/pulp)
- 1 quart chopped onions (about 4 large white onions, finely chopped)
- 1 quart chopped green bell peppers (about 4-5 medium-sized)
- 1 quart chopped hot peppers (such as jalapeños for moderate heat, use poblano for mild, or serrano for hot)
- 6 cloves fresh garlic (minced)
- 1 bunch fresh cilantro (chopped, optional but recommended)
- 2 1/2 cups white distilled vinegar (5% acidity)
- 24 oz tomato paste
Spices:
- 4 tsp garlic powder
- 4 Tbsp sea salt (or pickling salt)
- 2 Tbsp paprika
- 1/2 cup dried parsley
- 1 Tbsp dried oregano
- 1 Tbsp chili powder
- 2 tsp ground cumin
- 1 tsp ground mustard
Instructions
Detailed Directions:
 To create your tomato base, thoroughly wash, trim, and quarter your fresh tomatoes. Transfer them to a large stockpot and bring to a boil. Allow them to cook down until they become soft and mushy. Once softened, use a hand blender (or transfer in batches to a standard blender) to puree the tomatoes directly in the pot until a smooth, thick pulp is formed.
 Next, add the chopped onions, green bell peppers, hot peppers, minced fresh garlic, and all the dry spices to the tomato pulp. Stir everything together thoroughly. Bring the mixture to a boil, stirring frequently, then reduce the heat to a gentle simmer and let it cook for approximately 1 hour. This allows the flavors to deepen and meld.
 After simmering, stir in the white distilled vinegar and tomato paste. If using, add the fresh cilantro at this stage. Bring the salsa back to a rolling boil, stirring occasionally to ensure it is thoroughly heated.
 Carefully ladle the hot salsa into warm, prepared pint jars, leaving a 1/2-inch headspace. Wipe the jar rims clean, center new lids on top, and apply bands finger-tight. Place the filled jars into your boiling water canner, ensuring they are covered by at least 1 inch of water. Bring to a rolling boil and process for 20 minutes. Once done, remove jars and let them cool undisturbed for 24 hours to check for a proper seal.
Notes
- I highly recommend chopping all peppers and onions efficiently using a food processor for consistent size and time-saving.
- Always wear gloves when handling hot peppers like jalapeños or serranos to prevent skin irritation and burning sensations.
- For a truly Hot Salsa, increase the quantity of spicy chili peppers or opt for varieties like habaneros or ghost peppers according to your heat preference.
- For a Milder Salsa, use less hot peppers or substitute them with milder options like poblano peppers, which provide flavor without significant heat.
