Homemade Lox (Gravlax) Recipe: Easy Cured Salmon Without Smoking
Craving the rich, delicate taste of lox but don’t want to break the bank or deal with a smoker? You’ve come to the right place! This comprehensive guide will show you how to master the art of making homemade lox, also known as gravlax. This dry-cured salmon fillet is marinated in a simple mixture of salt and sugar, resulting in a tender, flavorful delicacy that rivals any store-bought smoked salmon – often at a fraction of the cost.
Forget those small, expensive packages from the store. With just one substantial salmon fillet, you can yield plenty of exquisite shavings for countless bagels, sandwiches, and appetizers. Not only is salting salmon a time-honored preservation technique, but it’s also incredibly rewarding and surprisingly simple to do at home.

For many, the combination of homemade bagels and lox is the quintessential Jewish Deli experience, a cherished comfort food. As Ukrainians, our love for cured salmon runs deep, enjoying it with almost any meal. It pairs beautifully with simple sides like boiled potatoes, creamy mashed potatoes, or elegant open-faced sandwiches made with slices of homemade bread.
Making salmon gravlax at home is a revelation. It takes a mere 5 minutes of active preparation time, offering incredible value for your effort and money. A typical two-pound salmon fillet can yield an impressive 32 ounces of cured salmon. To put this into perspective, if you were to buy those small 4-ounce packages at $5 each, you’d easily spend over $40! Making it yourself translates into significant savings, allowing you to enjoy this gourmet item more often.
This cured salmon gravlax recipe is a cherished staple in my household. I’ve prepared it countless times for family gatherings, potlucks, and special occasions. My sister-in-law even successfully catered a church function using this very recipe, a testament to its reliability and widespread appeal. It consistently delivers a perfectly balanced flavor profile; the salt and sugar amounts are meticulously calibrated, ensuring the fish is never overly salty, especially when cured for the recommended 24 hours.
Watch How to Make Cured Salmon at Home!
The Simple Art of Cured Salmon (Lox)
Curing fish has been an essential food preservation technique passed down through generations in my Ukrainian family. My parents relied on it for salmon, and to this day, they use this method to create a fantastic “smoked salmon dupe” without any actual smoking involved. Once properly cured, the salmon is incredibly delicious on its own, showcasing its natural flavor enhanced by the simple cure of salt and sugar.
While you could certainly take the extra step to cold-smoke the salmon after dry-curing, we find it utterly perfect as it is. The beauty of this recipe lies in its simplicity and the pure, unadulterated taste of the cured fish. For a quick and light snack, I love to thinly slice raw onions and toss them with a few slivers of lox and a drizzle of good olive oil.
When hunger strikes, nothing beats a classic lox bagel. I generously smear cream cheese onto a toasted bagel half, then layer it with delicate slices of homemade cured salmon and plenty of thinly sliced raw red onions. It’s a combination that is truly irresistible and incredibly satisfying!
Lox, Gravlax, and Smoked Salmon: Understanding the Names
The world of cured salmon can be a bit confusing with its many names. Lox, salmon gravlax, cured salmon, and even Nova often refer to similar products, all stemming from the dry-curing process (salting). However, there’s a key distinction worth understanding:
- Gravlax (or Lox, Cured Salmon): This is typically salmon that has been dry-cured with salt, sugar, and often dill, but it remains unsmoked. Our recipe falls squarely into this category.
- Nova Lox & Smoked Salmon: These varieties undergo an additional step of cold-smoking after the dry-curing process. Cold smoking infuses the fish with a distinct smoky flavor without cooking it. This is why Nova lox often has a firmer texture and a more pronounced flavor profile.
If you enjoy that smoky flavor but don’t have access to a smoker, you can achieve a similar effect by adding a touch of liquid smoke to your curing mixture, as demonstrated in my Smoked Salmon Recipe. This simple trick allows you to mimic the smoky notes without the need for specialized equipment.

In Ukraine, gravlax holds a special place, often served at weddings and celebrations as a more economical yet equally delicious alternative to smoked salmon. The beauty of making it yourself is the freedom to customize the flavor. You can infuse it with an array of spices, from classic fresh dill and whole peppercorns to aromatic pickling spice, tailoring it precisely to your taste.
Essential Ingredients for Homemade Lox
Making your own gravlax requires just a handful of simple ingredients, making it accessible for any home cook:
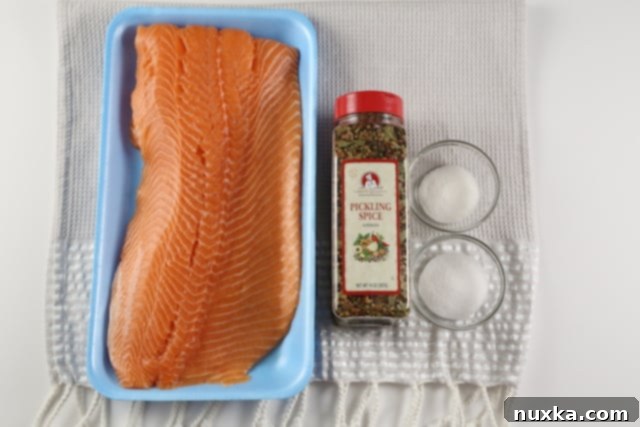
- Fresh Salmon Fillet: The quality of your salmon is paramount here. You can use either high-quality farmed salmon or ethically sourced, grade A wild-caught salmon. If you’re using a frozen fillet, ensure it’s fully thawed in the refrigerator overnight. Always wash the salmon thoroughly and pat it completely dry with paper towels before curing. This recipe is designed for a 2 1/2 to 3 lb fillet.
- Salt: This is the cornerstone of the curing process. Salt draws out moisture from the fish, a process known as osmosis, which both preserves the salmon and creates that desirable firm, sliceable texture. It’s crucial to use a high-quality salt, such as Kosher salt or a fine-grained sea salt. Avoid iodized table salt, as it can impart an off-flavor and often contains anti-caking agents that can affect the cure.
- Sugar: While salt preserves, sugar plays a vital role in balancing the harshness of the salt, making the lox more palatable and adding a subtle sweetness that enhances the salmon’s natural flavor. A common and effective ratio is two parts salt to one part sugar. I typically use coarse organic cane sugar, but regular granulated sugar works just as well – I’ve successfully used both!
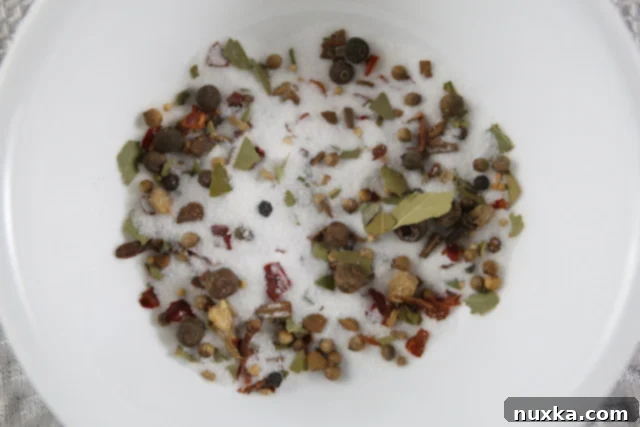
- Optional: Pickling Spice: For an extra layer of complex flavor, consider adding 1 tablespoon of pickling spice. This blend typically includes ingredients like bay leaves, mustard seeds, peppercorns, and allspice, which infuse the salmon with a savory, brine-like taste reminiscent of your favorite pickles.
Step-by-Step: How to Make Cured Salmon
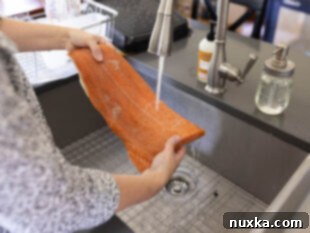
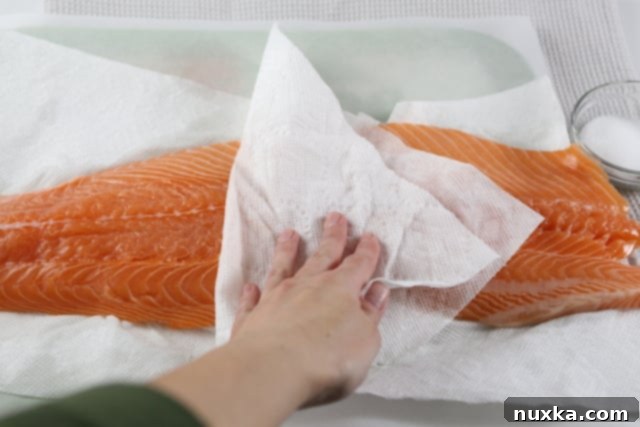
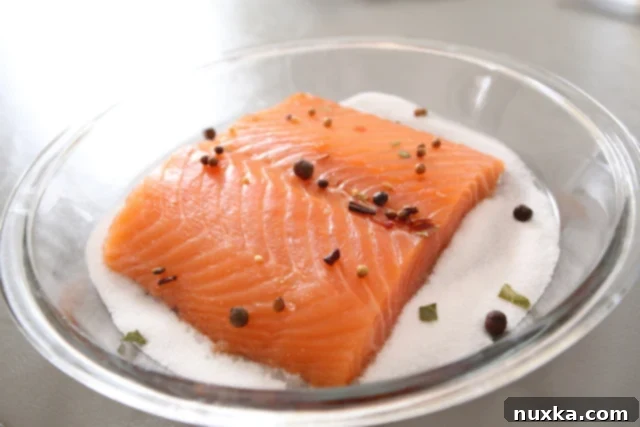
- Prepare the Salmon Fillet: Ensure your salmon fillet is completely thawed if frozen. Critically, leave the skin on – this makes slicing the cured salmon much easier later. Gently wash the salmon under cold running water and then meticulously pat it dry with paper towels. Any excess moisture can hinder the curing process. Transfer the prepared salmon fillet to a large tray or a large steam pan, ensuring it has enough space.
- Prepare the Curing Mixture: In a small bowl, combine the measured amounts of salt, sugar, and the optional pickling spice. Mix them thoroughly until well combined. This ensures an even distribution of flavor.
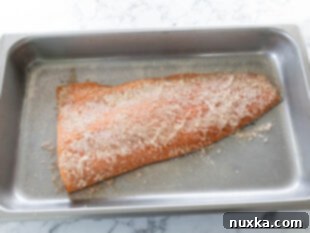
- Apply the Cure: For a more intense, “hard” cure, you can remove the skin at this stage and cut the salmon fillet into four equal pieces. This allows the cure to penetrate more quickly and deeply. Generously dredge each piece of salmon into the salt mixture, ensuring every side is coated very well. It’s important to use up all of the cure mixture across all the salmon pieces to ensure proper preservation and flavor. If you prefer a “medium” cure, you can simply rub the entire fillet (skin-on) with the cure mixture, covering all surfaces.
- Refrigerate and Cure: Place the heavily salted and seasoned fillets into a large, clean container, preferably one with a tight-fitting lid. Refrigerate for 12-24 hours before eating. For a medium cure, 24 hours is often perfect. For a harder, saltier cure, you can extend this to 32-36 hours (see notes for more details). During this time, the salt will draw out moisture, and a brine will form in the bottom of the container.
- Rinse and Prepare for Serving: To serve, remove the fillet from the refrigerator. Wash the fillet thoroughly under cold running water, making sure to wipe away and remove any and all seasoning remnants. Pat the salmon completely dry with clean paper towels. Lightly rub a mild cooking oil (like sunflower or grapeseed oil) onto the fillet. This not only adds a bit of moisture but also helps to preserve it further and give it a lovely sheen. Keep the oiled fillet refrigerated in an airtight container for up to 5 days.


Gravlax Variations: Unleash Your Creativity
The beauty of dry-curing salmon lies in its versatility. You can easily customize the flavor profile by adding various seasonings and herbs to your cure. Here are some popular and delicious ideas to inspire you:
- Dill: For a classic Nordic gravlax, generously lay fresh dill sprigs (whole or roughly chopped) directly on top of the salmon fillet before wrapping and curing. The dill will infuse its aromatic flavor into the fish. Discard the dill after curing, and if desired, add more freshly chopped dill after oiling the fish for garnish.
- Cajun Spice: If you enjoy a touch of heat, incorporate coarsely cracked black peppercorns and a tablespoon of your favorite Cajun seasoning blend into the salt and sugar cure. This will give your gravlax a spicy, robust kick.
- Pickling Spice: As mentioned, pickling spice is a fantastic addition. Its blend of bay leaves, mustard seeds, allspice, and other aromatics creates a wonderfully complex, brine-like flavor that mimics the tangy notes of pickle juice.
- Mustard Peppercorn Herb Crust: Create a more intense flavor crust by adding whole mustard seeds and additional black pepper to your curing mixture. This combination will infuse the salmon with a warm, nutty, and subtly pungent flavor.
- Lemon Zest: For a brighter, fresher taste and to subtly reduce any lingering “fishy” aroma, zest two small lemons directly into your curing blend. The citrus oils will add a delightful zing to the cured salmon.
- “Smoked” Salmon (Liquid Smoke): To replicate the smoky flavor without a smoker, add about 6 tablespoons of liquid smoke to your cure mixture. Ensure it’s evenly distributed before coating the salmon. This will give you a convincing smoked salmon taste.
What To Serve With Gravlax (Cured Salmon):
Cured salmon is incredibly versatile and can elevate any meal or snack. Here are some of our favorite ways to enjoy gravlax:
- Open-Faced Sandwiches: Create elegant and satisfying open-faced sandwiches. Spread a creamy base like cream cheese or a homemade garlic aioli sauce on toasted rye or sourdough bread. Top generously with thin shavings of gravlax and add crunchy elements like thinly sliced cucumbers or red onions for texture and freshness.
- With Potatoes: In our family, gravlax and potatoes are a match made in heaven! Serve it alongside warm boiled potatoes sprinkled with fresh dill, or even with mashed potatoes. The richness of the salmon complements the earthy flavor of potatoes beautifully.
- Classic Bagels and Lox: This iconic pairing is always a winner. A toasted bagel, a generous schmear of cream cheese, abundant slices of cured salmon, and thinly sliced purple onions create a timeless and utterly delicious breakfast or brunch.
- Appetizing Hors d’oeuvres: Arrange gravlax artfully on a platter with fresh garnishes like crisp cucumber slices, tender lettuce leaves, or juicy tomato wedges. For a light and refreshing touch, serve it with a classic mustard and dill sauce, turning it into a delightful starter or a component of a gourmet salad.
Frequently Asked Questions About Homemade Lox
How To Cure Salmon For Sushi?
For making salmon suitable for sushi, it’s crucial to start with sashimi-grade salmon. This is fish that has been handled and frozen specifically to eliminate parasites, making it safe for raw consumption. My gravlax recipe yields a perfectly cured salmon that is ideal for sushi: it’s not overly salty, and the flesh retains a wonderfully moist texture. This makes it easy to slice into the thin, delicate pieces required for sushi or sashimi, a feat impossible with raw, uncured salmon. The goal is a cure that makes it firm enough for slicing, yet tender and flavorful without being excessively salty.
Gravlax vs Smoked Salmon?
When comparing gravlax to smoked salmon, the primary distinction lies in the smoking process. Gravlax, which tastes much like the unsmoked lox you’d find at a quality bagel deli, is purely dry-cured. Smoked salmon, while also cured in a similar manner, undergoes an additional cold-smoking step. This means it’s exposed to smoke at a low temperature, infusing it with that characteristic smoky aroma and flavor without cooking the fish. Both gravlax and smoked salmon share a moist, raw-like texture because neither is cooked, but the smoky nuance is unique to smoked varieties.
Can You Make Cured Salmon with Frozen Salmon?
Absolutely! Using frozen salmon is a practical and often more economical option. I frequently purchase fresh salmon fillets from stores like Aldi when they’re on sale and freeze them in my commercial deep freezer (at -10°F / -23°C) until I’m ready to cure them. The most important step when using frozen salmon is proper thawing. Always thaw your salmon in the refrigerator overnight, ideally for 12-24 hours, placed on a tray to catch any potential leakage. Ensure it’s fully thawed before beginning the curing process to guarantee even penetration of the salt and sugar.
How Long Does Cured Salmon Keep?
When properly cured, washed, and lightly oiled, homemade gravlax can last for up to two weeks in an airtight container in the refrigerator. The thin coating of oil after rinsing plays a crucial role in preventing the salmon from drying out and helps prolong its freshness, maintaining its moist texture and delicious flavor for an extended period.
Can You Freeze Cured Salmon Gravlax?
Yes, homemade gravlax (lox) freezes beautifully! After the salmon is fully cured, washed, and patted dry with paper towels, you can slice it into individual portions before freezing. Keep enough slices in the refrigerator for immediate consumption (usually what you’ll eat within a week), and then freeze the remainder in airtight freezer bags. This ensures you always have a supply of delicious lox ready to thaw and enjoy whenever a craving strikes.
Helpful Tips For Curing Salmon:
- Initial Room Temperature Cure: After applying the salt mixture, I often leave the salmon out at room temperature (around 73°F / 23°C) for a few hours until I observe a small amount of liquid beginning to draw out from the fillet. This visible sign of osmosis indicates that the curing process has effectively begun. Then, I transfer it to the fridge to complete the cure. This initial warmth can give the curing a gentle head start.
- Keep the Skin On: For much easier and more precise slicing, always leave the skin on your salmon fillet during the curing process. The firm skin provides a stable base, allowing you to achieve those wonderfully thin, delicate shavings that are characteristic of lox.
- Utilize the Brine: The liquid that accumulates from the salmon cure (the brine) is full of flavor. Don’t discard it hastily! It can be used as a base for delicious sauces or dressings, adding a unique depth to other dishes.
- Avoid Over-Curing: This is a crucial tip. The longer the salmon remains in the salt cure, the saltier it will become. While washing off the cure will remove surface salt, prolonged exposure deeply seasons the fish. Aim for no longer than 24 hours for a perfectly balanced, medium cure that isn’t excessively salty. If you prefer a harder cure, limit it to 32-36 hours.
- Thorough Rinsing is Key: Before serving, it is absolutely essential to wash the salting cure off the salmon thoroughly under cold running water. Any residual salt will make your gravlax too salty and can affect its texture.
- Lightly Oil After Curing: After washing and patting dry, lightly rub a mild cooking oil (like sunflower, grapeseed, or even a very light olive oil) onto the cured salmon slices. This creates a protective coating that prevents the gravlax from drying out in the refrigerator, maintains its moist texture, and significantly prolongs its shelf life.
- Infuse with Onions: For an extra burst of flavor, consider adding thinly sliced raw onions to your gravlax slices after oiling them. Store them together in an airtight container. The onions will infuse the salmon with a wonderful savory aroma, and as a bonus, you’ll have delicious, lightly pickled onions to snack on later!
More Salmon Recipes To Make:
-
Baked Salmon With Alfredo Sauce
-
Costco Smoked Salmon
-
Baked Salmon With Garlic Mayo
-
Teriyaki Glazed Salmon Recipe (One Pan Meal)

Rate
Pin
Cured Salmon (Lox) Recipe
Equipment
-
1 large tray or steam pan
-
1 Sharp boning knife (for thin slicing)
-
Set of small mixing bowls
-
Airtight container (for curing and storage)
Ingredients
-
2 1/2 – 3 lb salmon fillet (skin-on preferred)
-
4 tbsp Kosher salt (or high-quality fine sea salt)
-
2 tbsp granulated sugar (or coarse organic cane sugar)
-
1 tbsp Pickling Spice (optional, for added flavor)
-
fresh dill for garnish (optional)
-
2 tbsp mild cooking oil (e.g., sunflower, grapeseed)
Instructions
-
 Prepare Salmon: Wash the salmon fillet thoroughly under cold water and pat it completely dry with paper towels. Leave the skin on for easier carving later. Place the salmon fillet onto a large tray or a full steam pan, ensuring it fits comfortably.
 -
 Apply the Cure: In a small bowl, combine the Kosher salt, granulated sugar, and optional pickling spice. Mix well. Evenly sprinkle this salt and sugar mixture over the entire surface and sides of the salmon fillet. Rub it gently to ensure full coverage.
 -
 Cure the Salmon: Cover the cured salmon tightly with plastic wrap or place it in a large airtight container. Refrigerate for 24 hours for a medium cure. For a firmer, saltier “hard” cure, extend the refrigeration time to 32-36 hours (refer to notes for more details).
 -
 Rinse and Slice: To serve, remove the salmon from the container. Wash off all of the cure and any pickling remnants under cold running water. Pat the fillet thoroughly dry with paper towels. Place on a cutting board, skin-side down. Using a very sharp boning knife, thinly carve the salmon at a shallow angle, slicing away from the skin, to achieve delicate, thin slices.
 -
 Oil and Store: Place all the sliced gravlax into an airtight container. Drizzle with 2 tablespoons of mild cooking oil and gently toss or rub to coat the slices evenly. This helps prevent drying. Serve immediately, or for even better flavor and texture development, refrigerate for another 12-24 hours before enjoying. Garnish with fresh dill if desired.
Notes
- Dill-flavored Cured Salmon: For a traditional dill gravlax, after rubbing the salt cure into the fillet, generously top it with 2-3 bunches of fresh dill. Then, wrap it tightly with plastic wrap before refrigerating. The dill will infuse its aroma and flavor into the salmon during curing. You can discard the dill before slicing and add fresh chopped dill as a garnish.
- For the best flavor and texture, cure the salmon in the salt mixture for 24 hours. After rinsing, thinly slice, and oil the salmon slices. Refrigerate for an additional 12-24 hours; this resting period allows the flavors to meld beautifully and the texture to fully develop.
- For a firmer flesh (often referred to as a “hard cure”) and a more seasoned taste, allow the salmon to marinate in the cure for 32-36 hours. Be aware that this extended curing time will result in a saltier product, even after thorough rinsing.
- Always leave the skin on the salmon fillet. This provides a stable base that makes it significantly easier to carve the cured salmon into delicate, thin slices with a sharp knife.
Nutrition per serving
Embrace the simplicity and deliciousness of making your own lox at home. This recipe isn’t just about saving money; it’s about connecting with a traditional culinary art and creating something truly special that you can enjoy with pride. Once you try this homemade gravlax, you’ll wonder why you ever bought it from the store!
