Master the Perfect Juicy Homemade Burger: The Ultimate Classic Recipe & Grill Guide
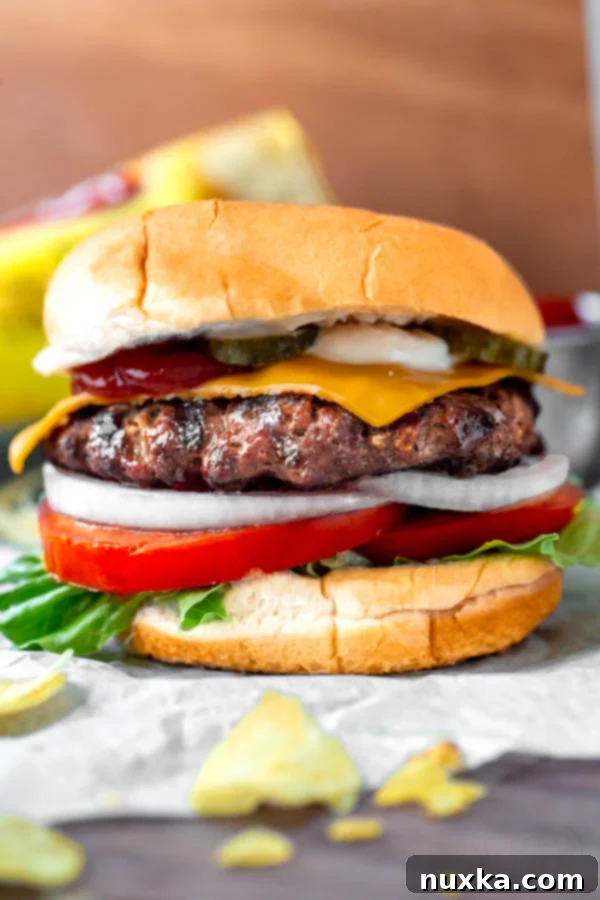
Welcome to the definitive guide for crafting the Ultimate Burger Recipe right in your own kitchen! Forget dry, bland patties – we’re going to show you how to make the perfect homemade juicy burgers the simple, classic way. Imagine sinking your teeth into a restaurant-style burger, built on a toasted bun with crisp lettuce, ripe tomatoes, thinly sliced onions, melty American cheese, and the perfect balance of mayo, ketchup, and tangy pickles. This comprehensive guide covers everything you need to know, from selecting the best beef and forming flawless patties, to grilling techniques and smart make-ahead options. Get ready to elevate your burger game, even without a grill!
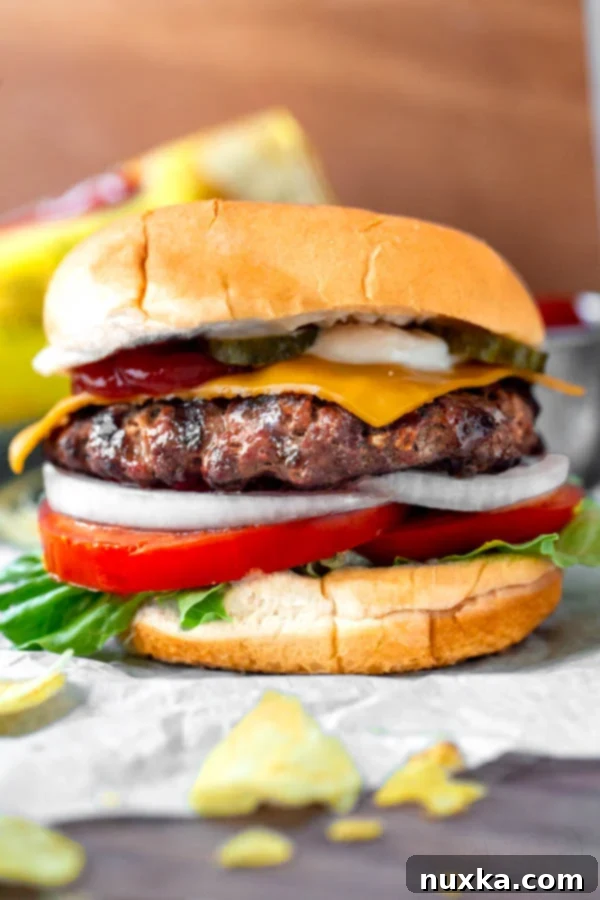
For many, burgers are more than just food; they’re a symbol of good times, family gatherings, and satisfying comfort. Like our other beloved sandwiches, this burger recipe is a cherished family favorite, a go-to for weeknight dinners and weekend BBQs alike. Crafting the ideal burger all starts with selecting the right beef, and we’re here to share all the essential secrets, tips, and tricks. Whether you’re planning to make burger patties ahead of time, aiming for perfectly toasted buns, or experimenting with delicious burger sauces, this ultimate guide has you covered. The best part? You can achieve mouth-watering results even without a traditional outdoor grill!
The Perfect Burger Recipe: Simplicity Meets Flavor
Creating the best burgers is surprisingly easy when you stick to the fundamentals. Our philosophy is “less is more” – no need for complicated mix-ins, a dozen different seasonings, or fancy, hard-to-find ingredients. These burgers come together effortlessly, delivering that classic, authentic beef burger taste everyone loves. They are incredibly freezer-friendly, making them ideal for hosting a large burger dinner, stocking up for future summer gatherings, or simply having a quick meal option on hand. Once you taste these homemade patties, you’ll find they are vastly superior to any commercial beef patties you might buy at the grocery store. It’s an unbelievably easy process, and it will change the way you think about store-bought patties forever!
Ground beef is, without a doubt, the superior choice for homemade burgers, offering that authentic, rich flavor and perfect patty texture. While mixing in a small amount of pork can yield magnificent results for variety, it’s the right beef that truly defines a classic burger. Beef also provides beneficial iron, but remember, too much can feel quite hearty. This recipe is designed for the standard, restaurant-sized burger patty, which we find to be the most satisfying. However, this doesn’t mean you’re limited! We’ll explore how you can easily adapt this simple beef patty recipe to create thick, stuffed, or even slider-sized burgers to suit any preference or occasion.
My initial foray into homemade burgers was inspired by the “Juiciest Hamburgers Ever” recipe. That recipe sparked my journey, but over the years, I’ve discovered a crucial insight: you don’t need a myriad of mix-ins or excessive seasonings. For truly great hamburger patties, simplicity is key. This approach is consistent with the efficiency of commercial frozen beef patties, which are designed for mass production. In my personal recipe book, these are simply called “the perfect burgers,” and I truly believe they hit the mark on seasoning and flavor for an unforgettable burger experience!
How to Make the Ultimate Juicy Burger Recipe:
Rate This Recipe
Pin Recipe
Ultimate Classic Burger Recipe
Ingredients
For the Burger Patties:
-
2 lbs ground chuck beef (80/20 fat ratio recommended for juiciness)
-
2 tsp salt
-
1 tsp black pepper
-
1/2 finely minced onion (optional, for added flavor)
Classic Cheeseburger Toppings & Buns:
-
8 hamburger buns
-
8 slices American Cheese (Deluxe or your favorite melting cheese)
-
1 large tomato (sliced into 8 rings)
-
1/4 head of iceberg lettuce (shredded or leaves)
-
1/2 onion (thinly sliced)
-
4 Tbsp ketchup
-
4 Tbsp mayonnaise
-
Dill pickle slices (to taste)
Instructions
How to Make the Perfect Grilled Burgers:
-
Prepare Grill: Preheat your grill to high heat. Once hot, clean the grill grates thoroughly and lightly baste them with a high-smoke-point oil (like vegetable or canola oil) to prevent sticking.
-
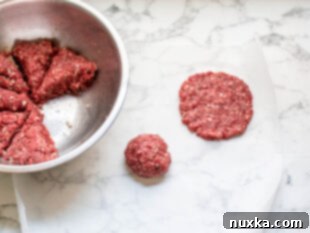
 Form Patties: Gently mix the ground beef with salt, pepper, and optional minced onion. Divide the mixture into 8 equal portions and form each into a flat, approximately 5-inch diameter patty. Ensure they are slightly wider than your buns, as they will shrink during cooking.
 -
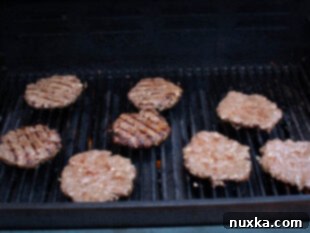
 Grill Burgers: Place the patties onto the preheated grill. Immediately reduce the heat to medium. Cook for approximately 4 minutes per side for a well-done burger (adjust time for desired doneness). Once cooked, remove from the grill and quickly place a slice of American cheese on top of each patty.
 -
 Assemble Burgers: While patties are cooking, prepare all your toppings. Lightly toast the hamburger buns. Assemble each burger in the following order: bottom bun, 1/2 tbsp mayonnaise, lettuce, tomato slice, onion slices, beef patty with melted cheese, and finally, 1/2 tbsp ketchup on the top bun, with pickle slices nestled in. Serve immediately and enjoy your ultimate homemade burger!
Notes for Success:
To freeze burger patties for future meals: We highly recommend making a double batch! Form 16 (5-inch) flattened patties. Layer them carefully between sheets of parchment paper and flash freeze them on a baking tray until solid. Once frozen, transfer the stacked patties (still separated by parchment) into freezer-safe bags. They will keep well in the freezer for up to 3 months.
To grill frozen patties: No need to thaw! Cook frozen patties directly on the grill as directed in the main instructions. The cooking time will be similar if the patties are of the same thickness as fresh ones. This makes meal prep incredibly convenient.
Make-ahead assembly for parties: If you’re preparing for a crowd or want quick leftovers, you can assemble burgers ahead of time to minimize hassle. Crucially, omit the burger sauces (mayonnaise and ketchup) or only apply them to the top part of the bun. Layer the other ingredients as directed, ensuring wetter toppings like tomatoes are nestled between dryer ingredients to prevent the buns from becoming soggy. Reheat as directed for a fast and delicious lunch.
Nutrition Information (per serving):
Frequently Asked Questions About Making Burgers
What is the best beef to use for homemade burgers?
For truly juicy and flavorful burgers, the best beef to use is ground chuck with an 80/20 lean-to-fat ratio. This means 80% lean meat and 20% fat, which is ideal because the fat renders during cooking, contributing significantly to the burger’s moisture, juiciness, and rich flavor. While more fat might seem appealing, it can lead to excessive shrinkage, so 80/20 strikes the perfect balance. Remember, because burgers do shrink during cooking, it’s always important to form your patties slightly wider than the standard bun size you intend to use.
What sized patty is perfect for hamburger buns?
We’ve found that forming patties into approximately 5-inch disks before they hit the grill results in the perfect size for most regular store-bought buns after cooking. This accounts for the natural shrinkage. Beyond this standard size, you can customize your patties for different burger experiences. Here are a few popular options based on this versatile burger recipe:
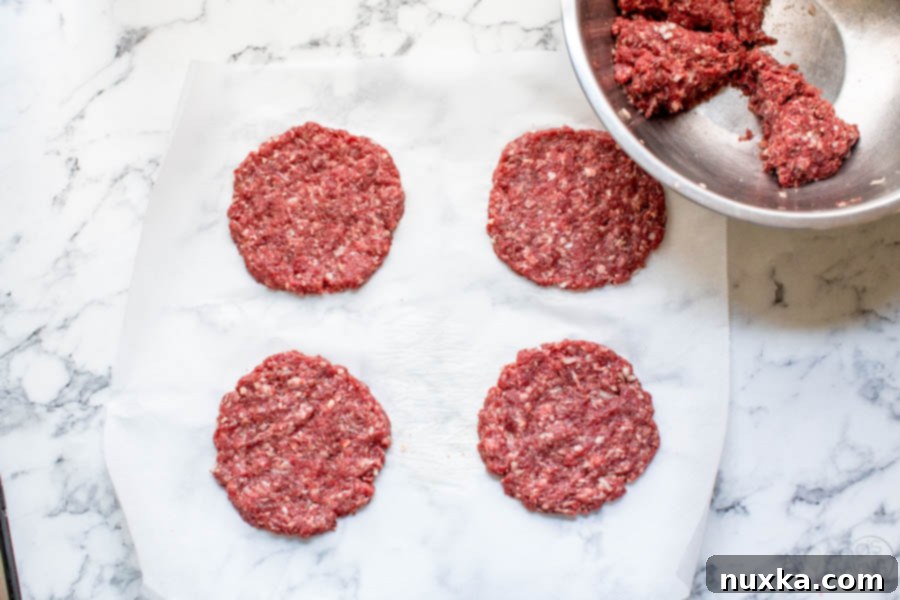
Standard Size Patty: This is the classic, slightly thinner patty that fits beautifully on a store-bought bun. To make these, form your beef mixture into flat, 5-inch disks. For standard-sized burgers, there’s generally no need to indent the centers, as this technique is more critical for thicker patties to prevent them from puffing up.
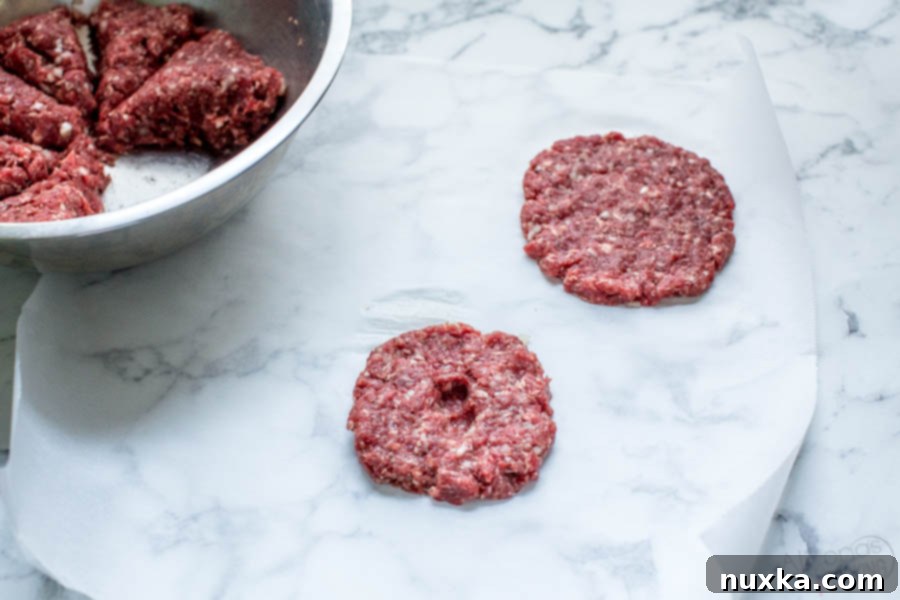
Thick Burgers: For a hearty, meaty experience where the beef is truly the star, form your patties into about 4-inch thick disks. To ensure they cook evenly and don’t puff up into a ball, make a shallow indentation (a “dimple”) in the center of each patty with your thumb before grilling. You might also want to enhance the beef flavor with a dash of Worcestershire sauce or extra seasoning for these robust patties.
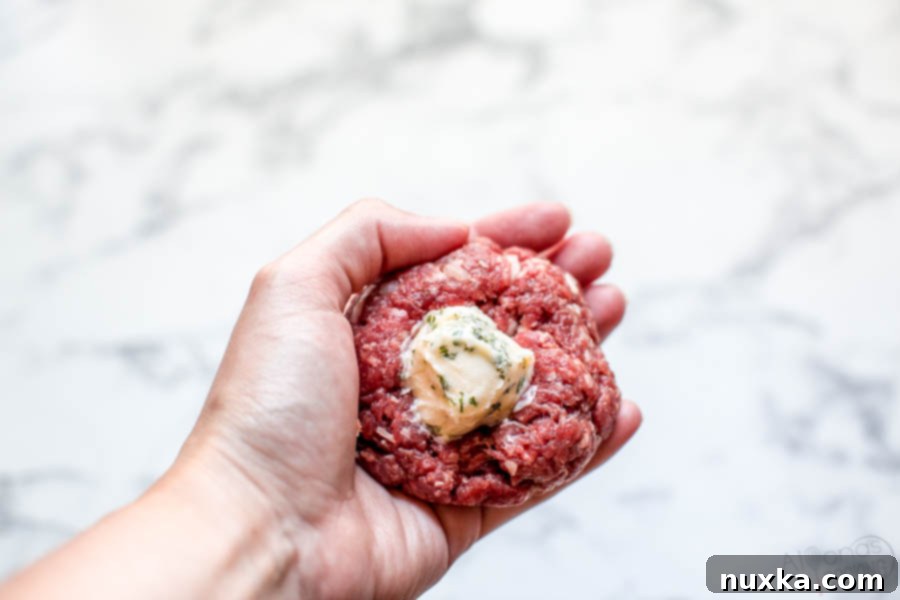
Stuffed Burgers: For a delightful surprise, create two thinner patties for each burger. Place a tablespoon of your favorite filling (like cheddar cheese, herbed butter, or caramelized onions and mushrooms) on one patty, then top with the second patty and seal the edges tightly. This technique encases the delicious filling, melting it inside the burger as it cooks.
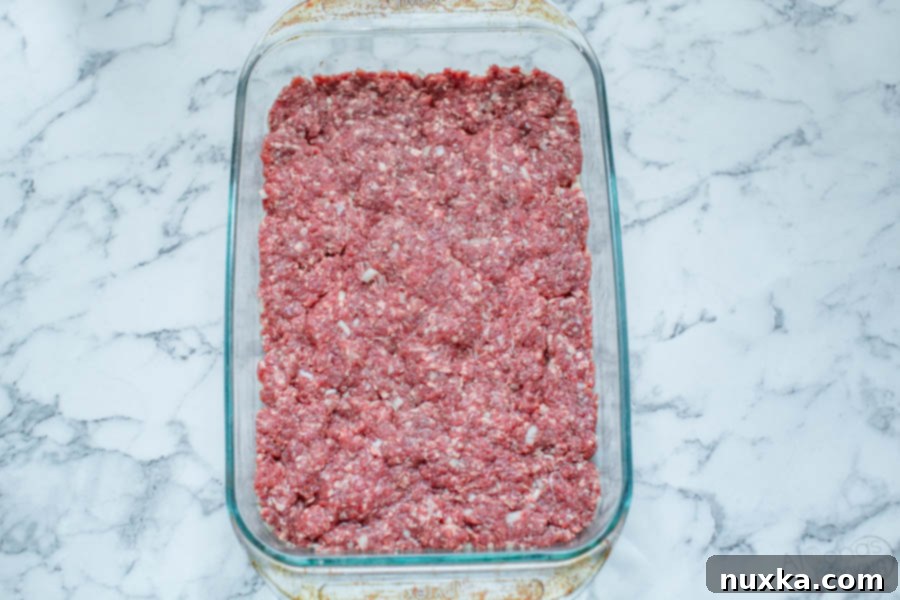
Sliders: Perfect for feeding a hungry crowd or serving as a party appetizer! This easy oven-baked method creates square patties. Simply press the 2 lbs of seasoned beef mixture evenly into a 13×9 inch casserole dish. Bake uncovered at 350°F (175°C) for about 15 minutes, or until cooked through. Once baked, cut the beef into 2-inch squares and serve on a 12-pack of mini dinner rolls with your favorite toppings.
Can I cook Burgers on the stovetop if I don’t have a grill?
Absolutely! You can achieve fantastic burgers without a grill. The key is to use the right cookware and technique to replicate that grilled char and juiciness. Here are several excellent ways to cook burgers indoors:
- Cast-Iron Skillet: This is arguably the best stovetop method. A heavy cast-iron skillet distributes heat incredibly evenly and retains high temperatures, allowing you to get a beautiful, charred crust on your burgers. Cook on high heat initially for a good sear, then reduce to medium.
- Cast-Iron Panini Press (or grill pan): For those coveted grill marks and a quick, efficient cook, a cast-iron panini press or a ridged grill pan works wonders. The press also ensures even contact with the heat and can help keep the patty flat.
- Oven-Baked Sliders: As detailed above, baking burgers is a great method, especially when making a large batch of mini sliders for parties or kids. It’s a hands-off approach that’s perfect for feeding many.
- Non-Stick Skillet: A standard non-stick skillet is a perfectly efficient and convenient way to make burgers at home. While it won’t give you deep char marks, it will still cook your patties thoroughly and keep them juicy. For 5-inch patties, cook for about 4 minutes per side or until desired doneness.
- Outdoor Grill: Of course, for classic summer flavor and perfectly charred burgers, the outdoor grill remains a favorite method for many!
How do you grill a burger for optimal results?
Grilling burgers is a straightforward process, but a few key steps ensure a juicy, perfectly cooked patty with a delicious sear:
- Preheat and Prepare: Start by preheating your grill to high heat. Once it’s searing hot, thoroughly clean the grill grates with a wire brush. Then, lightly baste the clean grates with a high-smoke-point oil (like vegetable, canola, or grapeseed oil) to prevent the patties from sticking and help achieve those desirable grill marks.
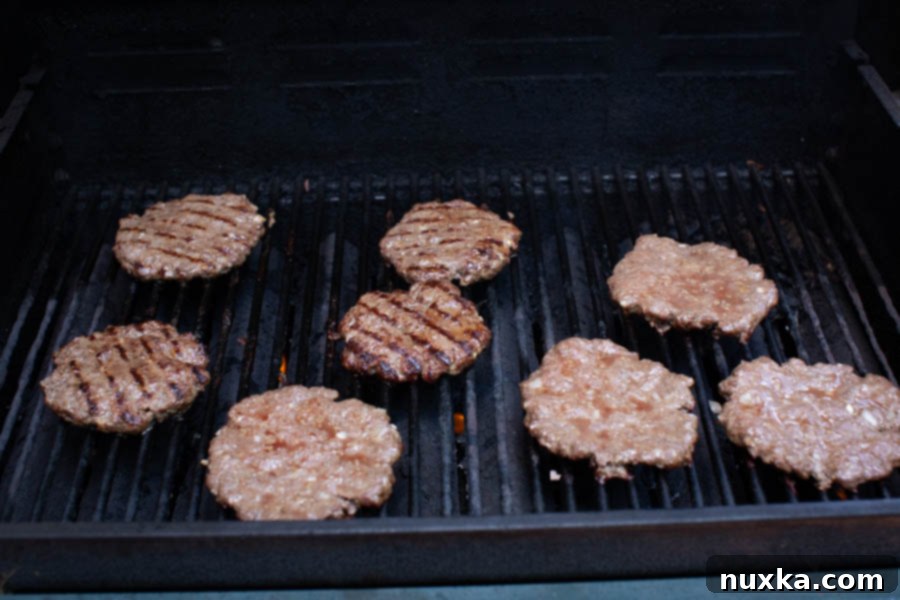
- Grill and Flip: Form your beef mixture into 8 (5-inch) patties as described in the recipe. Carefully place the patties onto the very hot grill. Immediately turn the heat down to medium. This initial high heat creates a great sear, while the lower heat allows the inside to cook without burning the outside. Cook for approximately 4 minutes on each side. Avoid pressing down on the patties, as this squeezes out valuable juices. Once cooked to your desired doneness, remove them and quickly top with cheese, allowing it to melt beautifully from the residual heat.
Can you freeze homemade burger patties? How?
Yes, homemade burger patties freeze exceptionally well, and it’s one of the most efficient ways to prepare for future meals or large gatherings. Freezing allows you to work with larger quantities of beef, saving you significant prep time when you’re ready to cook. When it’s time to enjoy them, you can simply place the frozen beef patties directly onto a hot grill or skillet – no need for thawing!
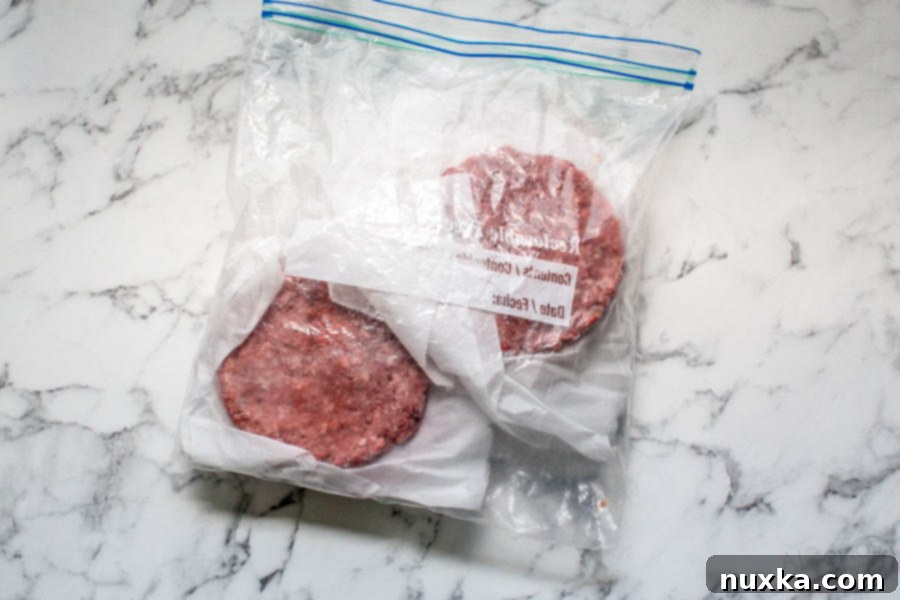
To freeze burger patties: Form your patties into flat, 5-inch disks as described in the main recipe. Lay individual patties between sheets of parchment paper. Stack them up, then flash freeze them on a baking tray until they are completely solid. Once frozen, you can transfer the stacked patties (with parchment in between each) into a large, freezer-safe bag or airtight container. They will maintain their quality in the freezer for up to 3 months.
To grill frozen burgers: The process is very similar to grilling fresh patties! Preheat your grill to high heat, clean and oil the grates. Place the frozen patties directly onto the preheated grill. Immediately turn the heat down to medium and cook for approximately 4 minutes per side. Remove and quickly top with cheese to melt. The cooking time for frozen versus fresh patties of the same thickness is surprisingly similar.
What are the essential classic burger toppings?
While building a burger is ultimately a matter of personal preference, the ultimate juicy cheeseburger, in our opinion, features a harmonious blend of fresh, crisp toppings piled high on a perfectly toasted bun. These classic toppings not only add incredible flavor but also contribute essential color and texture. Here’s a rundown of the classic toppings we love, plus some popular additions:
- Cheese: American cheese, especially the “Deluxe” variety, is often considered the gold standard for its superior melt and reheat capabilities. Other cheeses like cheddar, provolone, or Swiss can also be used, but American cheese excels at achieving that gooey, restaurant-style melt.
- Tomatoes: Opt for large, ripe beefsteak tomatoes or flavorful “off the vine” tomatoes, sliced into thick, juicy rings. Their freshness is key.
- Lettuce: Crisp iceberg lettuce is a classic choice for its satisfying crunch. Green leaf or Romaine lettuce are also excellent alternatives.
- Onions: Thinly sliced sweet Vidalia onions, pungent red onions, or rich caramelized onions all offer distinct and delicious flavor profiles.
- Bacon: Crispy, smoky bacon strips add an irresistible layer of flavor and texture that elevates any burger.
- Avocado: Sliced or mashed avocado provides a creamy, healthy, and subtly nutty counterpoint to the richness of the beef.
- Caramelized Onions and Mushrooms: These deeply savory additions pair wonderfully with Swiss or provolone cheese for a gourmet twist.
- Jalapeños: Fresh or pickled jalapeño slices are perfect for those who enjoy a kick of spiciness and heat.
- Pickles: Dill pickles are the go-to choice, offering a tangy, briny crunch that cuts through the richness of the burger beautifully.
What are the best hamburger buns to use for burgers?
A great burger needs a great bun! The bun is the foundation, providing texture and holding everything together. You can even make your own incredibly soft and fresh hamburger buns with our feather-light Hamburger Bun Recipe! For store-bought options, here is a complete list of some of the best burger buns:
- Kaiser Roll: A sturdy, often slightly crusty bun with a distinctive star-shaped top, commonly found in restaurant settings. It holds up well to juicy burgers.
- Potato Rolls: These buns are known for their soft, slightly sweet, and moist texture with a characteristic yellowish hue. They’re excellent for absorbing burger juices without becoming soggy too quickly.
- Standard Hamburger Buns: The classic, soft, and slightly sweet bun found in almost every grocery store. It’s a reliable and popular choice, probably the #1 seller for a reason!
- Sesame Seed Buns: A very popular and classic variation of the standard hamburger bun, recognizable by the toasted sesame seeds on top that add a subtle nutty flavor and texture.
- Brioche Buns: Often seen in upscale burger joints, brioche buns are rich, buttery, and slightly sweet with a beautiful dark, shiny top. They toast incredibly well and offer a luxurious mouthfeel that complements the beef.
How do you properly assemble burgers to prevent sogginess?
The way you assemble your burger significantly impacts how quickly it might become soggy. A common mistake is allowing wet ingredients to sit directly on the bun. Even fast-food chains and delis, which often sell prepared sandwiches, often keep dressings separate to avoid this issue. By layering correctly, you can ensure a delicious experience, even with leftovers! Here’s our recommended method for assembling a perfect, non-soggy burger:
How to Assemble a Burger for Maximum Freshness:
- Toast the Buns: This is a crucial first step! Toasting the burger buns creates a barrier, hardening the bread’s surface and preventing it from quickly absorbing moisture from the fillings. It also adds a wonderful textural element.
- Layer Less-Wet Veggies First, Patty on Top: Start your burger construction with dryer ingredients. On the bottom bun, place a thin layer of mayonnaise (acting as an initial barrier), followed by lettuce, then tomato slices, and finally, onion slices. Place the hot burger patty with melted cheese directly on top of these veggies. By “nestling” mushy or wetter veggies like tomatoes into the middle layers, you minimize their direct contact with the bread.
- Add Sauces to the Top Half of the Bun: Since most burger buns have thinner bottoms, they tend to get soggy faster. Apply any additional sauces (like ketchup) to the top half of the bun. This keeps the bottom bun firmer for longer. Add pickles alongside the sauces or on top of the patty. If you anticipate having leftovers, it’s best to add all sauces just before serving.
What are the best burger sauces to enhance flavor?
While classic ketchup and mayonnaise are always great, sometimes you want to jazz things up and take your burger to the next level! There’s nothing quicker than using your favorite prepared condiments, but if you’re looking to elevate your burger experience, here’s a list of fantastic burger sauces to try:
- Aioli: These are essentially mayonnaise-based sauces infused with various flavorings like mustard, BBQ sauce, ketchup, or roasted garlic. To make a quick aioli, simply stir a teaspoon of your favorite flavoring into 1/3 cup of good quality mayonnaise.
- Secret Sauce: Often resembling a thousand island dressing, secret sauces are famously used by burger joints like In-N-Out Burger. They typically combine mayonnaise, ketchup, relish, and various spices for a unique tangy and savory flavor.
- Chick-fil-A Sauce: Don’t reserve this fan-favorite sauce just for chicken! Its smoky, sweet, and tangy profile makes it surprisingly delicious slathered over beef burgers or as a dipping sauce for fries.
- Fry Sauce: A beloved condiment, especially in the Western U.S., fry sauce is a simple yet addictive blend of seasoned mayonnaise and ketchup. It’s designed to pair perfectly with both burgers and fries. Check out this fry sauce recipe for a homemade version.
What should the internal temperature of burgers be for doneness?
Ensuring your burgers are cooked to a safe internal temperature is crucial for both food safety and optimal enjoyment. For a well-done burger, the internal temperature should reach 160°F (71°C). This applies whether you’re grilling freshly made patties or cooking frozen burger patties. If you prefer a medium-rare burger, the temperature should be around 130-135°F (54-57°C), medium at 140-145°F (60-63°C), and medium-well at 150-155°F (66-68°C). Always use an instant-read meat thermometer inserted into the thickest part of the patty to accurately check for doneness. For more detailed information, you can consult this helpful article on Burger Temperatures.
How can I prevent my homemade burgers from getting soggy?
Preventing soggy buns is a common challenge when making and assembling burgers, but it’s easily avoidable with the right technique! The best way to keep your buns firm and delicious is to layer your toppings strategically. The goal is to create barriers between the bread and any moisture-releasing ingredients.
- Toast Your Buns: Always start by lightly toasting your burger buns. This creates a slightly crispy, more robust surface that acts as a natural shield against moisture.
- Strategically Layer Wet and Dry: Begin with dryer ingredients on the bottom bun. A thin layer of mayonnaise or another sauce can also act as a moisture barrier. Then, add ingredients like lettuce and onions. Place wetter ingredients, such as tomato slices and pickles, in the middle of your burger stack, ideally between layers of dryer veggies or directly on top of the patty.
- Sauce Placement: Apply most of your burger sauces (ketchup, mustard, etc.) to the top half of the bun. The bottom bun is typically thinner and more prone to getting soggy quickly.
- Meat First (or last): Consider placing your cooked burger patty directly on top of the lettuce/onion layer. If you’re adding crispy bacon, that can go on top of the patty too. The idea is to keep the most absorbent parts of the bun (the bottom, especially) away from highly moist ingredients.
By following these steps, you’ll ensure that your delicious homemade burgers remain flavorful and texturally pleasing, even if you save some for later!
Essential Tips for the Best Burger Patties:
- Freeze Patties Before Grilling: For easier handling and to prevent them from falling apart, I highly recommend freezing your hand-formed patties for about 15-30 minutes before grilling. This is also an excellent strategy when preparing a large freezer batch for future use.
- Strategic Layering for Freshness: To keep your burger buns from getting soggy, always layer wetter toppings (like tomatoes or pickles) in the middle of the burger, tucked between dryer ingredients like lettuce, onion, and the patty itself.
- Avoid Overmixing the Meat: When combining the ground beef with seasonings, mix gently and only until just combined. Overmixing can compact the meat, resulting in a dense, tough burger rather than a tender, juicy one.
- Don’t Press or Over-Flip: Once the patties are on the grill, resist the urge to press down on them with your spatula. This squeezes out precious juices, leading to a dry burger. Also, avoid flipping them too frequently; allow them to cook for at least 3 minutes per side to develop a beautiful crust and distinct grill marks.
- Baste with Oil: Lightly basting your patties with a neutral oil before placing them on the grill, and optionally once during cooking, can add extra juiciness and help prevent sticking to the grates.
